
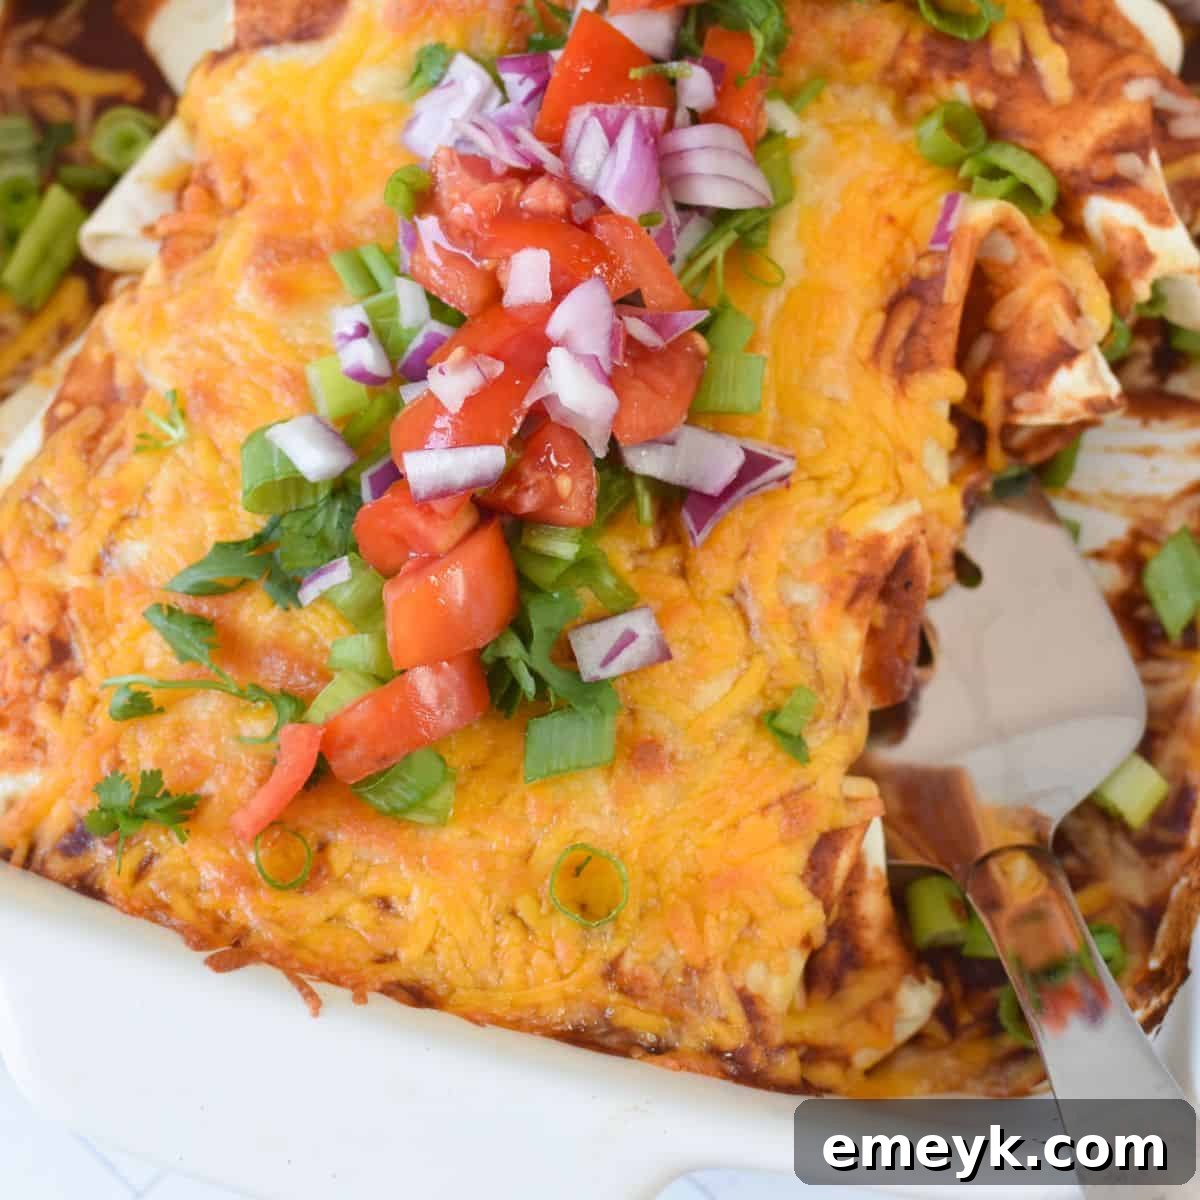
Prepare to delight your family with these incredibly easy and undeniably delicious Three-Cheese Beef Enchiladas. A true Tex-Mex classic, this recipe brings together savory seasoned ground beef, a vibrant enchilada sauce, and a decadent blend of three distinct cheeses, offering a hearty and satisfying meal. Loaded with protein and dairy, these enchiladas are not just filling but also packed with flavor that everyone will love. Customize with your favorite toppings and serve alongside fluffy Mexican rice and refried beans for a complete Mexican-inspired feast.
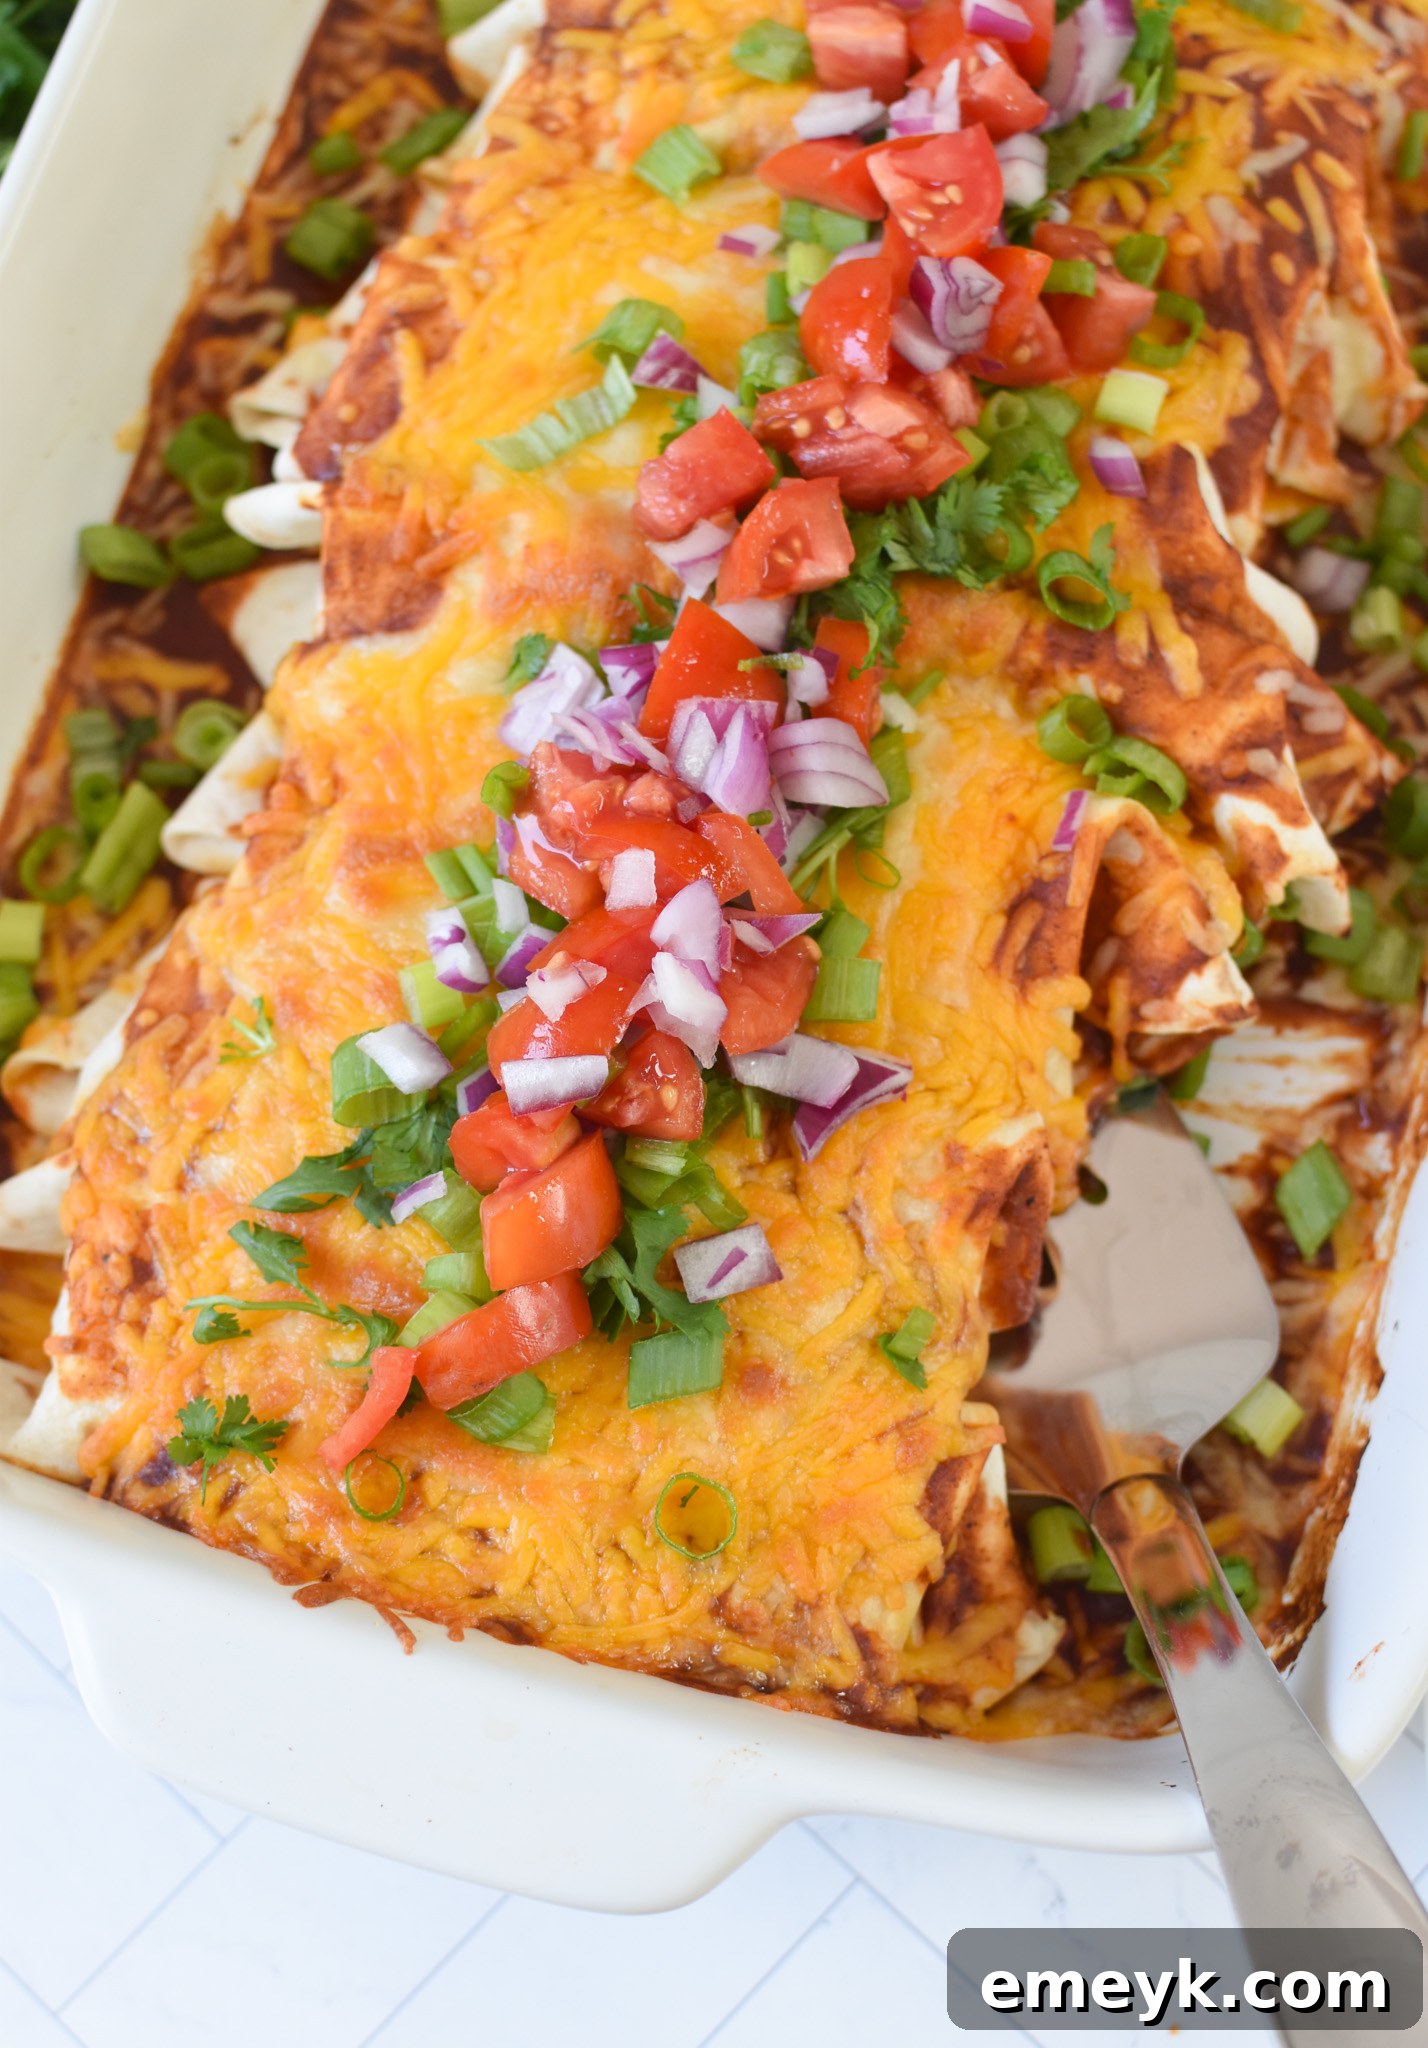
Enchiladas have long been a cornerstone of comforting, family-friendly meals in my kitchen, and for good reason! Their enduring popularity stems from a perfect blend of simplicity, versatility, and sheer deliciousness. What truly sets them apart, in my opinion, is how straightforward they are to assemble, allowing for endless customization with whatever ingredients you have on hand. And, let’s be honest, who can resist a dish that’s generously loaded with gooey, melted cheese? This recipe for Easy Three-Cheese Beef Enchiladas is designed to become your new go-to for a satisfying and easy dinner.
This classic enchilada recipe is built on a foundation of a few core ingredients: perfectly seasoned ground beef, soft flour tortillas, a flavorful enchilada sauce, and, of course, a trio of cheeses that take the flavor and texture to the next level. The combination creates a harmonious balance of savory, spicy, and cheesy notes that is simply irresistible.
For my ultimate Three-Cheese Beef Enchiladas, I’ve opted for a winning combination of sharp cheddar for its robust flavor, pepper jack for a subtle spicy kick, and Monterey jack for its excellent melting properties and mild creaminess. However, the beauty of this dish lies in its flexibility. Feel free to experiment with your own preferred blend of three cheeses – whether it’s Colby Jack, a robust Mexican blend, or even a touch of Cotija for a salty finish – to tailor it to your family’s unique taste buds.
If you’re constantly searching for vibrant, satisfying meal ideas to streamline those hectic weeknights, these easy beef enchiladas are undoubtedly the answer. They come together quickly, bake up beautifully, and offer a hearty serving that truly satisfies. Beyond their incredible taste, these enchiladas also provide substantial nutritional benefits. The blend of three cheeses delivers a significant dose of calcium, essential for strong bones, while the lean ground beef contributes ample protein, keeping your family feeling full, satisfied, and energized to tackle the rest of their day.
Craving more delightful Mexican-inspired dishes? You might also enjoy exploring this Beef Enchilada Casserole for a deconstructed twist, this incredibly efficient One Pot Chicken Enchilada Pasta, a speedy and flavorful Quick and Easy Pork Enchilada Recipe, the ever-popular Easy Chicken Enchiladas, or these deliciously light Easy Vegetarian Enchiladas Recipe.
Why These Easy Three-Cheese Beef Enchiladas Will Become Your New Favorite
There’s so much to adore about this enchilada recipe, making it an essential staple in any home cook’s repertoire:
- Effortlessly Delicious: Don’t let the authentic, rich flavor fool you – these enchiladas are incredibly simple to prepare, making them perfect for novice cooks and busy parents alike looking for a satisfying meal.
- Customization King: This recipe is a fantastic canvas for your creativity. Easily adapt the filling with your favorite vegetables, adjust the spice level to suit every palate, or swap out cheeses to achieve your desired flavor and texture.
- Hearty & Satisfying: Packed with savory ground beef, wholesome vegetables, and an abundance of gooey, melted cheese, this dish is a complete and incredibly fulfilling meal that will leave everyone at the table feeling full and happy. It’s the ultimate comfort food for any day of the week.
- Make-Ahead Friendly: Life gets busy, which is why these enchiladas are a lifesaver. You can easily assemble them in advance, cover, and refrigerate for baking later, making them ideal for meal prep on Sunday or entertaining guests without last-minute stress.
- Freezer-Friendly: Leftovers? If there are any! These enchiladas freeze beautifully, providing a convenient and delicious option for future quick meals. Just thaw and reheat for a fuss-free dinner.
- Protein & Calcium Rich: Beyond their incredible taste, these enchiladas are a great source of essential nutrients. The lean ground beef provides ample protein for muscle health, while the generous blend of three cheeses contributes valuable calcium for strong bones, promoting a balanced and energizing diet for the whole family.
Essential Ingredients for Perfect Three-Cheese Beef Enchiladas
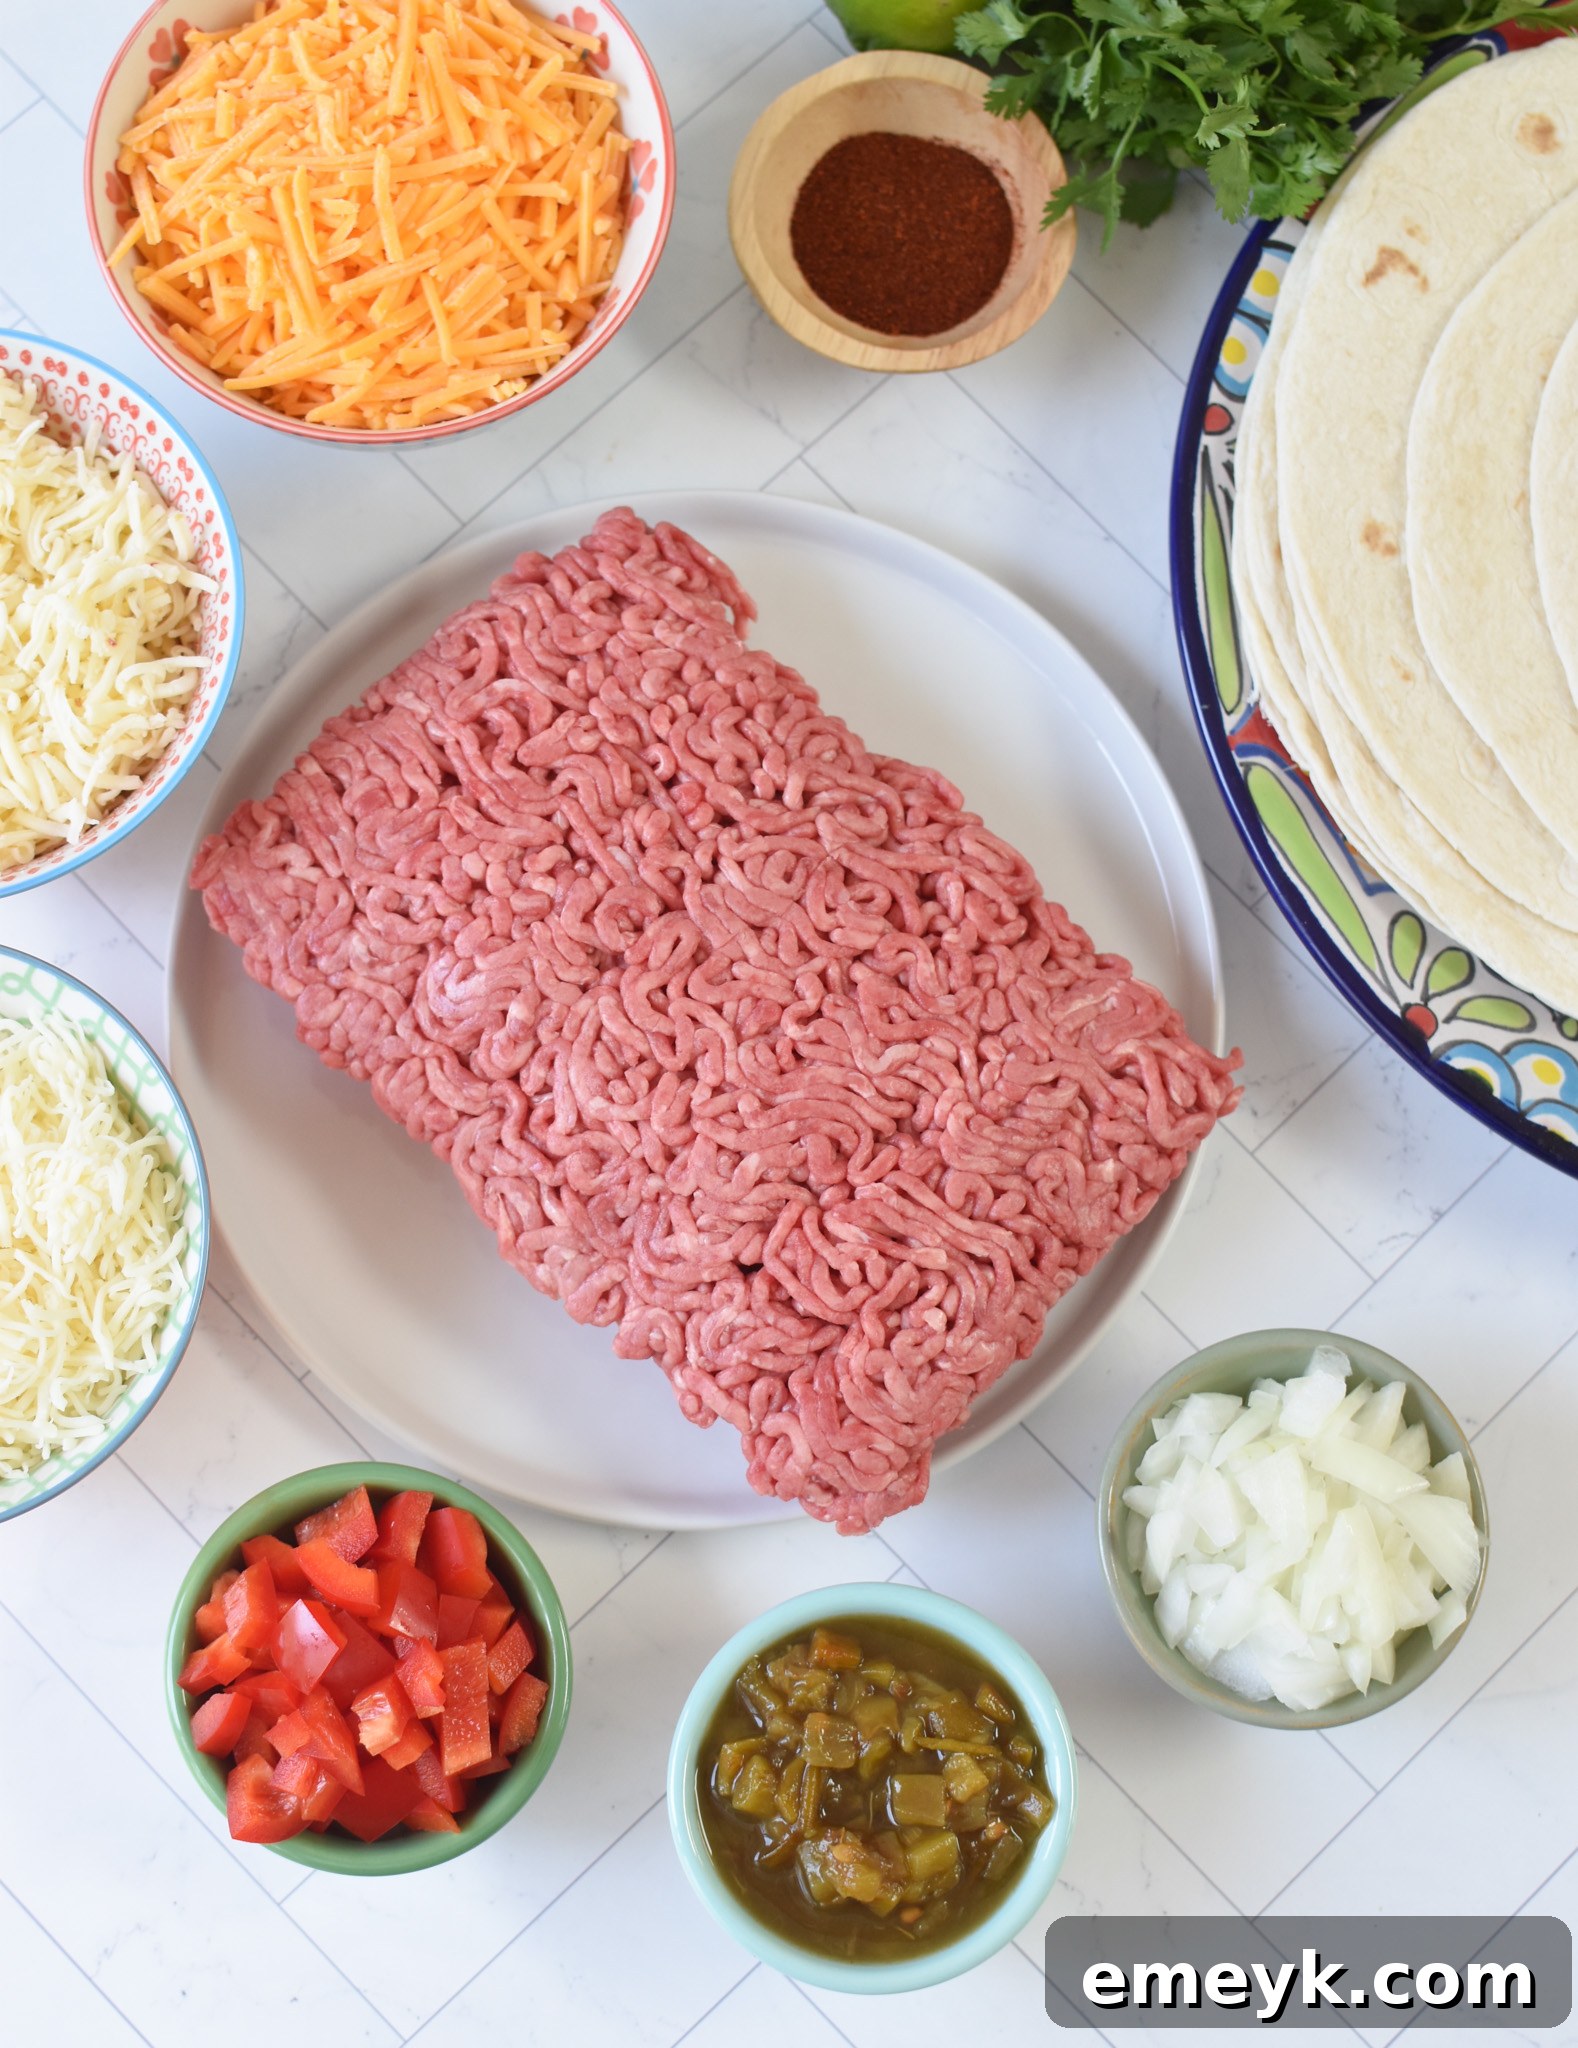
Crafting the perfect beef enchilada begins with selecting quality ingredients. While the full recipe card below provides exact measurements, here’s a deeper look into the components that make this dish shine and some tips for choosing the best ones:
- Ground Beef: I typically reach for 80/20 ground beef because its slightly higher fat content adds incredible flavor and helps keep the filling moist and rich. However, you can absolutely opt for leaner cuts like 90/10 or even ground turkey for a lighter version of this dish without sacrificing much flavor. Remember to thoroughly drain any excess fat after cooking, as this is crucial to prevent a greasy final product.
- Flavorful Vegetables: To add depth, freshness, and a wonderful aromatic base, this recipe incorporates diced sweet onion and vibrant red bell pepper. These vegetables sauté beautifully with the beef, softening and releasing their natural sweetness. For an extra layer of mild heat and authentic Tex-Mex flavor, a can of diced green chilies (undrained for moisture) is a must-add. Don’t hesitate to get creative with other additions like diced tomatoes, a touch of red onion for sharpness, or even thinly sliced radishes for a crisp garnish upon serving.
- Signature Spices: The star of our spice blend is chili powder, which infuses the beef with its characteristic warmth and earthy notes. You can choose a mild chili powder for a family-friendly dish or a medium-to-hot variety if you prefer more zing. For enhanced flavor and complexity, consider adding a pinch of ground cumin for warmth, garlic powder for an aromatic boost, or dried oregano for its classic Mexican essence to the beef mixture.
- Zesty Salsa: A couple of tablespoons of your favorite salsa adds moisture, a burst of fresh, tangy flavor, and another layer of spice to the beef filling. Whether you prefer mild, medium, or hot, chunky or smooth, choose a salsa that perfectly complements your taste preferences. For an authentic homemade touch, try my easy Homemade Salsa or the vibrant and zesty Tomatillo Salsa Verde.
- Rich Enchilada Sauce: The sauce is truly the heart and soul of any enchilada dish, enveloping the rolls in deep flavor. While your favorite store-bought brand works wonderfully for convenience and speed, making your own homemade enchilada sauce allows you to control the flavors, spice level, and ingredients precisely. A good quality red enchilada sauce provides the perfect savory and slightly spicy base for our cheesy beef rolls.
- The Three Cheeses: This recipe celebrates the magic of three distinct cheeses! I love the bold, savory taste of sharp cheddar, the creamy texture and excellent melt of Monterey Jack, and the slight, delightful kick of pepper jack. This combination offers a perfect balance of flavor, richness, and melt-factor. Feel free to substitute with a Mexican blend, Colby Jack, or even Oaxaca cheese for authentic stretchiness. The key is to use freshly shredded cheese, as pre-shredded varieties often contain anti-caking agents that hinder a smooth, uniform melt.
- Flour Tortillas: Large flour tortillas, often labeled as “burrito size” (typically 10-inch diameter), are ideal for these enchiladas. Their generous size makes them easy to fill generously and roll without tearing, and their soft texture bakes up beautifully, soaking up the delicious sauce. While corn tortillas can be used for a more traditional approach, they typically require a quick dip in hot oil or warm sauce to become pliable and prevent cracking during rolling.
Crafting Your Delicious Beef Enchiladas: A Detailed Step-by-Step Guide
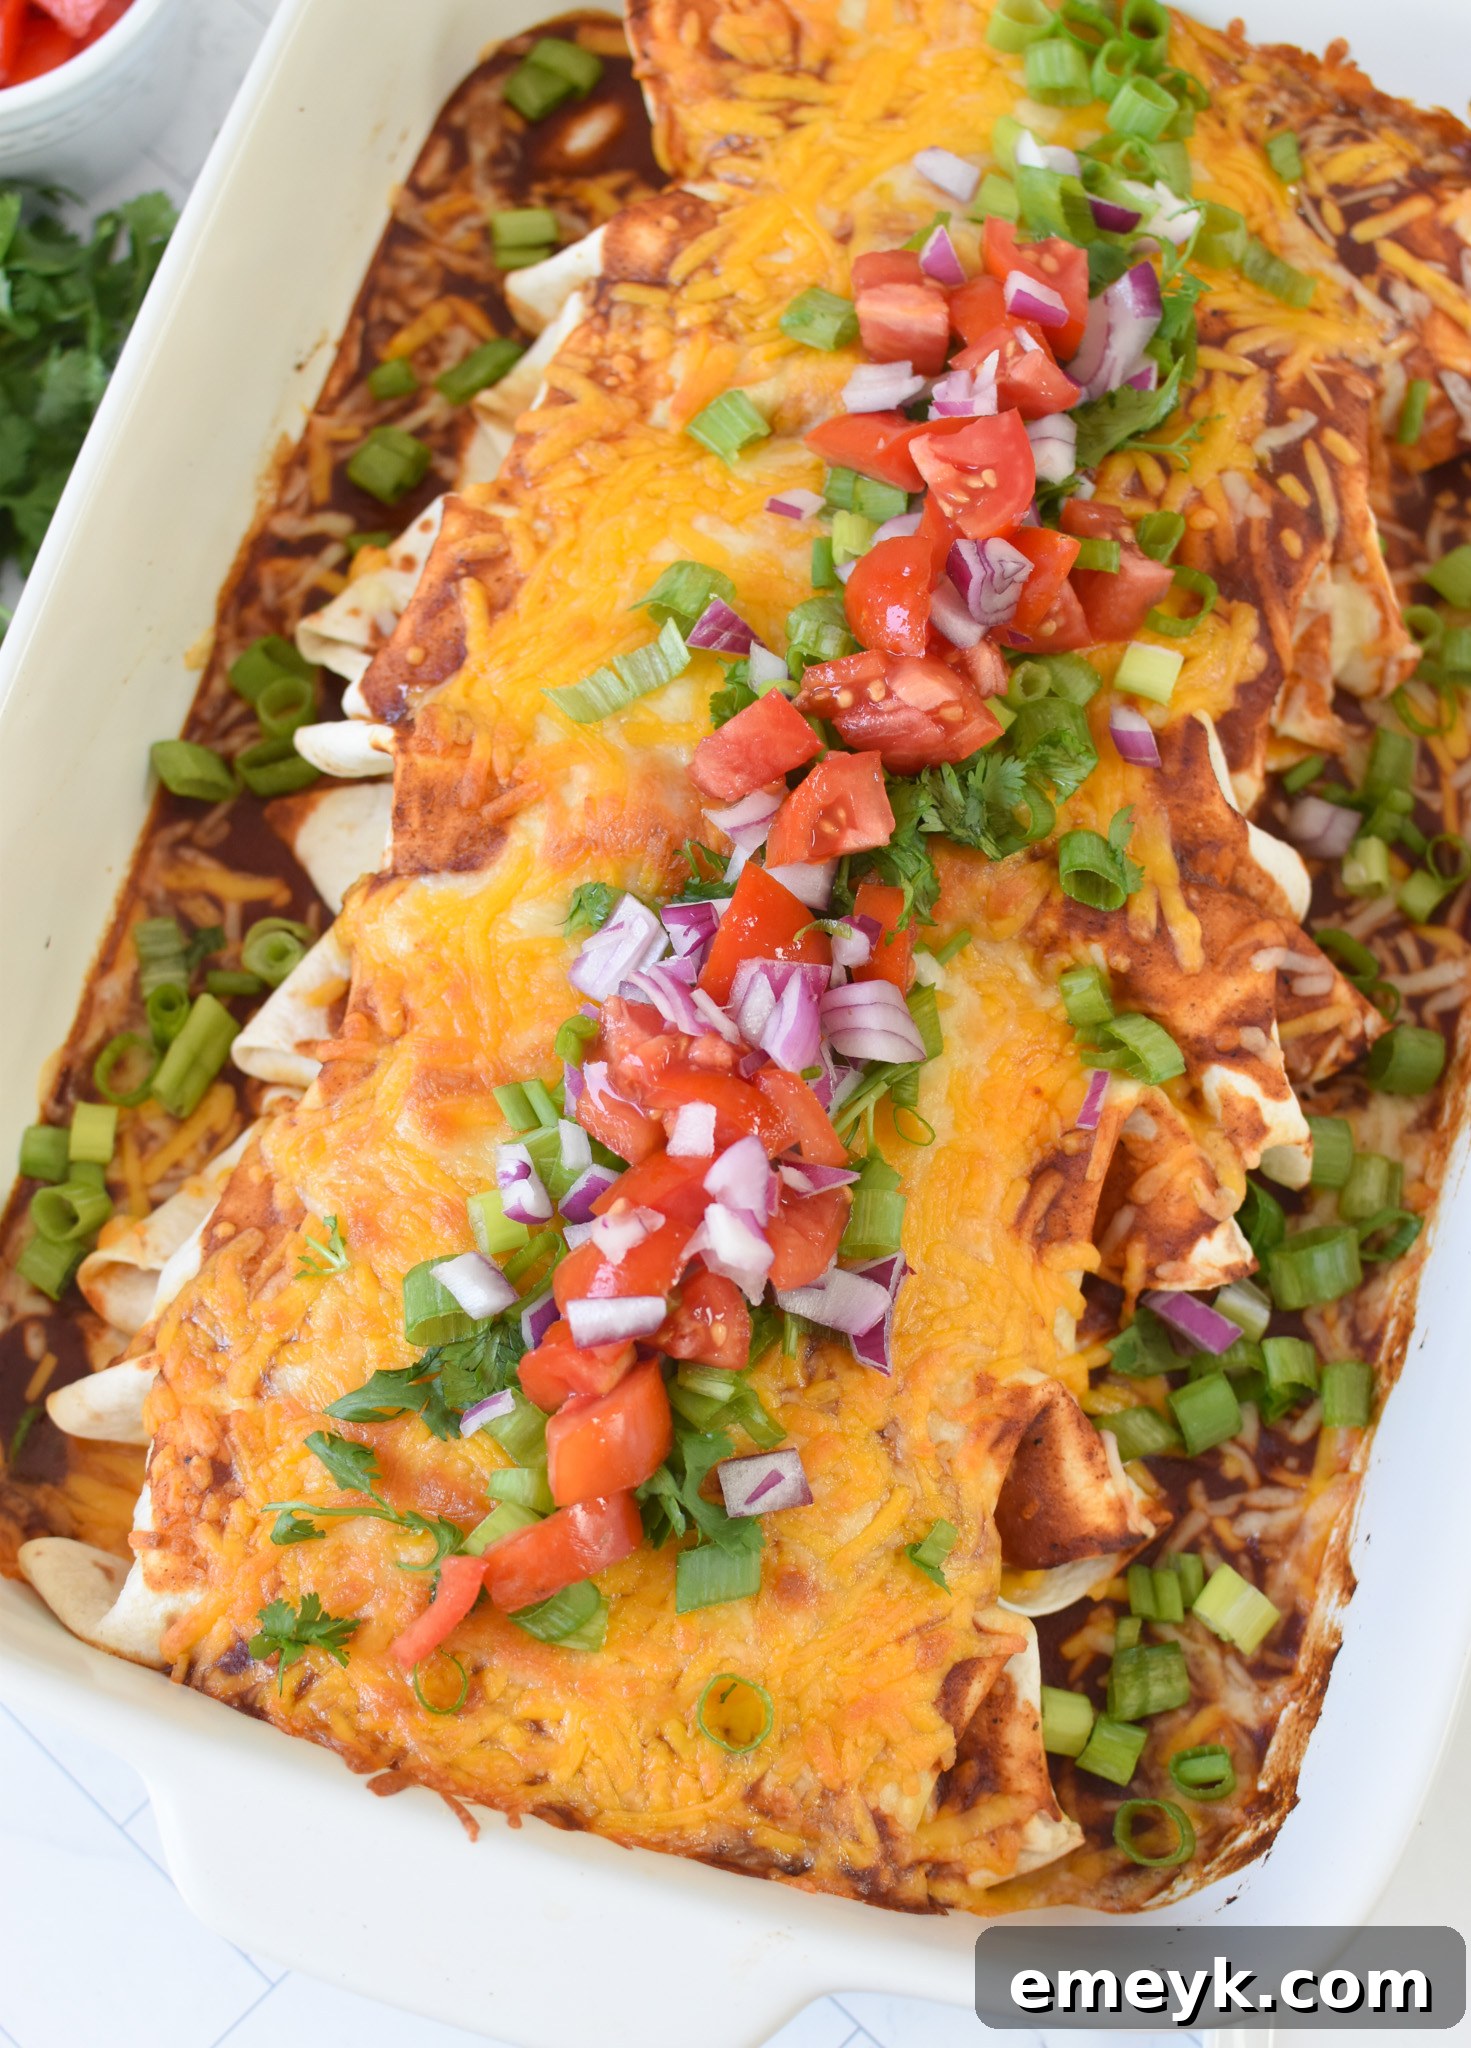
Making these beef enchiladas is surprisingly straightforward and incredibly rewarding. Follow these simple, clear steps to create a truly rewarding culinary experience that your family will rave about:
- Preheat Oven: Begin by preheating your oven to a steady 350 degrees F (175 degrees C). This ensures the oven is at the correct temperature for even baking, resulting in perfectly melted cheese and thoroughly warmed enchiladas.
- Sauté Vegetables & Brown Beef: In a large, sturdy skillet (preferably cast iron or a heavy-bottomed pan), heat 2 tablespoons of olive oil over medium-high heat. Add the diced sweet onion and red bell pepper and sauté for about 2 minutes, stirring occasionally, until they just begin to soften and become fragrant. Next, add the ground beef to the skillet, breaking it up into crumbles with a wooden spoon or spatula as it cooks. Continue to cook until no pink remains in the beef, ensuring it’s fully browned. Carefully drain any excess fat from the beef (do not pour hot grease down the drain; let it cool and solidify before discarding). Return the browned beef to the skillet.
- Season the Filling: Stir in the can of diced green chiles (no need to drain), chili powder, and salsa into the browned beef mixture. Continue to cook for another 1-2 minutes, stirring constantly, to allow all the wonderful flavors to meld and infuse into the beef. Remove the skillet from the heat.
- Prepare Baking Dish & Internal Cheese: Pour about 1/2 cup of your chosen enchilada sauce into a 9×13 inch baking dish and spread it evenly across the bottom. This thin layer prevents the tortillas from sticking and adds moisture to the base. In a separate bowl, stir 1/2 cup of the shredded pepper jack cheese directly into the prepared beef mixture – this adds an extra layer of creamy, subtly spicy goodness within the filling of each enchilada. Set aside the remaining cheese for topping.
- Assemble the Enchiladas: Lay one flour tortilla flat on a clean work surface or a large plate. Using a spoon, place 2-3 generous spoonfuls of the beef and cheese mixture in a line across the center of the tortilla. Carefully roll the tortilla up tightly, enclosing the filling, and then place the rolled enchilada seam-side down into the prepared baking dish. Repeat this process with the remaining tortillas and beef filling, arranging them snugly side-by-side in the dish. Don’t worry if they are a little crowded; it helps them stay together.
- Sauce and Cheese Topping: Once all the enchiladas are rolled and neatly placed in the baking dish, generously drizzle the remaining enchilada sauce over the top, ensuring each enchilada is well-coated. This will keep them moist during baking. Finally, sprinkle the remaining 1 1/2 cups of shredded cheese (your mix of sharp cheddar and Monterey jack, plus any extra pepper jack) evenly over the sauced enchiladas. This creates that irresistible golden, bubbly cheese crust.
- Bake to Perfection: Cover the baking dish tightly with aluminum foil. Place the dish in the preheated oven and bake for 15-20 minutes, or until the cheese is gloriously melted and bubbly, and the enchiladas are thoroughly heated through and warm on the inside. For a slightly more browned and crispy cheese topping, you can remove the aluminum foil for the last 5 minutes of baking.
- Garnish and Serve: Once baked, carefully remove the dish from the oven and let the enchiladas rest for 5-10 minutes before serving. This brief resting period allows the cheese to set slightly and the flavors to deepen, making them easier to cut and serve without falling apart. Garnish generously with fresh diced tomatoes, chopped cilantro, and thinly sliced green onions for a burst of vibrant color and fresh flavor. Serve immediately and enjoy!
Pro Tips for Making the Best Three-Cheese Beef Enchiladas
Achieving enchilada perfection is easier than you think with these helpful tips and tricks:
- Warm Your Tortillas for Flexibility: Before you even think about filling and rolling, briefly warm your flour tortillas. You can do this by wrapping a stack in a damp paper towel and microwaving for 15-30 seconds, or quickly heating them in a dry skillet. Warming makes them incredibly pliable and significantly less likely to tear or crack when rolled, ensuring neat, intact enchiladas.
- Don’t Overfill for Stability: While it’s tempting to load up each tortilla, overfilling can lead to them bursting during baking, creating a messy situation. Aim for 2-3 generous spoonfuls of filling per tortilla, leaving enough space to roll them securely.
- Thoroughly Drain Excess Fat: After browning your ground beef, it’s absolutely crucial to drain off any accumulated grease. This prevents a soggy, oily final product and ensures the flavors of your filling and sauce remain clean and distinct.
- The Sauce is Key – Don’t Skimp!: Enchilada sauce plays a dual role: flavor and moisture. A thin layer on the bottom of the pan prevents the tortillas from sticking and becoming overly dry, while a generous coating on top ensures the tortillas stay moist, tender, and flavorful throughout baking.
- Opt for Freshly Shredded Cheese: While convenient, pre-shredded cheese often contains anti-caking agents (like cellulose) that prevent it from melting smoothly and evenly. For the best gooey, bubbly, and rich texture, take a few extra minutes to shred your own cheese from a block. The difference in melt quality is remarkable.
- Let Them Rest After Baking: Patience is a virtue, especially with baked casseroles. After baking, let the enchiladas rest for 5-10 minutes before cutting and serving. This allows the cheese and sauce to set slightly, making them easier to cut and serve without falling apart, and helps the flavors meld even further.
What to Serve with Your Three-Cheese Beef Enchiladas
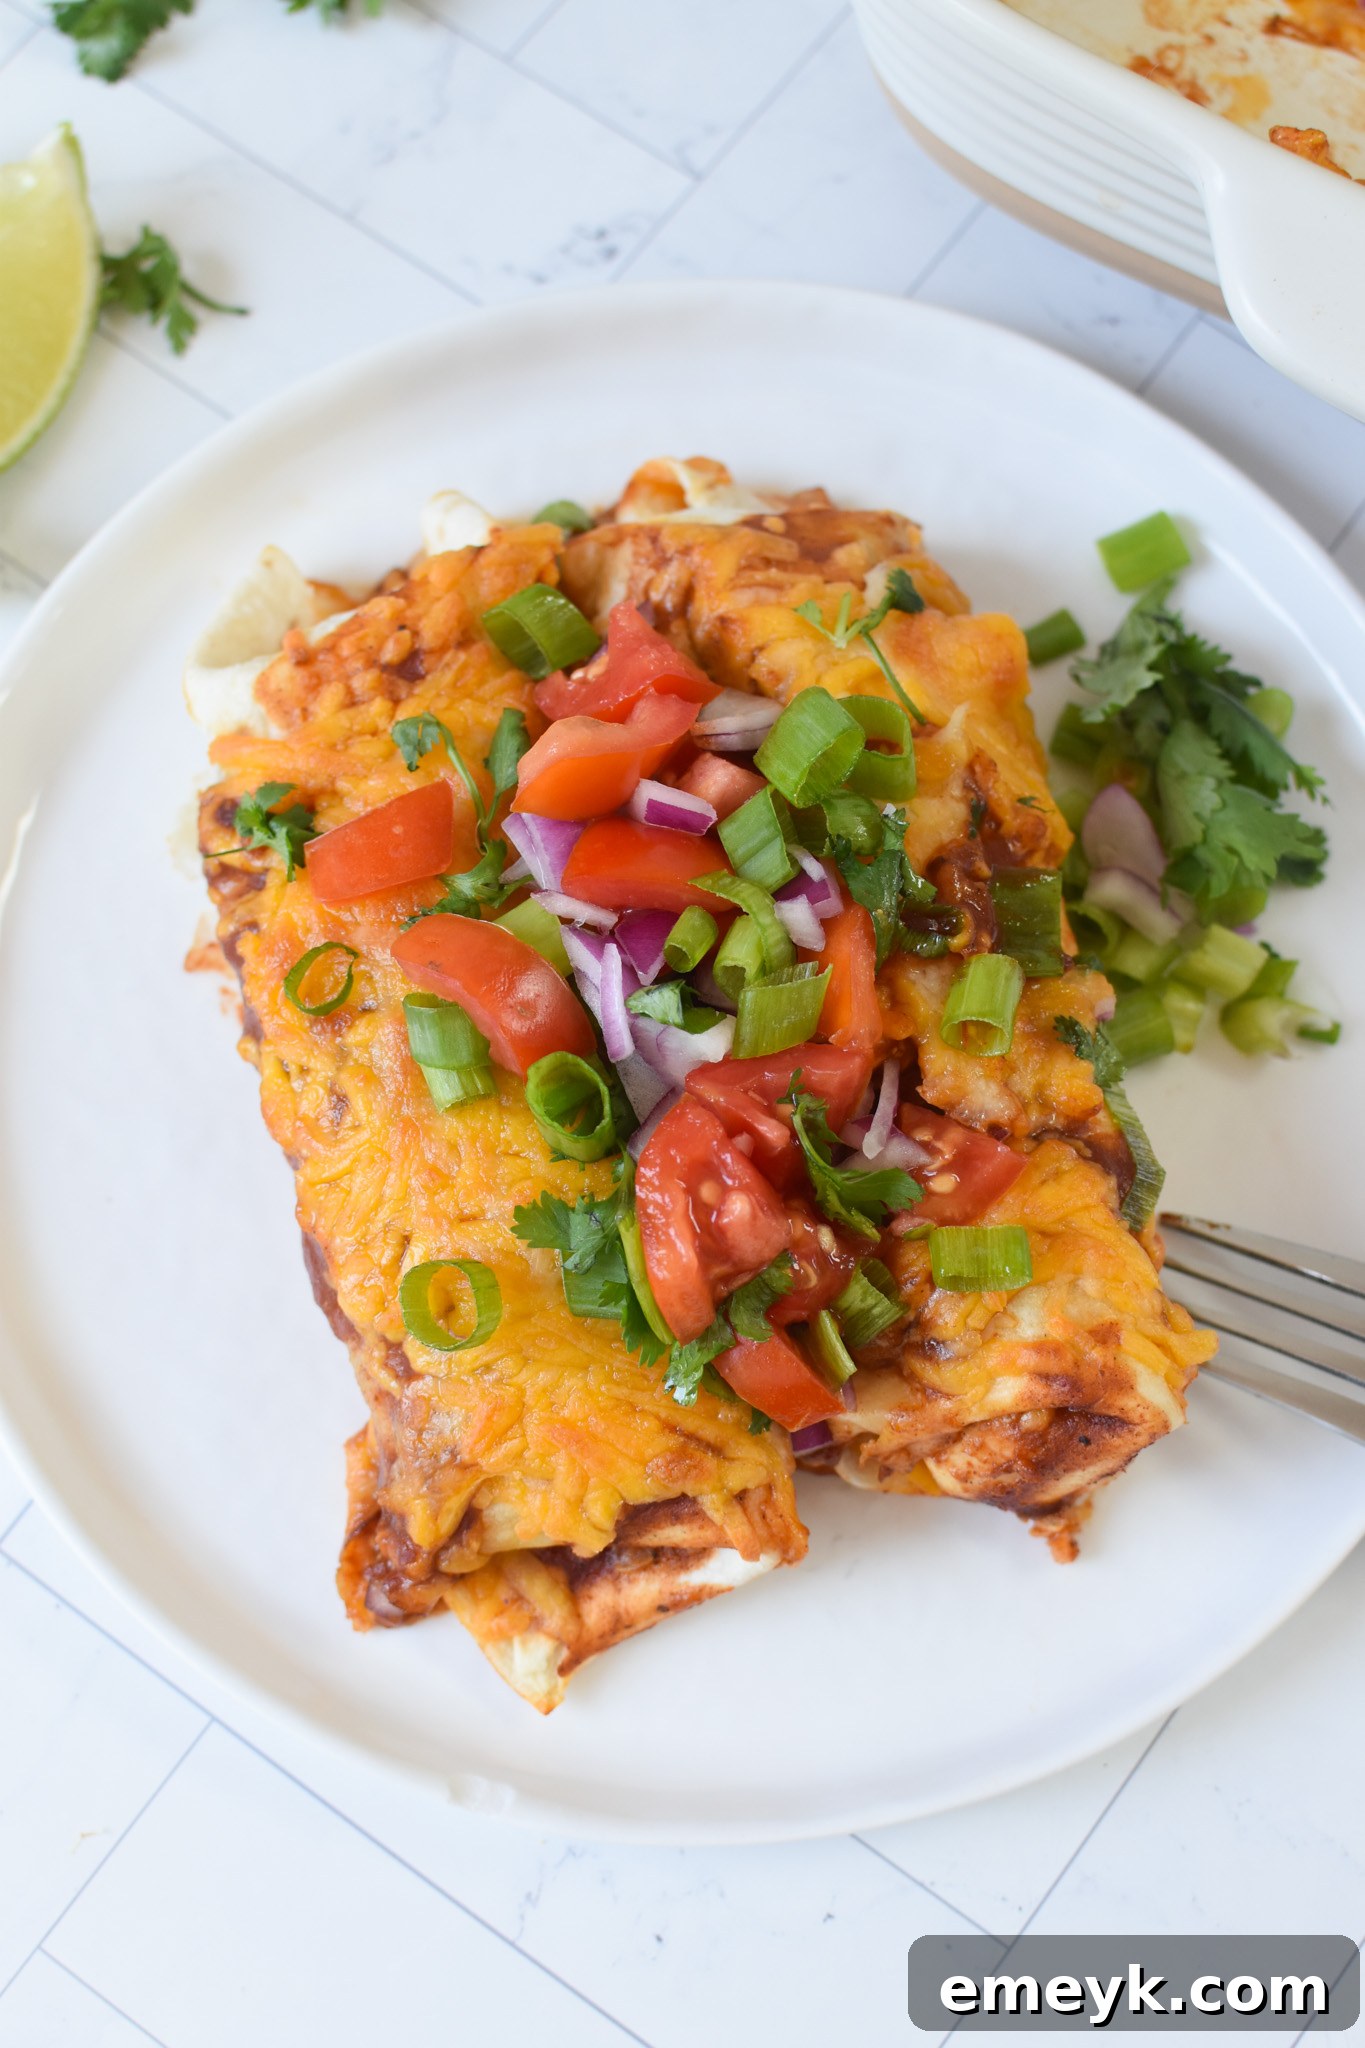
These hearty enchiladas are fantastic on their own, but pairing them with classic sides and fresh toppings elevates the meal to new heights. Here are some popular serving suggestions to complete your Mexican-inspired feast:
- Classic Rice and Beans: A quintessential pairing! Serve with fluffy Mexican rice, savory black beans, or creamy refried beans for a complete and traditional meal that truly satisfies.
- An Array of Fresh Toppings: Offer a variety of garnishes for guests to customize their plates. Favorites include cool sour cream or a healthier Greek yogurt, creamy sliced or diced avocado, vibrant fresh cilantro, thinly chopped green onions, a dollop of extra salsa for a fresh kick, or a dash of your favorite hot sauce for an added layer of spice.
- Crisp Side Salad: A simple, light side salad with a zesty lime vinaigrette or a vibrant Mexican chopped salad can provide a refreshing contrast to the richness of the enchiladas, adding freshness and crunch.
- Guacamole & Chips: A side of freshly made guacamole and crunchy tortilla chips is always a welcome addition for dipping, snacking, and rounding out the Tex-Mex experience.
- Elote (Mexican Street Corn): Grilled or pan-fried corn seasoned with chili powder, lime juice, and a sprinkle of Cotija cheese makes for a phenomenal, flavorful, and colorful side dish.
Storage and Freezing Tips for Beef Enchiladas
Enchiladas are not only a fantastic meal to make and enjoy fresh, but they also store and freeze beautifully, making them an excellent option for meal prepping or having convenient dinners ready for later:
- Refrigerator Storage: Store any leftover beef enchiladas in an airtight container or tightly covered baking dish in the refrigerator for up to 3 days. To reheat, simply microwave individual portions until heated through, or warm a larger batch in a preheated oven at 350°F (175°C) until bubbly and hot in the center.
- Freezing Instructions: Enchiladas are incredibly freezer-friendly! To freeze, ensure they are completely cooled to room temperature after baking. You can freeze the entire casserole (if your dish is freezer-safe) tightly wrapped in plastic wrap and then aluminum foil. Alternatively, for individual portions, wrap each enchilada separately in plastic wrap and then foil. Place them in a large freezer-safe bag or container and freeze for up to 3 months.
- Reheating from Frozen: To reheat a frozen casserole, transfer it directly from the freezer to a preheated oven (covered tightly with foil) at 350°F (175°C) for 45-60 minutes, or until thoroughly heated through. Individual enchiladas can be reheated in the microwave for 2-4 minutes or in a conventional oven until warm and bubbly.
Creative Variations & Customizations for Your Enchiladas
This beef enchilada recipe is a fantastic canvas for your culinary creativity. Feel free to adapt it to your taste preferences, dietary needs, or simply what you have on hand:
- Different Proteins: Instead of ground beef, try ground chicken, ground turkey, pre-cooked shredded chicken, or even tender pork carnitas for a different flavor profile. For a delicious vegetarian option, black beans, pinto beans, roasted sweet potatoes, or a mixture of your favorite roasted vegetables make excellent fillings.
- Add More Veggies: Boost the nutritional value and add extra texture by stirring in more vegetables to your beef mixture. Cooked corn kernels, sautéed mushrooms, fresh spinach (wilted down), or finely diced zucchini are all excellent additions.
- Sauce Swaps: Experiment with a green enchilada sauce for a brighter, tangier flavor profile, or even a rich, complex mole sauce for a gourmet touch that truly elevates the dish.
- Adjust the Spice Level: Easily customize the heat! Adjust the amount of chili powder to your preference. For extra kick, consider adding a pinch of cayenne pepper, finely diced fresh jalapeños (with or without seeds), or a dash of your favorite hot sauce to the beef filling. For milder palates, ensure you use a mild chili powder and remove any seeds from fresh peppers.
- Healthier Twist: For a lighter version, use whole wheat tortillas, opt for leaner ground beef or turkey, and significantly load up on extra vegetables. You can also swap some of the cheese for a lower-fat blend or simply reduce the overall quantity of cheese.
Explore More Delicious Mexican & Tex-Mex Inspired Recipes
Beef
Mexican Pizza
Beef
One Pot Mexican Stuffed Pepper Casserole
Beef
Slow Cooker Mexican Beef Brisket (Tender + Flavorful)
Beef
Mexican Zucchini
Tried this recipe? Leave a star rating and comment below! Subscribe to my newsletter or follow me on
Facebook,
Instagram, or
Pinterest for the latest.
★
★
★
★
Easy Three-Cheese Beef Enchiladas Recipe
Julia Jolliff
Print Recipe
20
20
40
8
Recipe Video
Want to save this recipe for later? Subscribe to our newsletter for more delicious recipes delivered straight to your inbox!
Ingredients
- 2 Tablespoons olive oil
- 1 pound ground beef (80/20 recommended, or your preferred fat content)
- 1/4 sweet onion, diced
- 1/2 red bell pepper, seeds removed, diced
- 1 – 4 ounce can of diced green chiles (undrained)
- 1 tablespoon chili powder (use mild or medium depending on preference)
- 2 tablespoons salsa (your favorite brand, or try homemade)
- 1 – 10 ounce can of red enchilada sauce (good quality store-bought or homemade)
- 1 cup sharp cheddar cheese, freshly shredded
- 1/2 cup Monterey Jack cheese, freshly shredded
- 1/2 cup pepper jack cheese, freshly shredded (plus extra for topping if desired)
- 8 10-inch flour tortillas (burrito size)
Instructions
-
1. Preheat Oven: Preheat your oven to 350°F (175°C).
-
2. Sauté Vegetables & Brown Beef: In a large skillet, heat 2 Tablespoons of olive oil over medium-high heat. Add the diced onion and red bell pepper and sauté for 2 minutes until slightly softened. Add the ground beef and cook, breaking it up with a spoon, until it is fully browned. Drain any excess fat from the ground beef. Return the beef to the skillet.
-
3. Season the Filling: Stir in the diced green chiles (undrained), chili powder, and salsa into the browned beef mixture. Cook for another 1-2 minutes to allow the flavors to meld. Remove from heat.
-
4. Prepare Baking Dish & Internal Cheese: Pour 1/2 cup of the enchilada sauce into a 9×13 inch baking dish and spread it evenly across the bottom. Next, stir 1/2 cup of the shredded pepper jack cheese into the prepared beef filling. Set aside the remaining cheese for topping.
-
5. Assemble Enchiladas: Place one flour tortilla on a large plate. Spoon 2-3 spoonfuls of the beef and cheese mixture into the center of the tortilla. Roll the tortilla tightly to enclose the filling and place it seam-side down in the prepared baking dish. Continue this process with the remaining tortillas and filling, arranging them side-by-side in the dish.
-
6. Sauce & Top with Cheese: Drizzle the remaining enchilada sauce generously over the top of the assembled enchiladas. Sprinkle the remaining 1 1/2 cups of shredded cheese (sharp cheddar and Monterey jack, plus any extra pepper jack) evenly over the sauced enchiladas.
-
7. Bake: Cover the baking dish tightly with aluminum foil. Bake in the preheated oven for 15-20 minutes, or until the cheese is beautifully melted and bubbly, and the enchiladas are thoroughly heated through.
-
8. Garnish & Serve: Carefully remove the foil (optional: bake uncovered for another 5 minutes to slightly brown the cheese). Garnish with fresh diced tomatoes, chopped cilantro, and sliced green onions before serving warm.
Recipe Notes & Expert Tips
- Boost Your Veggies: Easily enhance the nutritional value and texture by adding more vegetables to your beef mixture. Consider stirring in cooked black beans, corn, finely diced zucchini, or spinach along with the green chilies.
- Tortilla Choice: While this recipe uses flour tortillas for their ease of rolling, traditionalists can opt for corn tortillas. If using corn, briefly warm them in a hot skillet or microwave (wrapped in a damp paper towel) to make them pliable and prevent cracking.
- Flavor Enhancers: For a deeper flavor profile, consider adding a pinch of ground cumin, garlic powder, or a dash of hot sauce to your beef filling.
- Customizable Garnishes: The sky’s the limit when it comes to garnishes! Beyond the suggested fresh tomatoes, cilantro, and green onions, consider adding a dollop of sour cream or Greek yogurt, fresh avocado slices or guacamole, finely diced red onion, or pickled jalapeños for an extra kick.
Nutrition Information (per serving)
Calories: 388kcal,
Carbohydrates: 18g,
Protein: 19g,
Fat: 27g,
Saturated Fat: 11g,
Polyunsaturated Fat: 2g,
Monounsaturated Fat: 10g,
Trans Fat: 1g,
Cholesterol: 67mg,
Sodium: 525mg,
Potassium: 275mg,
Fiber: 2g,
Sugar: 3g,
Vitamin A: 827IU,
Vitamin C: 11mg,
Calcium: 268mg,
Iron: 3mg
Nutrition information is automatically calculated and should be considered an approximation. Factors like ingredient brands, exact measurements, and optional additions can affect the final nutritional values.
Tried this recipe?
Mention @acedarspoon or tag #acedarspoon!
Frequently Asked Questions (FAQ) About Beef Enchiladas
-
How do I prevent my enchiladas from getting soggy?
Soggy tortillas are a common concern, but easily avoided! Ensure your beef filling isn’t too wet by thoroughly draining any excess fat after cooking. Also, make sure your tortillas are warmed slightly before rolling, as this makes them more pliable and less likely to absorb too much sauce. A thin layer of enchilada sauce on the bottom of the pan also helps to create a barrier and protect the tortillas from becoming saturated.
-
Can I use corn tortillas instead of flour for this recipe?
Absolutely! Corn tortillas offer a more traditional flavor and a slightly different texture that many people prefer. However, they are naturally less pliable and more prone to cracking. To prevent this, lightly fry them in a bit of oil for a few seconds per side, or briefly dip them in warm enchilada sauce before filling and rolling. This makes them much more flexible and easier to work with.
-
What’s the best type of cheese to use for enchiladas?
A blend is almost always best for a complex flavor profile and superior texture! Sharp cheddar provides a robust, tangy flavor, Monterey Jack offers a creamy, wonderfully melty texture, and Pepper Jack adds a delightful, mild spice kick. Other great options to experiment with include Colby Jack, a pre-made Mexican blend, or even authentic Oaxaca cheese for its characteristic stretchiness. For the best gooey results, always recommend shredding your own cheese from a block!
-
Can I make my own enchilada sauce instead of using store-bought?
Yes, and it’s often more flavorful and allows for greater control over ingredients! Many homemade red enchilada sauce recipes involve creating a roux (flour cooked in oil or butter) with chili powder and broth. A simple blender enchilada sauce recipe (like the one often linked in the ingredients section of comprehensive recipe sites) is also a fantastic and quick homemade option that delivers fresh, vibrant flavor.
-
How long should I bake these beef enchiladas?
Typically, beef enchiladas like these bake for about 15-20 minutes at 350°F (175°C) if the filling ingredients (especially the beef) are already cooked and warm. The primary goals during baking are for the cheese topping to be beautifully melted and bubbly, and for the entire dish to be thoroughly heated through. If you are baking an assembled casserole from cold (after refrigerating), you might need an extra 10-15 minutes, or until piping hot in the center.
Today’s post was proudly sponsored by ADA Mideast, an organization committed to promoting dairy goodness and healthy eating. As always, all opinions expressed here are 100% my own and reflect my genuine love for creating delicious and nourishing meals for families. Thank you for supporting the brands that enable me to continue sharing new and flavorful recipes with you!