
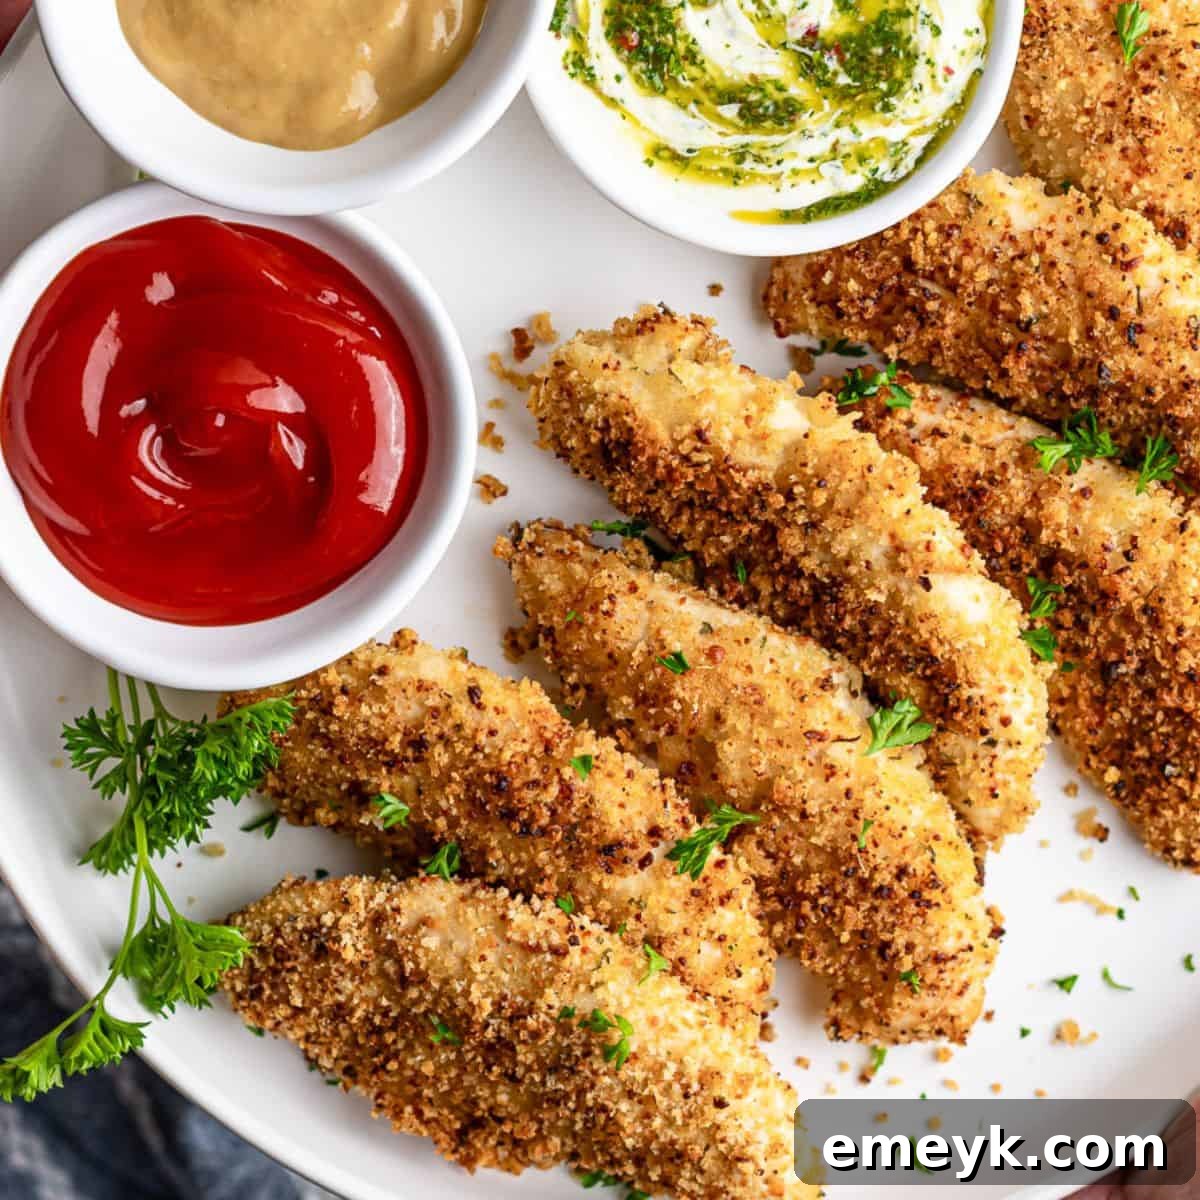
Say goodbye to drive-thru dilemmas and hello to unbelievably crispy baked chicken tenders, ready to grace your table in a mere 35 minutes! These oven-baked chicken fingers emerge perfectly golden, wonderfully juicy, and remarkably crunchy, all without the mess and added fat of deep frying. This recipe has been a true weeknight MVP in our home for years, cherished by even the pickiest eaters. For those moments when you need an even quicker fix, my Air Fryer Chicken Tenders offer a fantastic alternative. Plus, with a convenient batch-and-freeze option, effortless lunches and dinners are guaranteed throughout the week.
Why You’ll Adore These Easy Baked Chicken Tenders
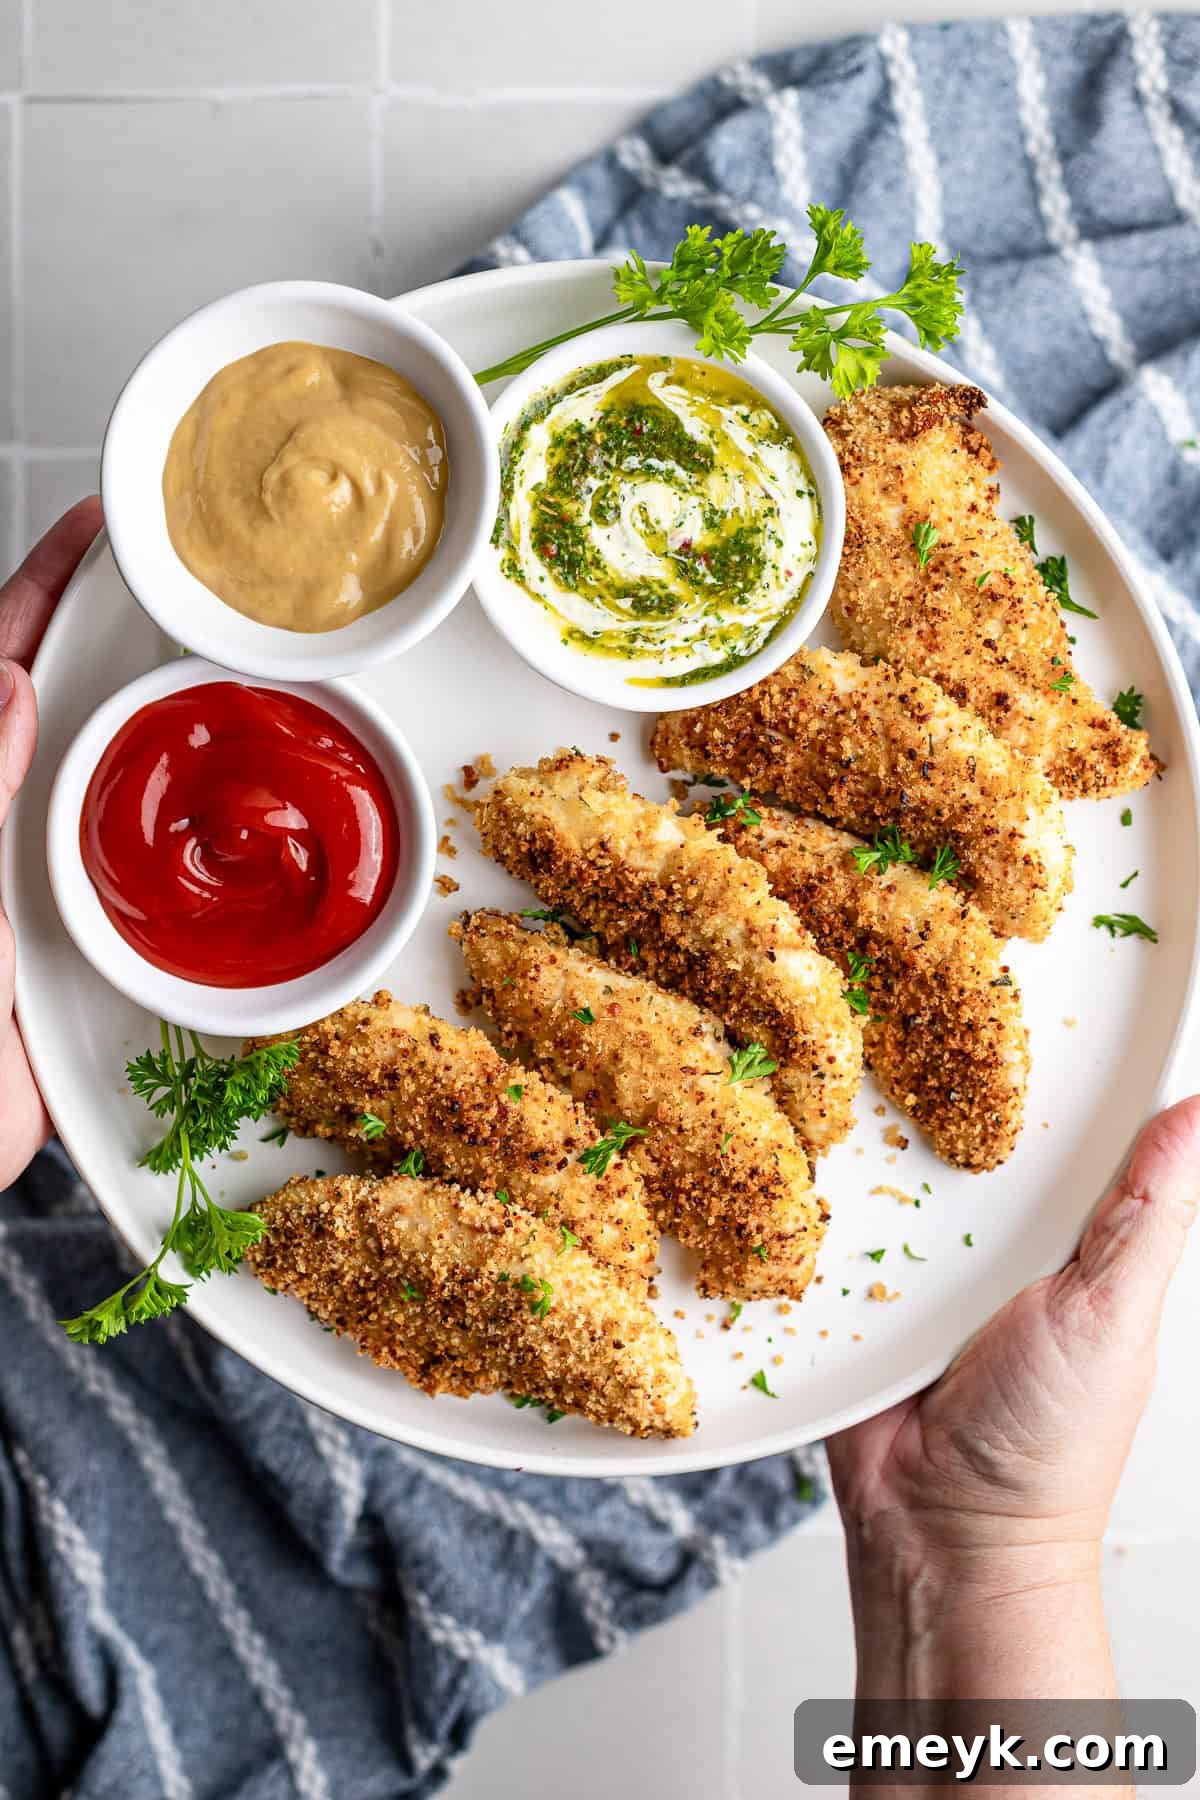
This baked chicken tenders recipe isn’t just a meal; it’s a culinary triumph that consistently delivers on flavor, texture, and convenience. It’s a true weeknight hero in countless households, including ours, effortlessly fitting into even the most hectic schedules while always earning rave reviews. Imagine pulling a tray of perfectly crisp, golden-brown chicken tenders from your oven, knowing precisely what wholesome ingredients went into making them. It’s a satisfying feeling that store-bought options simply can’t match.
What truly elevates these homemade chicken tenders is their exceptional texture and the thoughtfully balanced seasoning. The secret to their incredible crunch lies in panko breadcrumbs, which create an irresistible crust that stays crisp throughout the baking process. Complementing this texture is a savory blend of garlic, fragrant thyme, and smoky paprika, providing a warm, inviting flavor profile that enhances the chicken without overwhelming it. The beauty of this recipe also lies in its adaptability: easily customize the spice blend to suit your family’s preferences or experiment with different breadcrumbs. Best of all, preparation is minimal, and you’ll love avoiding the messy oil splatter and elaborate setup required for deep frying. This recipe offers a healthier alternative to fried chicken without compromising on the delicious crispiness everyone craves.
Looking for delightful ways to serve these golden panko chicken tenders? They pair beautifully with a variety of sides, transforming a simple dinner into a memorable feast. Consider serving them alongside Crispy Air Fryer Zucchini Fries for an extra crunch, or with vibrant Mediterranean Roasted Vegetables for a colorful, nutrient-packed meal. These versatile chicken fingers are also fantastic for school lunches, quick snacks, or even as part of an appetizer platter.
Essential Ingredients for Crispy Oven-Baked Chicken
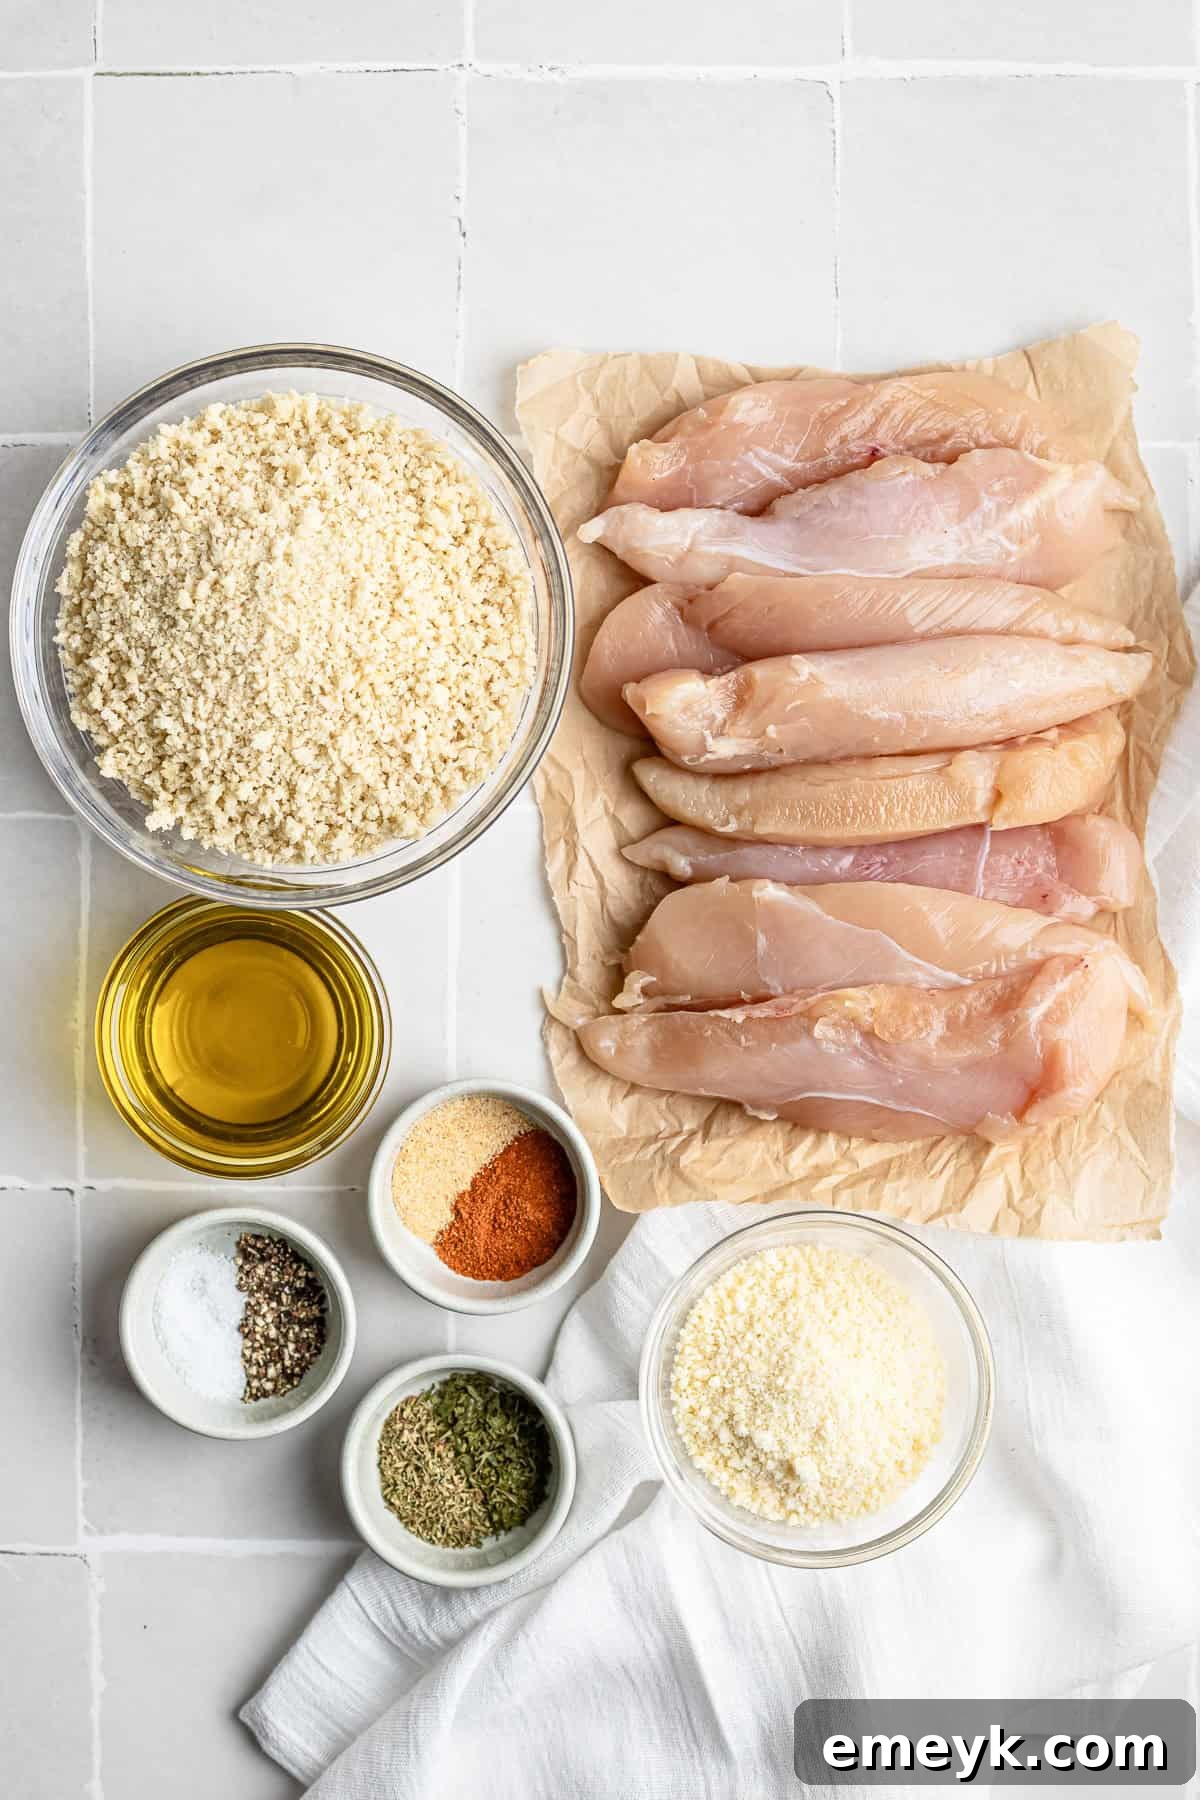
Crafting these delicious, healthy baked chicken tenders requires just a handful of straightforward pantry staples. The magic lies in how these simple ingredients come together to create an extraordinary meal. Below, you’ll find a detailed breakdown of each component; for exact measurements and printable instructions, please refer to the recipe card at the bottom of this post.
- Chicken Tenderloins – These lean cuts are ideal for quick cooking, ensuring juicy results in a short amount of time. If tenderloins aren’t available, you can easily substitute them with boneless, skinless chicken breasts. Simply slice chicken breasts into 1-inch thick strips or cutlets to mimic the tenderloin size. Remember that cooking times may vary slightly based on the thickness of your chicken pieces.
- Panko Breadcrumbs – The cornerstone of our crispy crust! Panko breadcrumbs are renowned for their larger, flakier texture, which absorbs less oil and delivers an unparalleled crunch compared to regular breadcrumbs. If panko isn’t on hand, standard fine breadcrumbs will work, though the texture will be slightly less crisp. For a creative twist, consider crushed cornflakes, pretzels, Ritz crackers, or even saltines for a unique flavor and crunch. To make these gluten-free chicken tenders, simply opt for gluten-free panko breadcrumbs.
- Parmesan Cheese – Grated Parmesan cheese isn’t just for flavor; it also contributes to that beautiful golden-brown finish and adds a delightful savory depth to the coating. For those avoiding dairy, or simply seeking an umami-rich alternative, nutritional yeast (such as Bragg’s Roasted Garlic) makes an excellent dairy-free swap, offering a cheesy flavor without the cheese. Shredded mozzarella can also be used for a milder cheese flavor.
- Garlic Powder, Thyme, Smoked Paprika, Dried Parsley, Salt & Pepper – This carefully selected spice blend ensures your chicken tenders are bursting with savory warmth and aromatic notes without being overpowering. Garlic powder provides a foundational savory base, thyme adds a subtle earthiness, smoked paprika imparts a lovely warmth and depth, and dried parsley brightens the overall flavor. Feel empowered to adjust these spices or add others based on your family’s taste preferences. Experiment with a dash of cayenne pepper for a little heat, za’atar for a Mediterranean twist, or Italian seasoning for classic herbaceous notes. A pinch of onion powder can also deepen the savory profile.
- Olive Oil (or Egg) – This essential binding agent is crucial for ensuring the breadcrumb coating adheres beautifully to the chicken. Extra virgin olive oil contributes to the crispness and a subtle richness, while also helping the exterior achieve that desirable golden hue. Alternatively, a beaten egg provides a slightly richer, more robust coating. You can also explore options like plain Greek yogurt or a thin layer of mayonnaise for a moist, flavorful binder that also helps the breadcrumbs stick.
Step-by-Step: How to Bake Crispy Chicken Tenders
Achieving perfectly crispy, juicy baked chicken tenders is simpler than you might think. Follow these straightforward steps to create a family favorite in under 40 minutes:
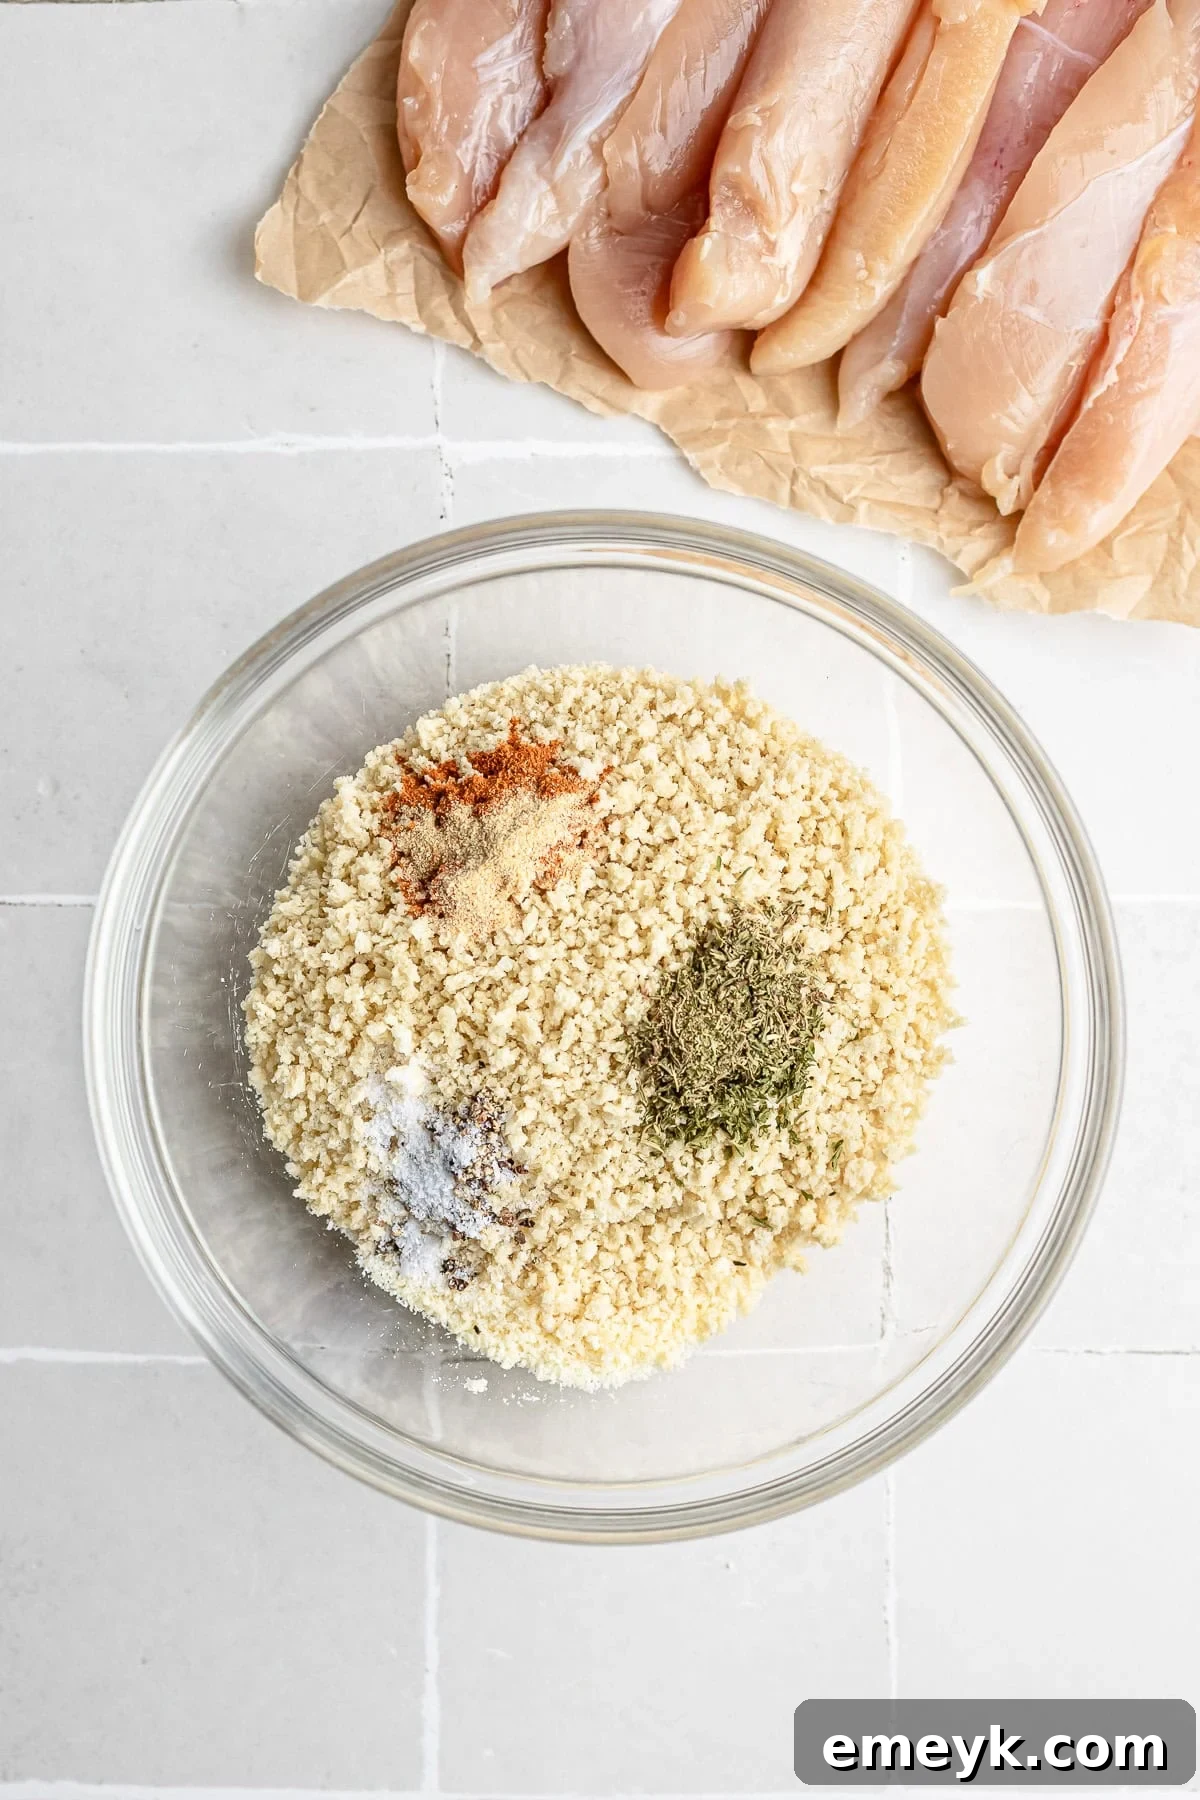
Step 1: Prepare Your Oven and Coating Mixture. Begin by preheating your oven to a robust 400°F (200°C). For the crispiest results, line a baking sheet with parchment paper and place a wire rack on top. This elevation allows hot air to circulate all around the chicken, preventing soggy bottoms. In a shallow bowl—large enough for dredging—combine the panko breadcrumbs, grated Parmesan cheese, garlic powder, dried thyme, smoked paprika, dried parsley, salt, and black pepper. Stir these ingredients thoroughly until they are uniformly distributed, creating your flavorful breading blend.
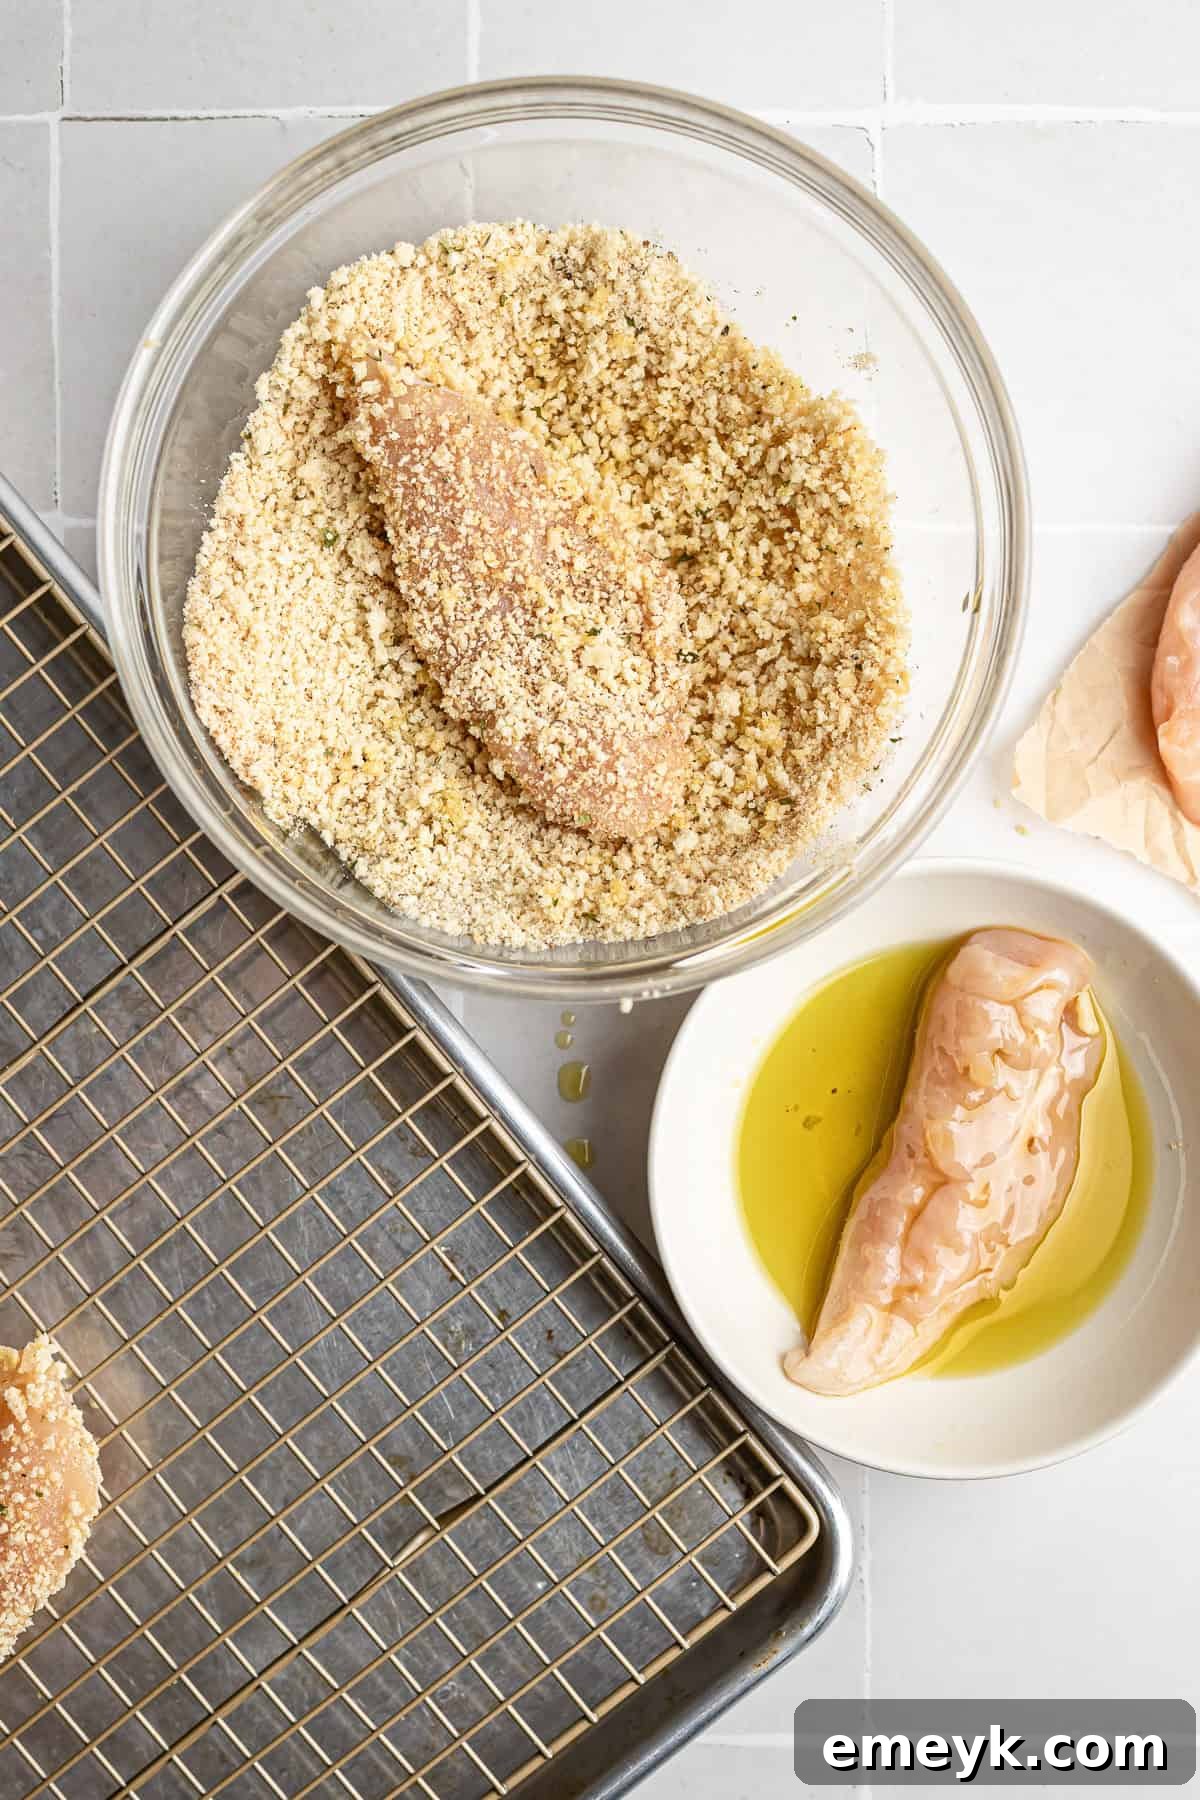
Step 2: Coat the Chicken Tenders. In a separate shallow dish, pour your extra virgin olive oil (or beat one large egg, if using). Ensure your chicken tenderloins are patted thoroughly dry with paper towels—this is a crucial step for breading adhesion! Take each chicken tender and first dredge it completely in the olive oil or egg mixture, allowing any excess to drip off. Then, transfer the tender to the breadcrumb mixture, coating both sides generously. Gently press the breading onto the chicken to ensure it adheres well and creates a thick, even crust.
Why 400°F + a wire rack equals fryer-level crunch: Baking at a high temperature like 400°F ensures that hot air quickly reaches all surfaces of the chicken, rapidly toasting the breadcrumbs to a golden perfection. The wire rack is an unsung hero here; it lifts the chicken off the baking sheet, allowing steam to escape rather than getting trapped underneath. This ingenious combination promotes maximum crispness, giving you that desirable crunchy coating before the delicate chicken meat has a chance to dry out. It’s the secret to achieving that deep-fried texture in the oven!
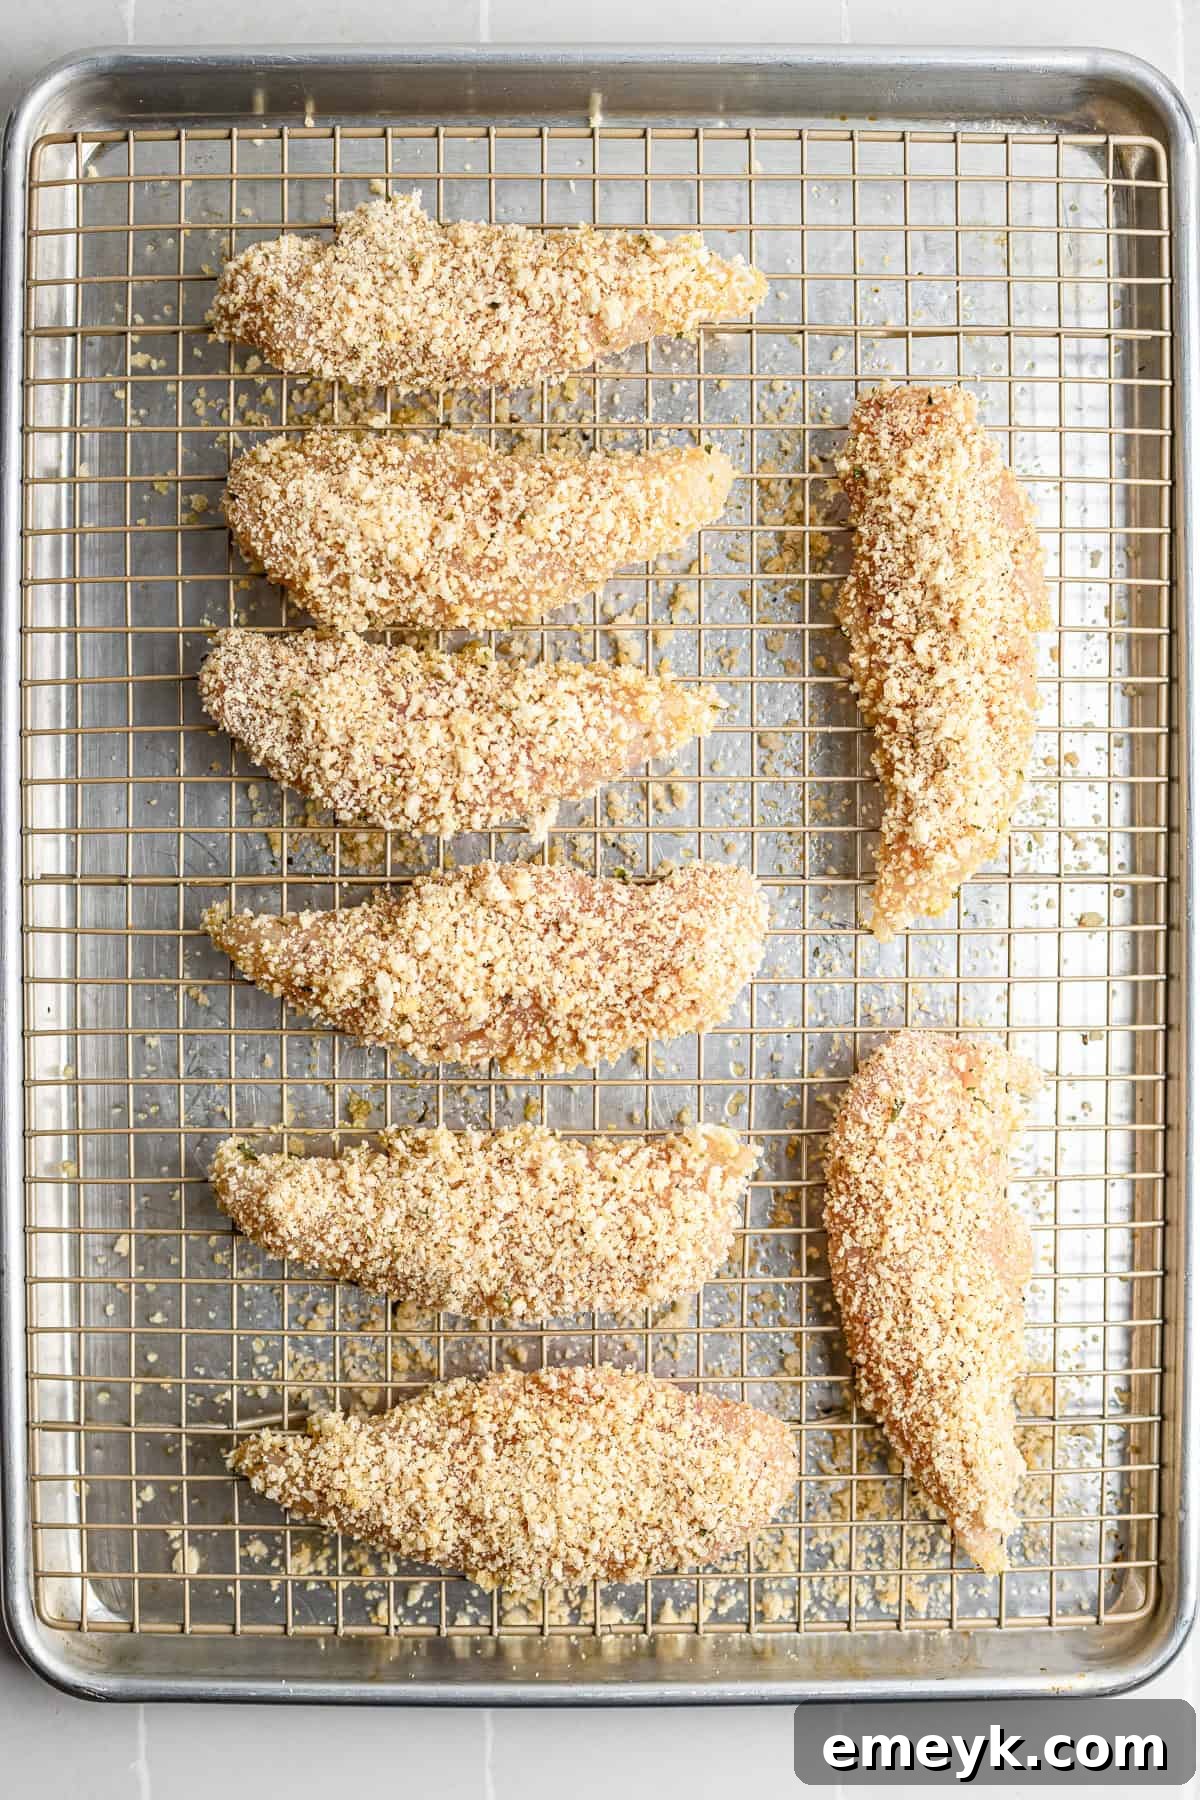
Step 3: Bake to Golden Perfection. Arrange the breaded chicken tenders on your prepared baking sheet with the wire rack, ensuring there’s ample space between each piece for even air circulation (avoid overcrowding!). Bake for a total of 25 minutes. At the halfway point (around 12-13 minutes), carefully flip each tender to encourage uniform browning and crisping on both sides. Continue baking until the chicken tenders are beautifully golden-brown and reach an internal temperature of 165°F (74°C) as measured by a meat thermometer. This ensures they are safely cooked through and perfectly juicy.
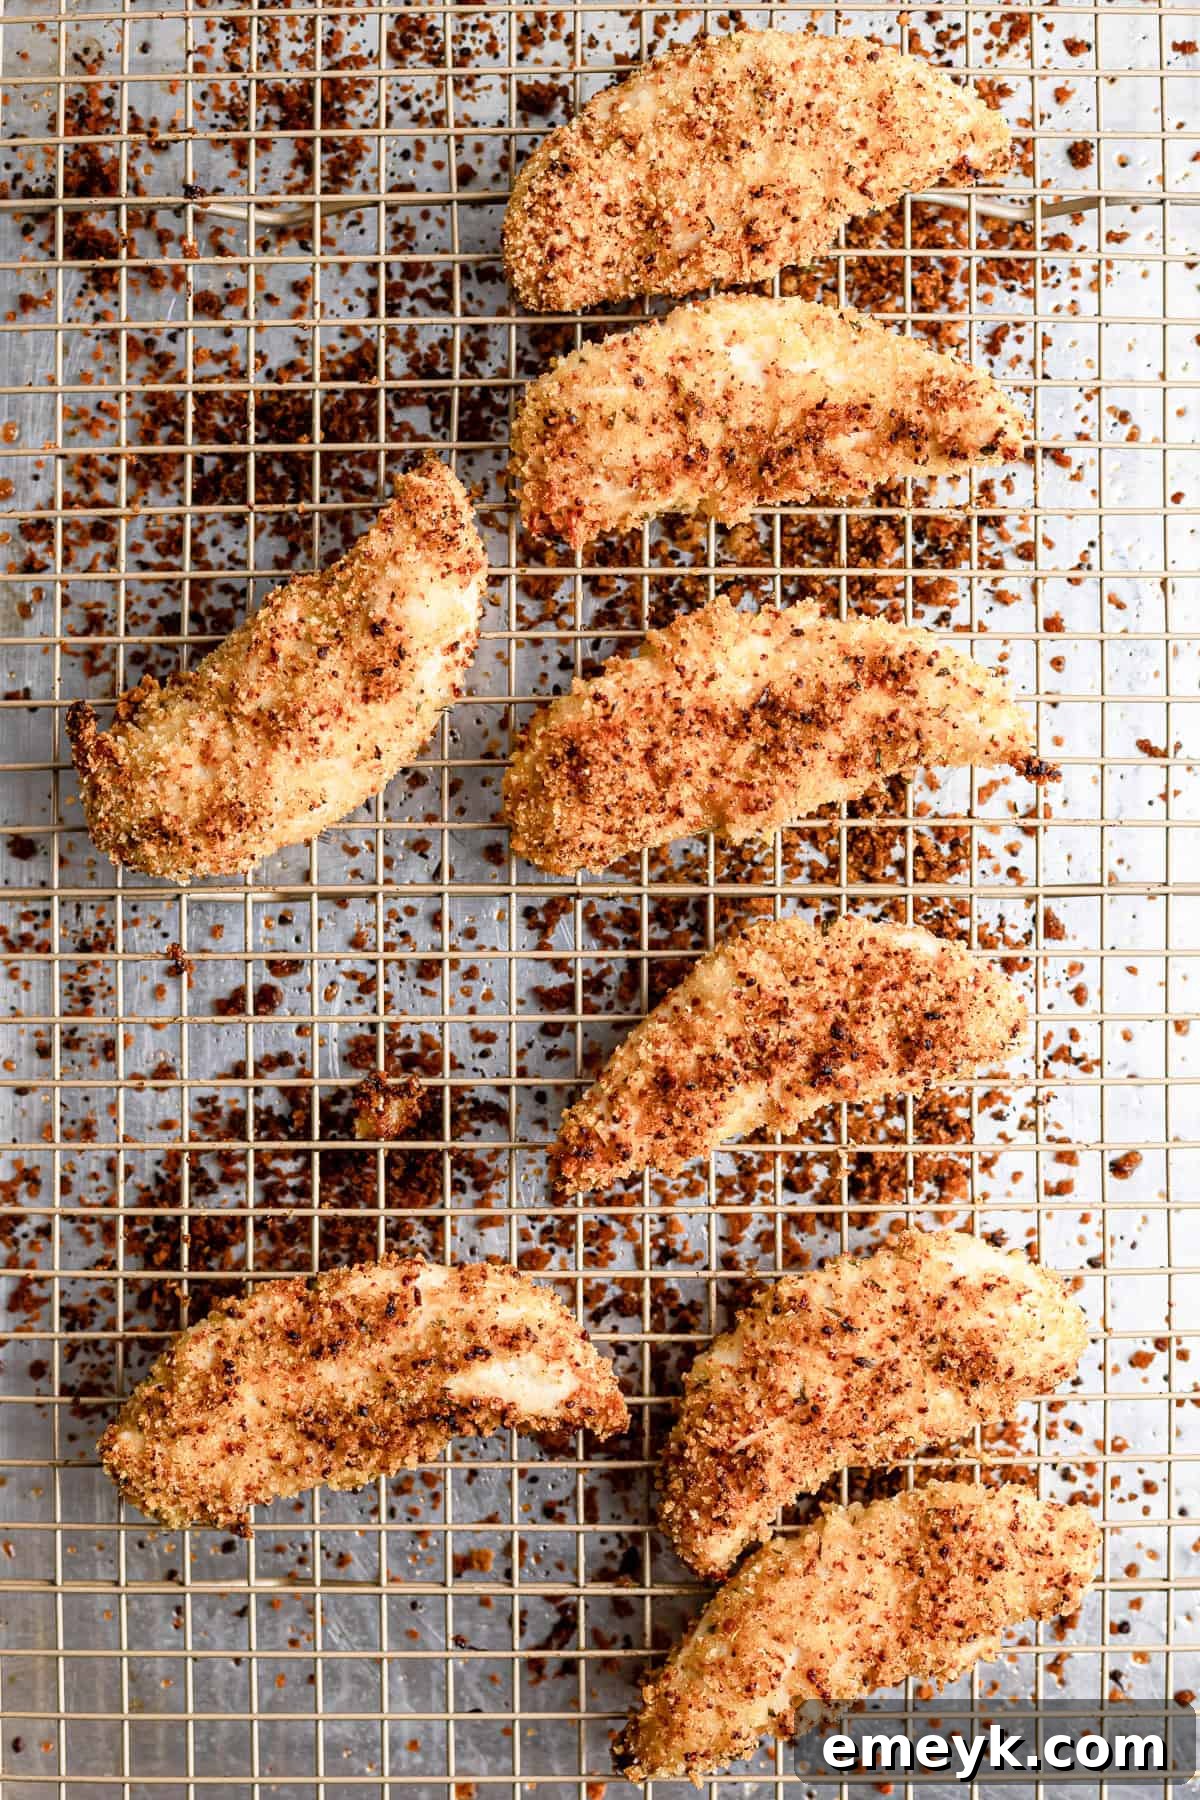
Step 4: Serve and Enjoy! Once baked, remove the crispy chicken tenders from the oven. For an extra touch of freshness and color, you can sprinkle them with a handful of freshly chopped parsley. Serve them immediately while warm, accompanied by your favorite dipping sauces (see our suggestions below for inspiration!). If you’re planning for meal prep, allow them to cool completely before storing them in an airtight container in the refrigerator for up to 5 days. These chicken tenders reheat beautifully, making them ideal for quick meals throughout the week.
Pro Tips for Perfectly Crispy Baked Chicken Tenders
While this recipe is incredibly straightforward, a few expert tips can elevate your crispy oven-baked chicken tenders from great to absolutely phenomenal. Pay attention to these details for the best possible results every time:
- Ensure Optimal Breading Adhesion: If you’ve ever struggled with breading falling off your chicken, the solution is simple yet effective:
- Pat Chicken Dry: Before you even think about dredging, thoroughly pat your chicken tenderloins dry with paper towels. Excess moisture is the enemy of a sticking crust.
- Chill Coated Tenders: For an extra layer of security, after coating, place the tenders on a plate and chill them in the refrigerator for 10–15 minutes. This brief chill time helps the breading ‘set’ and adhere more firmly to the chicken, preventing it from flaking off during baking and ensuring maximum crispness.
- Alternative Binders for Dietary Needs: Looking for an oil-free or egg-free option to help the breadcrumbs adhere?
- Greek Yogurt: A thin layer of plain Greek yogurt can act as an excellent binder, adding a touch of tang and moisture.
- Mayonnaise: A light coating of mayonnaise works wonders, not only helping the breadcrumbs stick but also contributing to a richer flavor and browning.
- Mustard: Some recipes use a thin layer of Dijon or honey mustard for flavor and adhesion.
- Always Use a Wire Rack: This isn’t an optional step for truly crispy tenders. Baking on a wire rack, elevated above your baking sheet, is critical. It allows hot air to circulate completely around each chicken piece, ensuring that the bottoms get just as crispy as the tops. Without it, the bottom of your tenders might steam and become soggy.
- Light Olive Oil Spritz: For an enhanced golden color and an extra layer of crunch, lightly spritz the coated chicken tenders with olive oil or avocado oil spray *before* they go into the oven. This helps the breadcrumbs crisp up beautifully and brown evenly.
- Don’t Overcrowd the Pan: Give your chicken tenders plenty of room to breathe! Arranging them in a single layer with space between each piece on the baking sheet is essential for proper air circulation. Overcrowding traps steam, which will prevent the breading from crisping up and instead lead to a softer, less desirable texture.
- Monitor Internal Temperature: Always use a meat thermometer to check that your chicken reaches a safe internal temperature of 165°F (74°C). This ensures both food safety and that your chicken remains perfectly juicy, avoiding overcooking.
Want even more crunch? Explore the advanced tricks below for making these extra crispy!
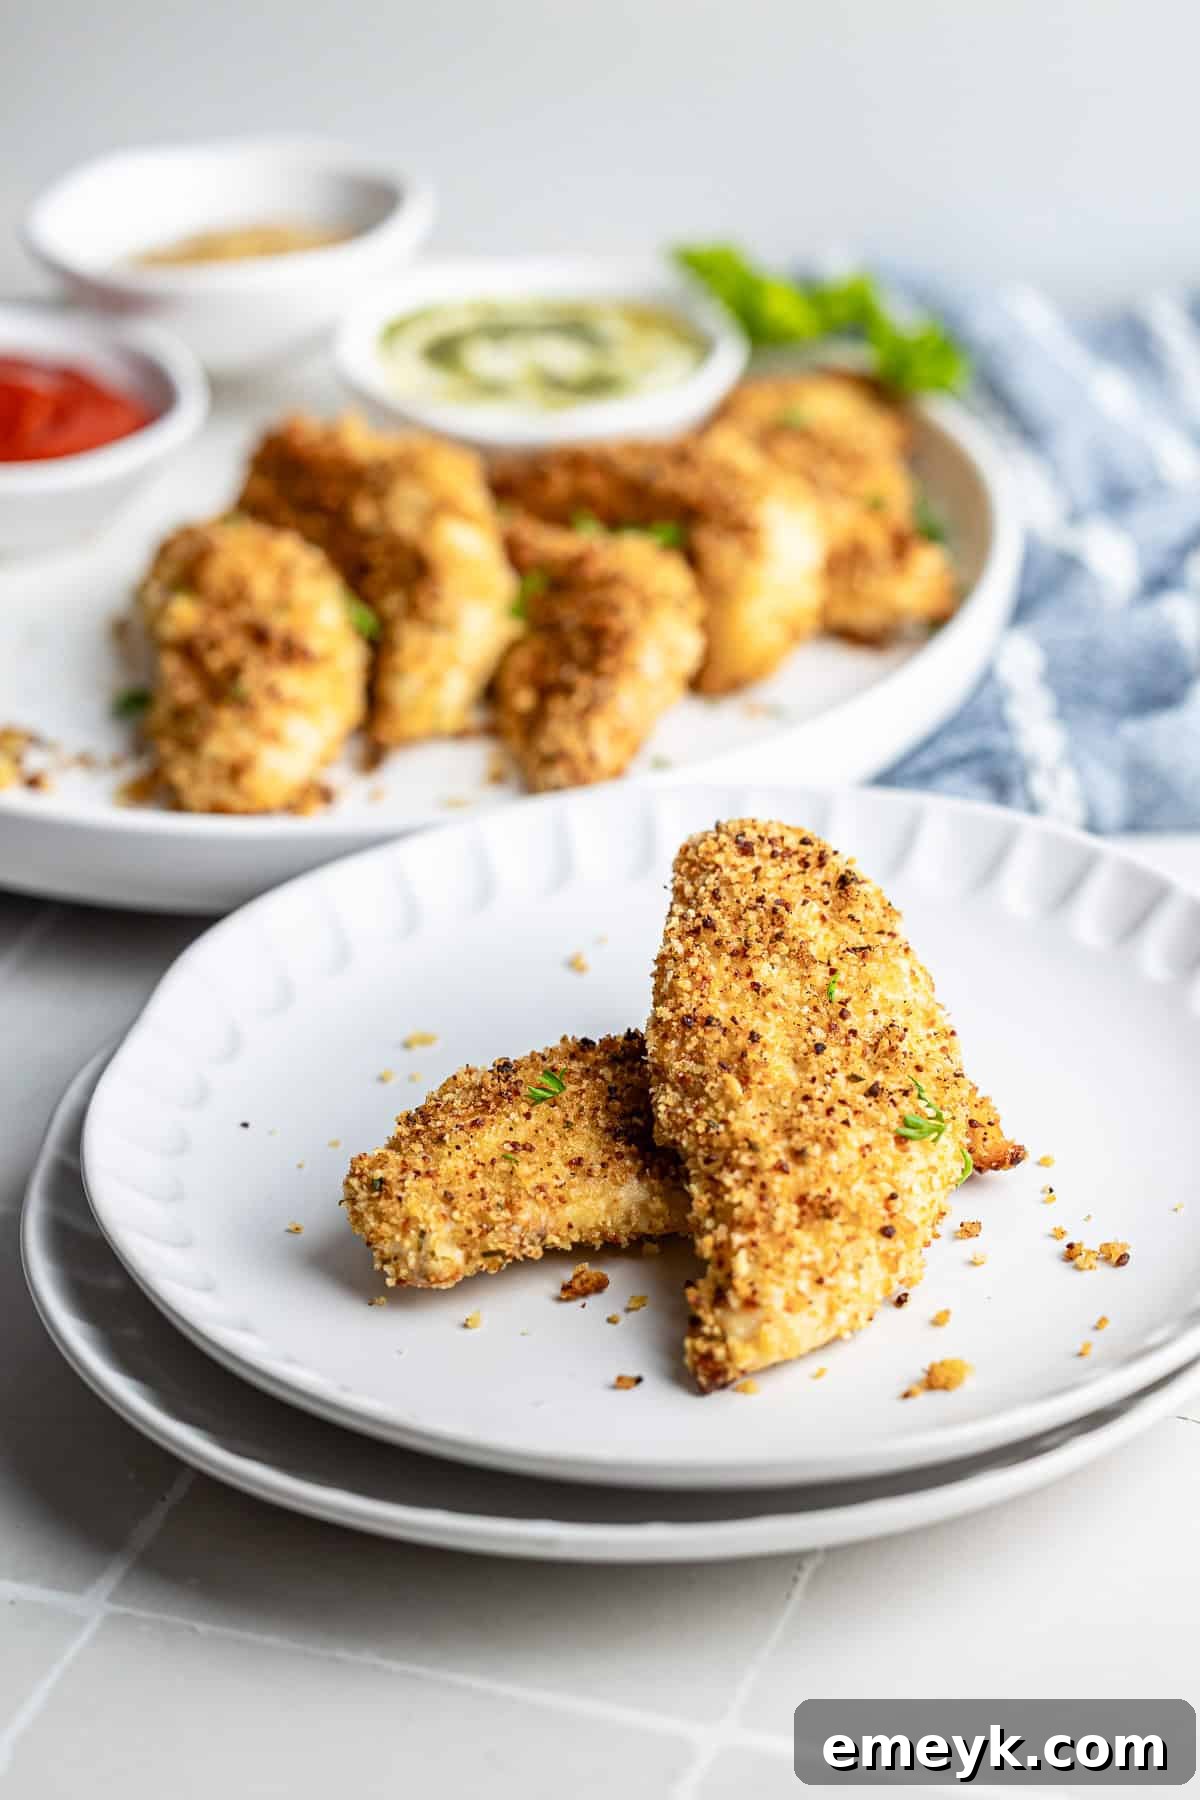
Mastering the Extra Crispy Baked Chicken Tender
If you’re chasing that ultimate, restaurant-quality crunch for your oven-baked chicken tenders, these reader-favorite and kitchen-tested tricks will guide you to achieve an undeniably golden and crunchy finish. Say goodbye to soft breading and hello to maximum crispiness!
- Strategic Oil Spraying: For the best browning and crisp, lightly spritz your breaded tenders with olive oil or avocado oil spray before they enter the oven. This initial coat helps the crumbs toast evenly and turn golden. Spraying after baking often just adds fat without enhancing crispness.
- The Indispensable Wire Rack: As mentioned, a wire rack is your best friend for oven-fried textures. It promotes crucial air circulation, preventing soggy bottoms by allowing steam to escape. If you absolutely don’t have one, bake directly on parchment-lined baking sheet and commit to flipping the tenders more frequently to ensure even cooking and crisping.
- A Quick Broil for Golden Finish: For that final touch of deep golden brown and extra crispness, consider broiling your chicken tenders during the last 2–3 minutes of cooking. Watch them *very* closely—broilers can burn food quickly—until they reach your desired level of crisp and color.
- Pre-Toast Your Panko: Take crispiness up a notch by pre-toasting your panko breadcrumbs. Simply spread them in a dry skillet over medium heat or on a baking sheet in a 400°F (200°C) oven for 3–5 minutes until light golden. Let them cool before coating the chicken. This deepens their flavor and accelerates the crisping process in the oven.
- Avoid Overcrowding the Pan: This rule is paramount. When chicken tenders are too close together, they release steam, which gets trapped and softens the breading instead of allowing it to crisp. Ensure each tender has ample space for air to circulate freely. Bake in batches if necessary.
- Creative Coating Swaps: Beyond traditional panko, experiment with alternative crunchy coatings. Crushed cornflakes provide a classic “fried chicken” texture, while crushed pretzels offer a salty, savory twist. Crushed Ritz crackers add a buttery richness and exceptional crunch. These swaps can introduce new flavors and textures to your homemade chicken tenders.
- The “Mid-Bake Sprinkle” Trick: Here’s a brilliant tip from a seasoned reader: reserve a few tablespoons of your dry breadcrumb mixture. After you flip the chicken tenders halfway through baking, sprinkle this reserved mixture over the tops. This adds a fresh layer of breading that gets toasted during the remaining cook time, contributing to an additional layer of crunch and texture.
These simple yet effective tweaks are entirely optional, but if you’re truly aiming for that next-level extra-crispy, golden finish, they are guaranteed to get you there. Enjoy your perfectly crunchy homemade chicken tenders!
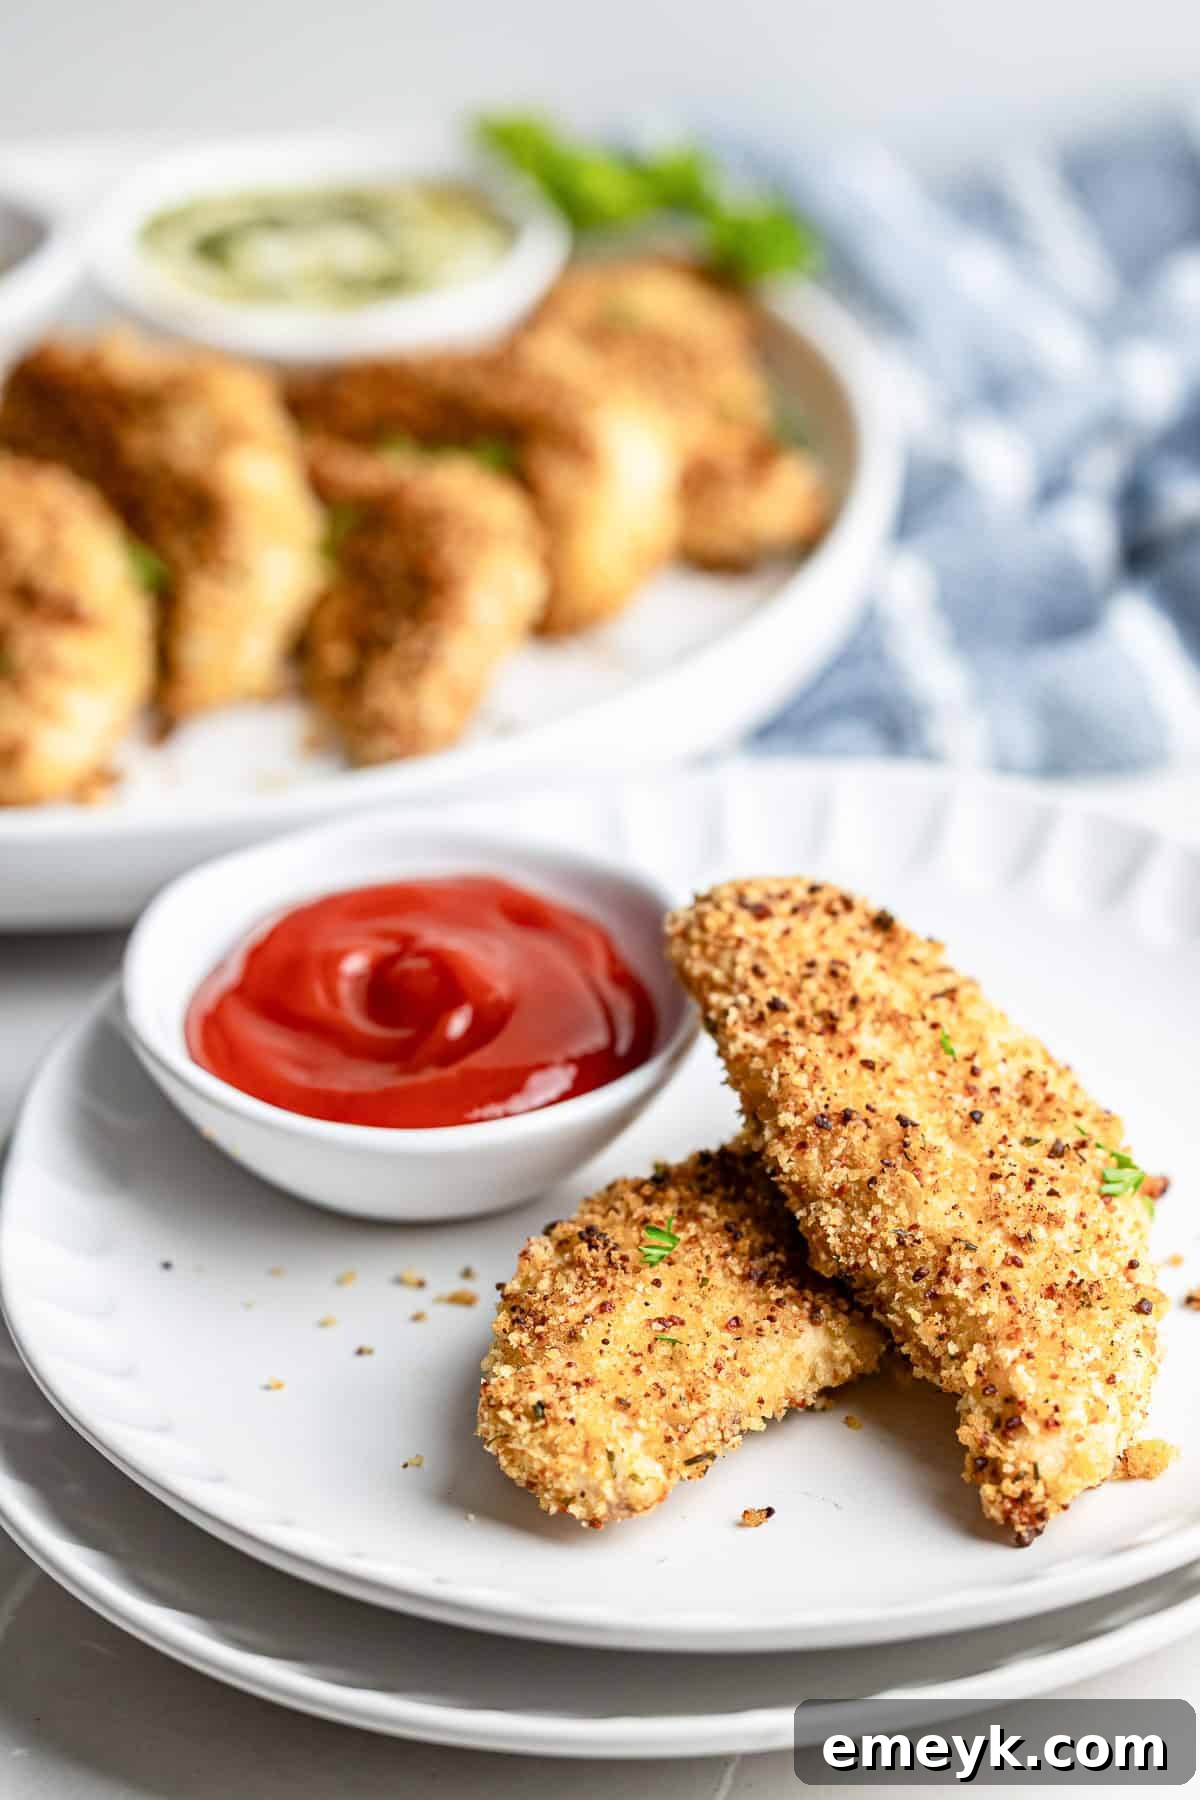
Irresistible Dipping Sauces for Your Chicken Tenders
No plate of perfectly crispy chicken tenders is complete without a selection of delicious dipping sauces! These sauces add an extra layer of flavor and fun, making every bite an experience. Here are some of our top recommendations:
- Classic Honey Mustard Sauce – A timeless pairing, offering the perfect balance of sweet and tangy flavors. Homemade versions are often the best!
- Tangy BBQ Sauce – For a smoky and robust kick, a good quality BBQ sauce is always a crowd-pleaser and a classic choice for chicken fingers.
- Cool & Creamy Ranch Dressing – A staple for many, offering a refreshing and herbaceous contrast to the warm, crispy chicken.
- Zesty Creamy Dill Sauce – This herbaceous and fresh sauce adds a vibrant, bright flavor that complements the chicken beautifully.
- Garlicky Tahini Yogurt Dressing – For a Mediterranean-inspired twist, this creamy, garlic-infused yogurt and tahini dip offers a unique and savory profile.
- Spicy Mayo – A simple mix of mayonnaise and sriracha (or your favorite hot sauce) for those who enjoy a little heat.
- Sweet Chili Sauce – Offers a delightful sweet and spicy kick, often found in Asian cuisine.
- Ketchup – Never underestimate the power of a simple, comforting ketchup dip, especially for kids!
Creative Ways to Serve Parmesan Panko Chicken Tenders
Beyond simply dipping, these versatile Parmesan panko chicken tenders can be incorporated into a wide array of meals, elevating everything from salads to sandwiches. Their crispy texture and savory flavor make them an excellent protein component for countless dishes. Get creative with these serving suggestions:
- In Wraps or Sandwiches: Slice the tenders and tuck them into warm tortillas, pita bread, or sandwich buns with crisp lettuce, fresh tomatoes, a swipe of mayonnaise, or any of your favorite sandwich fillings.
- Protein-Packed Salads: Chop the crispy chicken tenders and scatter them over a fresh green salad, like this vibrant Lemon Arugula Salad, for an instant and satisfying protein boost. They’re excellent in Caesar salads or any mixed green salad.
- Tacos or Burritos: Cube the cooked tenders and use them as a flavorful filling for soft tacos or hearty burritos, adding your favorite salsa, cheese, and fresh toppings.
- Pasta Power-Up: Toss sliced tenders with your favorite pasta and a medley of quick-cooked vegetables for a comforting and complete meal. A light tomato sauce or a creamy Alfredo would be delightful.
- Grain Bowls: Arrange them over a bed of quinoa, rice, or farro, alongside roasted vegetables and a drizzle of a flavorful dressing for a wholesome and balanced grain bowl.
- Lettuce Wraps: Create a lighter option by serving the sliced tenders in crisp lettuce cups with a drizzle of hot honey or a peanut sauce for a delicious, low-carb meal.
- Kid-Friendly Bento Boxes: Pack cooled, sliced tenders in school lunchboxes alongside fruit, veggies, and a small container of dipping sauce for a healthy and exciting meal.
- Appetizer Platter: Serve them whole or cut into bite-sized pieces on a platter with a variety of dipping sauces for a fantastic party appetizer.
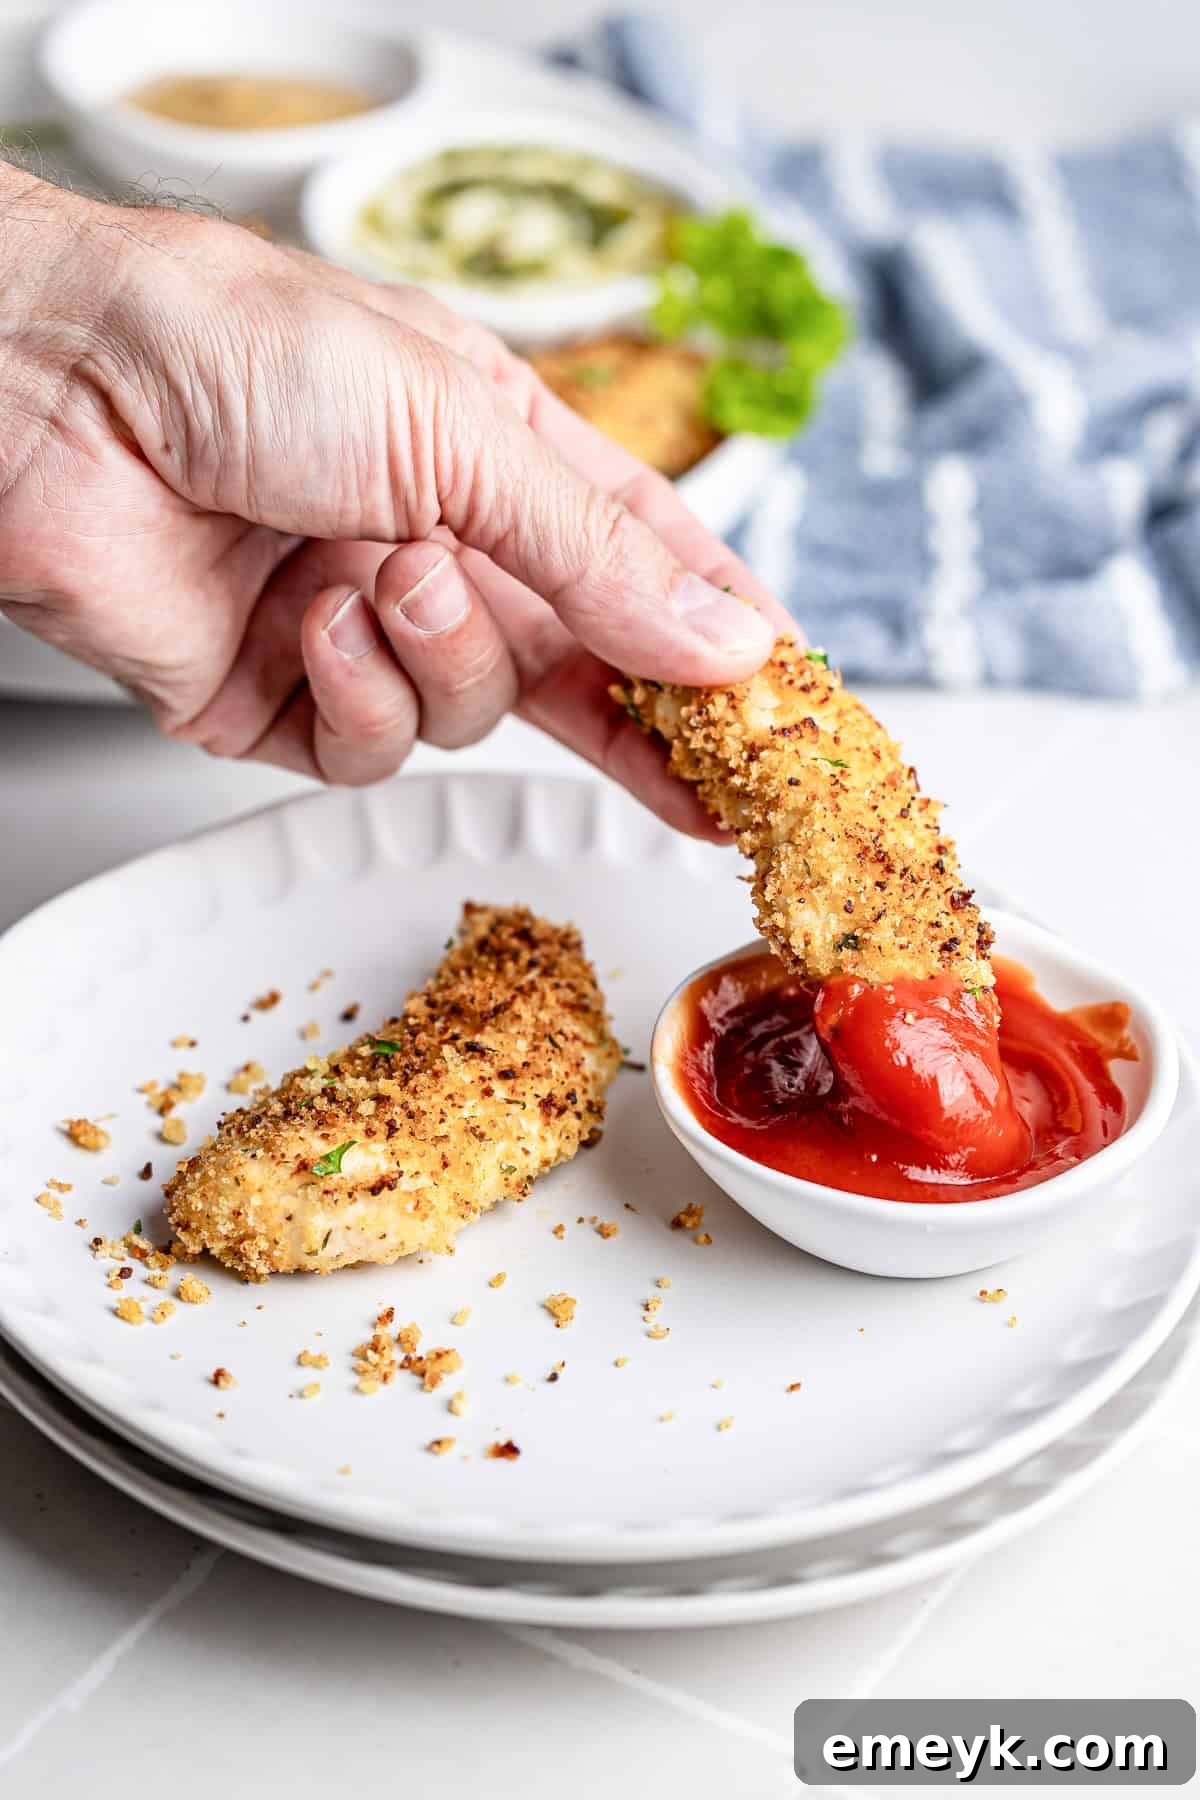
Make-Ahead & Meal Prep Tips for Baked Chicken Tenders
These crispy baked chicken tenders are not only ideal for immediate enjoyment but also perfect for meal prepping throughout the week or feeding a crowd at parties. Their versatility and freezer-friendly nature make them a true kitchen staple.
- For Parties and Entertaining:
- Serve them as sliders by placing mini chicken tenders on small buns with various sauces, or create an interactive chicken tender bar with multiple dipping options and fresh toppings for easy customization.
- You can bake them earlier in the day and reheat them just before serving. For best results, reheat in the oven or an air fryer at 300°F (150°C) until warmed through and re-crisped.
- To restore maximum crispiness when reheating, lightly spray the tenders with olive oil or avocado oil before popping them back into the oven or air fryer.
- Meal Prep for the Week:
- Storage: Store any leftover cooked chicken tenders in an airtight container in the refrigerator for up to 5 days. Avoid microwaving them for reheating, as this tends to soften the crispy coating.
- Reheating Leftovers: The best way to reheat cooked tenders to maintain their crispness is in the oven or air fryer. Preheat to 375°F (190°C) and bake or air fry for 5-10 minutes, or until thoroughly heated and re-crisped.
- Freezing for Future Meals (Cooked):
- Allow the cooked chicken tenders to cool completely to room temperature.
- For best quality, wrap each tender individually in aluminum foil or plastic wrap, then transfer them to a freezer-safe bag or container. This prevents freezer burn and makes it easy to grab just a few at a time.
- Freeze for up to 3 months.
- To reheat from frozen, bake or air fry at 375°F (190°C) for 15-20 minutes, or until crisp and heated through to an internal temperature of 165°F (74°C).
- Freezing Before Baking (Uncooked):
- After dredging the chicken tenders, arrange them in a single layer on a parchment-lined baking sheet.
- Place the entire tray in the freezer for about 2 hours, or until the tenders are solid. This flash-freezing prevents them from sticking together.
- Once frozen solid, transfer the uncooked, breaded tenders to a freezer-safe bag or container.
- Freeze for up to 3 months.
- To bake from frozen, preheat your oven to 375°F (190°C). Place the frozen tenders on a wire rack over a baking sheet and bake for 25–28 minutes, or until golden, crispy, and cooked to an internal temperature of 165°F (74°C). You may need to flip them once halfway through.
Frequently Asked Questions About Baked Chicken Tenders
The key to achieving crispy baked chicken tenders lies in a few crucial techniques: use panko breadcrumbs for their superior texture, bake them on a wire rack to allow air circulation and prevent sogginess, and give them a light spray of olive oil before baking to promote even browning. For even more advanced crisping techniques, refer to the ‘Extra Crispy Tricks’ section above in the post.
Absolutely! This recipe is easily adaptable for gluten-free diets. Simply substitute traditional panko breadcrumbs with your favorite brand of gluten-free panko breadcrumbs. Crushed gluten-free rice cereal can also be used for a similar crunch if you prefer.
These versatile chicken tenders are fantastic with a wide range of dipping sauces. Popular choices include classic honey mustard, tangy ranch, smoky BBQ sauce, and a fresh creamy dill sauce. For something different, consider spicy mayonnaise, a garlic yogurt-based tzatziki, or even a sweet chili sauce. Ketchup is always a kid-friendly favorite!
Yes, absolutely! The air fryer is a fantastic tool for making these chicken tenders even quicker and crispier. Prepare the chicken tenders as directed in the recipe up to the coating step. Then, arrange them in a single layer in your air fryer basket, ensuring not to overcrowd it. Cook at 400°F (200°C) for 10–12 minutes, flipping them halfway through, until they are golden brown and reach an internal temperature of 165°F (74°C). A light spray of olive oil on the tenders before air frying will help achieve maximum crispness.
While chicken tenderloins are ideal for their size and quick cooking, you can certainly use other cuts. Boneless, skinless chicken breasts can be sliced into 1-inch thick strips or cutlets. You could even use boneless, skinless chicken thighs for a richer flavor, though the cooking time might need to be adjusted slightly to account for thickness and fat content. Always ensure the internal temperature reaches 165°F.
This recipe is incredibly versatile! You can easily change the flavor profile by altering the spice blend. Try adding a pinch of Cajun seasoning for a spicy kick, Italian seasoning for a Mediterranean flair, onion powder for deeper savoriness, or even a touch of curry powder for an exotic twist. Experiment with different cheeses in the breading, such as finely shredded mozzarella or Gruyere, for new dimensions of taste.
These oven-baked chicken tenderloins represent a healthier, yet equally satisfying, version of a beloved comfort food. They are consistently a hit and rarely fail to please, even the most discerning palates. I encourage you to try them tonight and experience the crispy, juicy perfection for yourself! Don’t forget to share your experience by leaving a review or commenting on how you served them. If you loved this recipe, you might also enjoy my Crispy Coconut Chicken Tenders for another exciting flavor adventure.
More Delicious Chicken Recipes to Explore
Chicken
Pretzel Crusted Chicken Recipe
Chicken
Crispy Air Fryer Chicken Legs
Chicken
Sheet Pan Lemon Parmesan Chicken Tenders
Chicken
Easy Chicken Parmesan Sliders
Tried this recipe? Leave a star rating and comment below! Subscribe to my newsletter or follow me on
Facebook,
Instagram, or
Pinterest for the latest recipes and cooking inspiration.
Easy Baked Chicken Tenders (Extra Crispy!)
Julia Jolliff

Print Recipe
10 minutes
25 minutes
35 minutes
4
Video
Ingredients
- 1 1/3 cup panko breadcrumbs , {or you can use regular breadcrumbs}
- 1/4 cup grated Parmesan cheese, {or use mozzarella cheese}
- 1/2 teaspoon garlic powder
- 1/4 teaspoon thyme
- 1/4 teaspoon dried parsley
- 1/4 teaspoon paprika
- 1/2 teaspoon salt
- 1/8 teaspoon pepper
- 1 1/2 pounds chicken tenderloins
- 1/4 cup extra virgin olive oil, or you can use egg or avocado oil
Instructions
-
Preheat oven to 400°F (200°C). Spray a baking sheet with nonstick cooking spray or, for extra-crispy results, place a wire rack on top of the baking sheet.
-
In a shallow bowl, combine the panko breadcrumbs, Parmesan cheese, garlic powder, thyme, parsley, paprika, salt, and pepper. Stir until well combined. Set aside.
-
Pour the 1/4 cup olive oil into another shallow bowl and set aside. Alternatively, beat one large egg in this bowl if using egg as your binder.
-
Optional: Pat the chicken tenderloins thoroughly dry with paper towels before dredging. For best breading adhesion, after coating, let the tenders chill in the fridge for 10–15 minutes before baking.
-
Dredge each chicken tender first in the olive oil or egg mixture, then coat it completely in the panko breadcrumb mixture, pressing gently to ensure both sides are well-covered. Place the coated tenders on the prepared baking sheet or wire rack, ensuring they are in a single layer with space between them.
-
Bake for 25 minutes, flipping the tenders halfway through cooking (around 12-13 minutes). Continue baking until the chicken is golden brown and reaches an internal temperature of 165°F (74°C) as measured by a meat thermometer.
-
Sprinkle with fresh parsley, if desired, and serve warm immediately with your favorite dipping sauces such as honey mustard, ketchup, or ranch dressing.
Notes
- Use a wire rack: This allows air to circulate around the chicken and prevents the bottoms from becoming soggy, ensuring maximum crispiness.
- Olive oil spray: Lightly spritz the tenders with olive oil or avocado oil spray before baking for added crispness and an even golden-brown color.
- Let the breading set: If time allows, chill the coated tenders in the refrigerator for 10–15 minutes before baking. This helps the coating adhere better during cooking.
- Storage: Store leftover cooked chicken tenders in an airtight container in the refrigerator for up to 5 days. To reheat leftovers, bake or air fry at 375°F (190°C) until warmed through and re-crisped. Avoid microwaving, as it tends to soften the crunchy coating.
- To freeze after baking: Cool the cooked tenders completely. For best results, wrap them individually in foil or plastic wrap, then store them in a single layer in a freezer-safe container or bag. Reheat from frozen in the oven or air fryer at 375°F (190°C) until crisp and heated through (approx. 15-20 minutes).
- To freeze before baking: Line a tray with parchment paper and place the dredged but uncooked tenders on it in a single layer. Freeze for 2 hours, then transfer to a freezer-safe bag or container. Bake from frozen at 375°F (190°C) for 25–28 minutes, or until the internal temperature reaches 165°F (74°C).
Nutrition Information (per serving, estimated)
Carbohydrates: 16g,
Protein: 41g,
Fat: 21g,
Saturated Fat: 4g,
Polyunsaturated Fat: 3g,
Monounsaturated Fat: 12g,
Trans Fat: 0.02g,
Cholesterol: 114mg,
Sodium: 744mg,
Potassium: 689mg,
Fiber: 1g,
Sugar: 1g,
Vitamin A: 173IU,
Vitamin C: 2mg,
Calcium: 102mg,
Iron: 2mg
Nutrition information is automatically calculated and should only be used as an approximation.
Tried this recipe?
Mention @acedarspoon or tag #acedarspoon!