
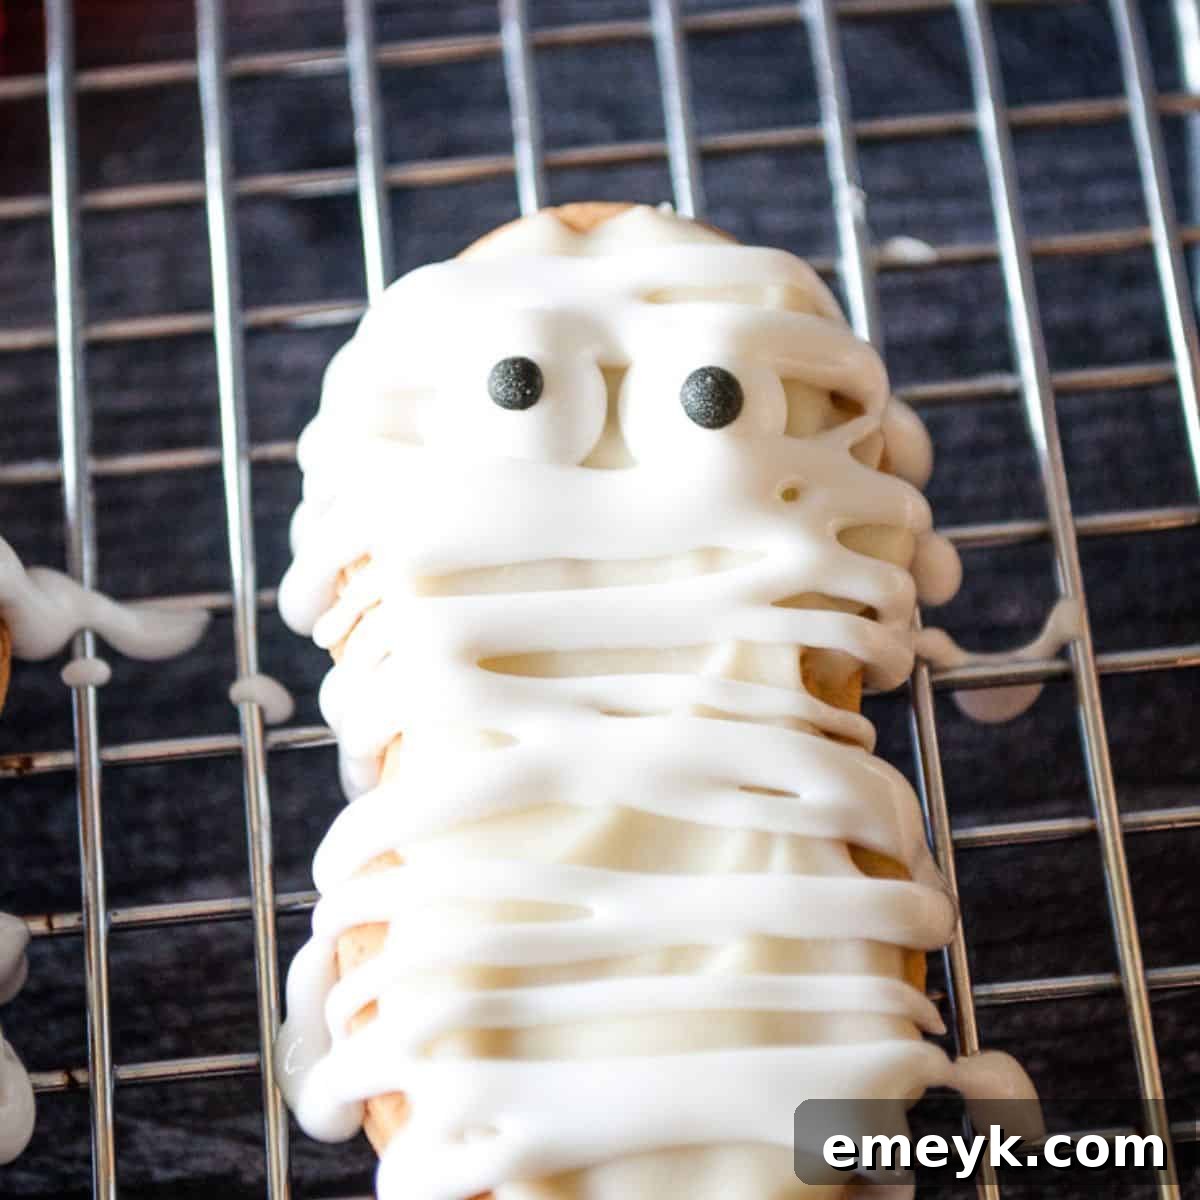
Easy Mummy Cookies: A Spooktacular No-Bake Halloween Delight
Get ready to wrap up some fun this Halloween season with our incredibly easy and absolutely adorable Mummy Cookies! These charming treats are the perfect way to celebrate the spooky holiday, whether you’re hosting a ghoulish gathering, preparing for trick-or-treaters, or simply looking for a delightful activity to do with the kids. Using readily available ingredients like Nutter Butter cookies, creamy white chocolate, and vibrant candy eyes, you can whip up a batch of these festive goodies in no time. They are truly the cutest Halloween cookies around!
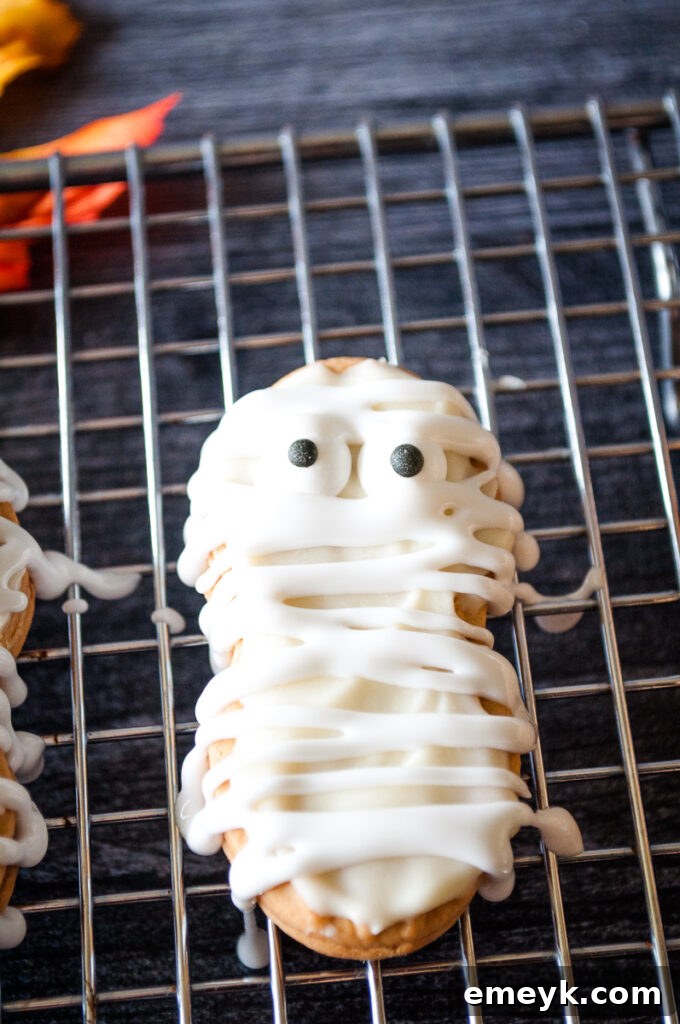
Halloween is a time for magic, costumes, and, of course, delicious treats! While trick-or-treating traditions may vary from city to city, one thing remains constant: the joy of celebrating with our loved ones. And what better way to infuse some festive spirit into your home than with a batch of homemade, yet wonderfully simple, Halloween cookies? This Mummy Cookie recipe is designed to be stress-free, engaging for all ages, and guaranteed to bring smiles.
Imagine the delight on your children’s faces as they help transform ordinary peanut butter sandwich cookies into eerie-sistibly cute mummies. This easy Halloween cookie decorating activity takes minimal effort, requiring only about 15 to 20 minutes from start to finish, depending on how many ghostly guests you’re preparing for. It’s the ideal project for an autumn afternoon, setting a wonderfully spooky mood as fall descends. Everyone loves a fun Halloween cookie, and these truly hit the mark for both charm and simplicity.
You only need a few basic ingredients to create these delightful cookies, making them a fantastic last-minute option or a staple for your annual Halloween baking. Just grab some Nutter Butter cookies, white chocolate chips, white cookie frosting, and a handful of candy eyes. That’s it! The beauty of this recipe lies in its straightforward nature, proving that you don’t need complex baking skills to create impressive holiday treats. These spooky-sweet creations would also make a fantastic addition to Halloween treat bags for school parties or neighborhood friends.
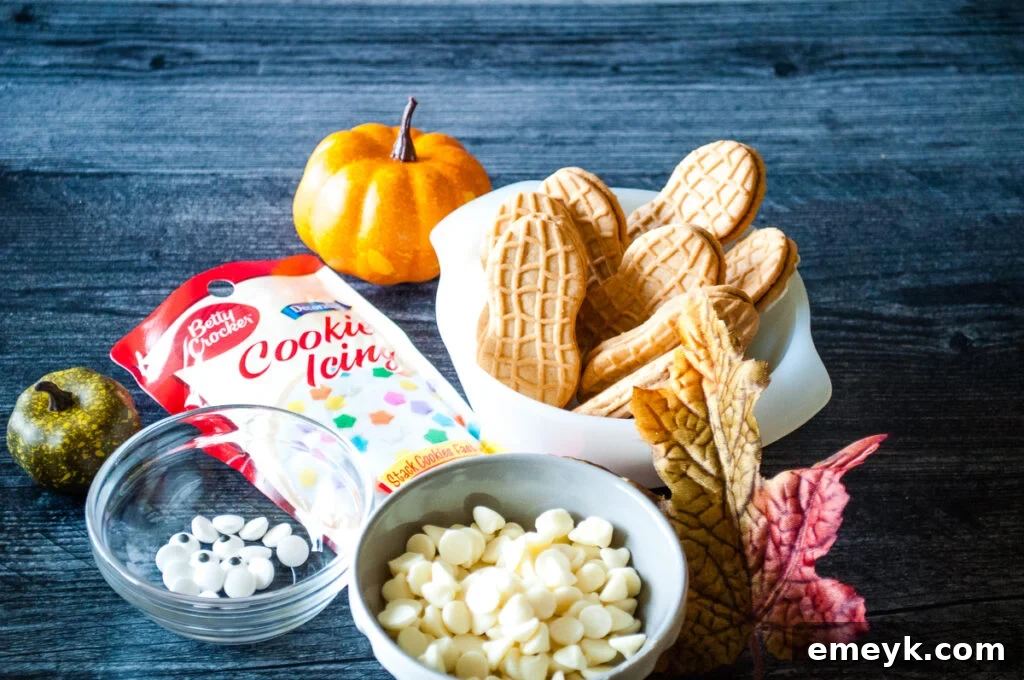
Essential Ingredients for Your Mummy Cookies
Crafting these adorable Mummy Cookies requires just a handful of straightforward ingredients. We’ll explore each one, offering tips and potential substitutions to ensure your Halloween baking adventure is smooth and successful.
- White Chocolate Chips: These are crucial for creating the melted “wrap” that forms the mummy’s base. You can use standard white chocolate chips, white melting wafers, or even a good quality white chocolate bar chopped into pieces. Melting wafers tend to melt more smoothly and harden faster, but chips work perfectly well.
- Nutter Butter Cookies: The star of our show! The iconic oval shape of Nutter Butter cookies perfectly mimics a mummy’s body, and their delightful peanut butter flavor pairs wonderfully with the sweet white chocolate. For those with nut allergies, plain rectangular shortbread cookies or even vanilla wafers can be used as alternatives, though the shape will be slightly different.
- Candy Eyes: These small, edible decorations bring your mummies to life! Look for them in the baking aisle of most grocery stores or craft stores. If you can’t find candy eyes, you can improvise by using small chocolate chips or even drawing eyes with edible black food marker gel once the white frosting has set.
- White Cookie Frosting: This is what gives your mummies their characteristic bandaged look. A pre-made tube of white cookie frosting (like Betty Crocker’s) with a fine tip is ideal for easy drizzling. You can also use canned vanilla frosting, thinned slightly with a tiny bit of milk or water if needed, and piped from a Ziploc bag with a snipped corner.
Recommended Equipment:
- Microwave-safe Bowl: For melting chocolate quickly.
- Spatula or Spoon: For stirring chocolate and dipping cookies.
- Parchment Paper or Wax Paper: To line your baking sheet and prevent sticking.
- Baking Sheet: To hold your cookies during preparation and cooling.
- Cooling Rack: Essential for allowing chocolate and frosting to set properly with air circulation.
- Piping Bag or Ziploc Bag: For neat and precise frosting application.
- Scissors: For snipping the tip of your frosting bag.
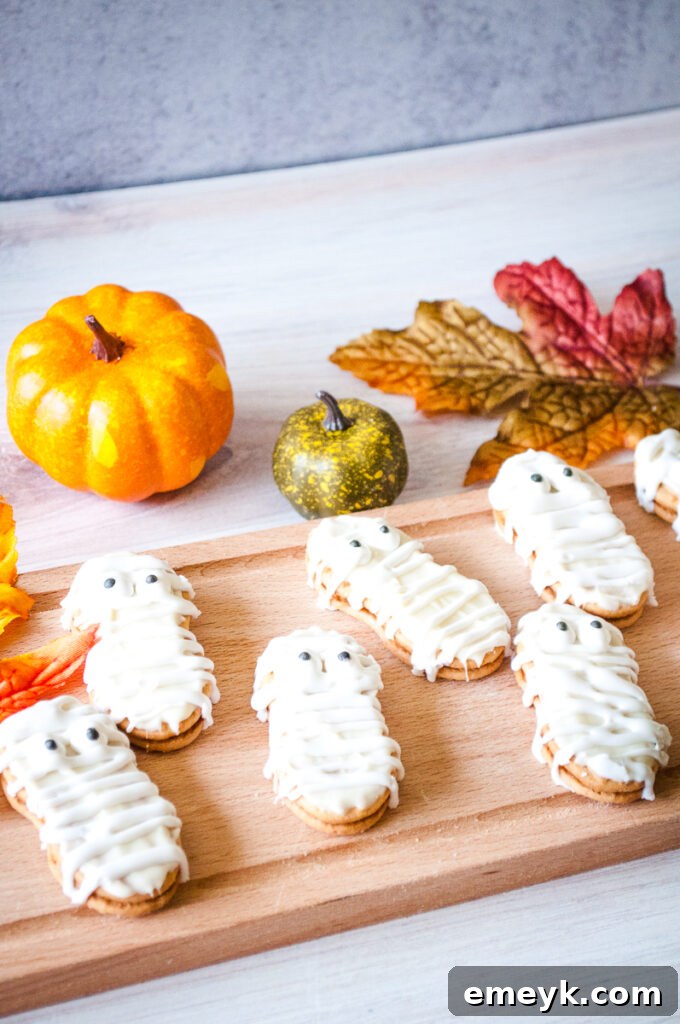
Crafting Your Spooky Treats: A Step-by-Step Guide to Making Mummy Cookies
Making these Mummy Cookies is an incredibly fun and straightforward process, perfect for beginner bakers and little helpers. Follow these simple steps to bring your delicious mummies to life!
Step 1: Perfectly Melt the White Chocolate
Your first step is to achieve smooth, dippable white chocolate. You have two excellent options:
- Microwave Method: Place your white chocolate chips in a microwave-safe bowl. Microwave on high for 15-20 seconds. Remove and stir thoroughly. White chocolate holds its shape even when melted, so stirring is key to checking its consistency. Continue microwaving in 10-15 second intervals, stirring well after each, until the chocolate is smooth and fluid. Be careful not to overheat, as white chocolate can seize and become grainy if microwaved for too long or at too high a power.
- Double Boiler Method: For a more controlled melt, set a heatproof bowl over a saucepan of simmering water, ensuring the bottom of the bowl does not touch the water. Add your white chocolate chips to the bowl. Stir constantly until the chocolate is fully melted and smooth. This method provides a gentle, even heat, reducing the risk of scorching.
Once melted, set the chocolate aside briefly. It should be warm enough to be liquid but not so hot that it’s difficult to handle.
Step 2: Dip and Decorate with Eyes
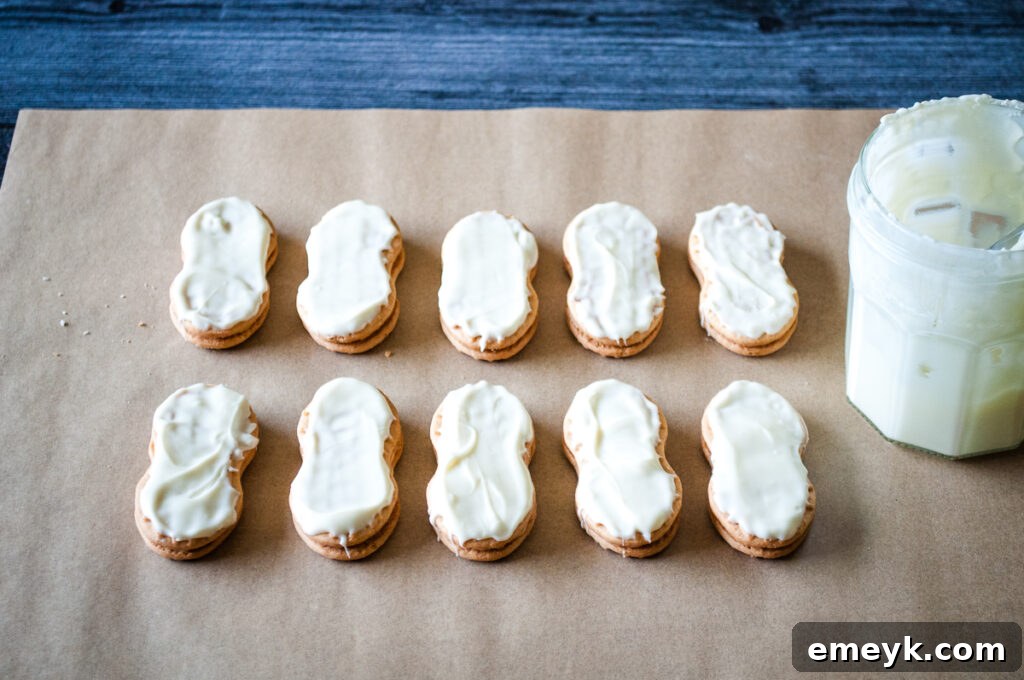
Now for the fun part! Line a baking sheet with parchment paper or wax paper. Carefully take each Nutter Butter cookie and dip one side (the “top”) into the melted white chocolate. Ensure it’s evenly coated. You can also use a small offset spatula or knife to spread the melted chocolate smoothly over the top surface of each cookie if you prefer more control or a thinner layer.
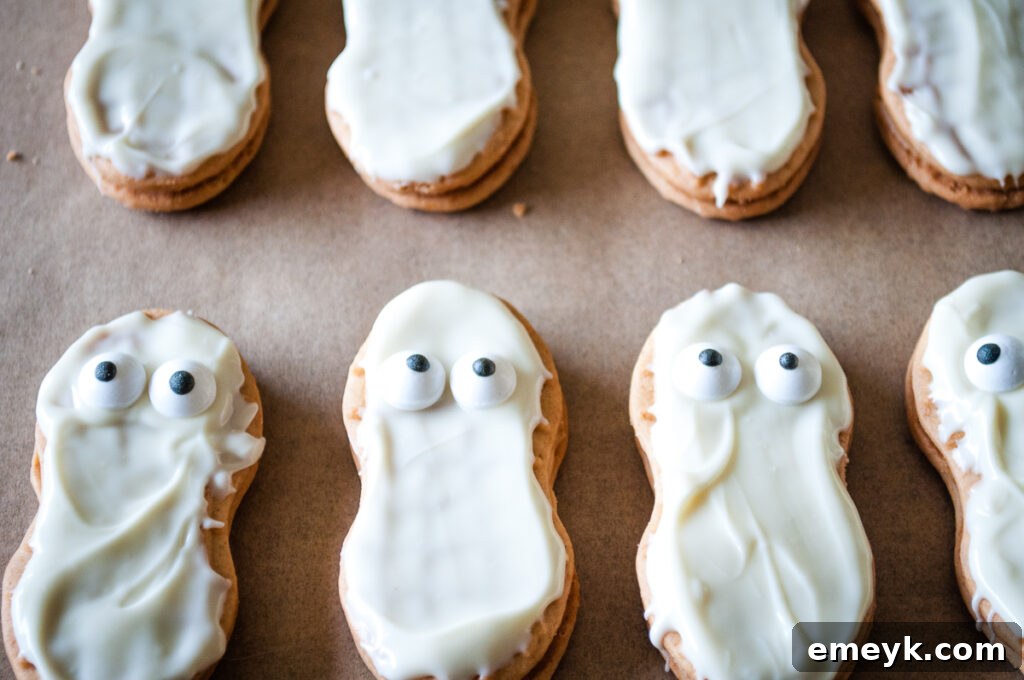
Immediately after dipping or spreading the chocolate, while it’s still wet and warm, gently place two candy eyes onto the upper portion of each cookie. Press them down just enough so they adhere firmly. The warm chocolate acts as glue, ensuring the eyes stay in place as the cookie cools. Transfer the dipped and eyed cookies to your prepared baking sheet.
Set the cookies aside to cool and allow the white chocolate to firm up completely. Depending on your room temperature, this might take 10-20 minutes, or you can speed up the process by placing the baking sheet in the refrigerator for about 5-10 minutes.
Step 3: Create the Mummy Bandages
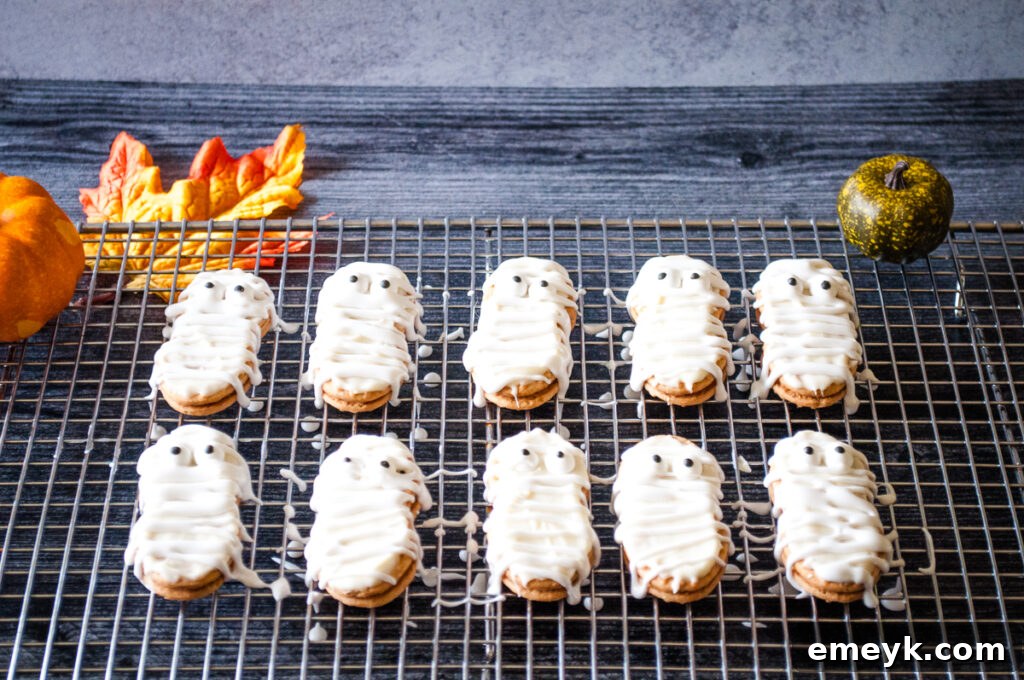
Once the white chocolate base is fully set, carefully transfer the cookies to a cooling rack. While they continue to cool (if needed), prepare your white cookie frosting. If using a pre-made tube, simply snip off the tip according to package directions, aiming for a small opening to create fine lines. If using canned frosting, spoon it into a piping bag fitted with a small round tip, or into a sturdy Ziploc bag with a tiny corner snipped off.
Now, it’s time to create those iconic mummy bandages! Hold your frosting bag or tube above a cookie and gently drizzle the white frosting back and forth across its surface in a zig-zag pattern. Overlap the lines slightly to mimic the appearance of ragged mummy wrappings. Leave a small gap around the candy eyes to make them stand out. Continue this process for all your cookies, ensuring each one has its unique, spooky-sweet bandage design.
After frosting, allow the cookies to sit undisturbed for about 20 minutes for the frosting to set up. This will prevent smudging and ensure your mummies are ready for display and enjoyment. Once set, your charming Mummy Cookies are ready to be served and devoured!
Pro Tips for Perfect Mummy Cookies
- Don’t Overheat the Chocolate: White chocolate is sensitive. Melt it slowly and gently, especially in the microwave, to prevent it from seizing or burning.
- Work Efficiently with Eyes: Place the candy eyes immediately after dipping the cookie in chocolate, before it has a chance to set. This ensures they stick securely.
- Chill for Speed: If you’re in a hurry, a quick stint in the refrigerator (5-10 minutes) can dramatically speed up the setting time for both the chocolate and the frosting.
- Vary Your Frosting Lines: For a more authentic “mummy” look, vary the thickness and direction of your frosting lines. Some can be straight, others slightly diagonal, creating a more dynamic appearance.
- Get the Kids Involved: This is an excellent recipe for children. Let them help dip cookies, place the eyes, or even drizzle the frosting (with supervision, depending on age!).
Storage Tips for Your Mummy Cookies
To keep your delightful Mummy Cookies fresh and delicious, store them in an airtight container at room temperature. They will remain wonderfully edible for up to 5 days. If your kitchen is particularly warm, or if you prefer a firmer cookie, you can store them in the refrigerator, but allow them to come to room temperature for optimal enjoyment.
Frequently Asked Questions About Mummy Cookies
Here are some common questions to help you perfect your Mummy Cookies:
- Can I use a different type of cookie? Absolutely! While Nutter Butters are perfect due to their shape and peanut butter flavor, you can use other rectangular or oval cookies like shortbread, vanilla wafers, or even graham cracker halves for a different base. Just ensure they are sturdy enough for dipping.
- What if my white chocolate seizes? If your white chocolate becomes thick, lumpy, or grainy, it likely seized due to overheating or contact with water. Unfortunately, it’s hard to recover. To prevent this, melt slowly, stir constantly, and ensure your bowl is completely dry before adding chocolate.
- Can I make these ahead of time? Yes, these cookies are perfect for making in advance! You can prepare them 2-3 days before your event and store them in an airtight container at room temperature.
- Are these nut-free? No, because they use Nutter Butter cookies, which contain peanuts. If you need a nut-free option, substitute the Nutter Butter cookies with plain vanilla wafers or a nut-free shortbread cookie, and ensure all other ingredients (chocolate, frosting, candy eyes) are also certified nut-free.
- Can I use colored frosting? While white frosting creates the traditional mummy look, feel free to get creative! You could use light green for a zombie mummy or even orange for a Halloween twist.
More Festive Fall & Halloween Recipes to Enjoy
Looking for more delicious ways to celebrate the autumn season and Halloween? Explore some of our other favorite fall-inspired recipes that are perfect for cozy evenings and holiday gatherings. From hearty chili to more spooky treats, we’ve got you covered!
Turkey
Instant Pot Turkey Chili
Warm up with this flavorful and easy-to-make turkey chili, perfect for a crisp fall day.
Snack
Mummy Hot Dogs
Another fantastic Halloween-themed treat, these mummy hot dogs are a savory, fun twist on a classic.
Beef
Hearty Beef and Bean Chili
A robust and flavorful chili featuring beef, poblano peppers, and black beans – perfect for family dinners.
Chicken
Instant Pot White Chicken Chili
A lighter yet equally satisfying chili option, made quickly and easily in your Instant Pot.
Tried this recipe? Share your creations and leave a comment below! Subscribe to our newsletter or follow us on
Facebook,
Instagram, or
Pinterest for the latest recipes and updates.
Mummy Cookies
Ingredients
- ¾ cup white chocolate chips
- 10 Nutter Butter Cookies
- 20 Candy Eyes
- 1 container Betty Crocker Cookie Frosting in White (or similar)
Instructions
-
In a double boiler or a microwave-safe bowl, gently melt the white chocolate chips. If using a microwave, heat in 15-second increments, stirring well after each, until smooth. Avoid overheating.
-
Dip the top half of each Nutter Butter cookie into the melted chocolate, or use a knife to spread the chocolate evenly over the top surface.
-
While the chocolate is still warm and wet, carefully place two candy eyes onto each cookie. Set aside on parchment paper to cool and allow the chocolate to set completely.
-
Once the chocolate is set, transfer the cookies to a cooling rack.
-
Prepare your white cookie frosting. If using a tube, snip the tip to create a small opening. If using a piping bag, ensure it has a small round tip.
-
Drizzle the frosting back and forth across the cookies in a zig-zag pattern, creating the appearance of mummy bandages. Leave the candy eyes exposed.
-
Allow the frosting to set up for approximately 20 minutes before serving. Store in an airtight container.
Nutrition
Carbohydrates: 21g,
Protein: 2g,
Fat: 7g,
Saturated Fat: 3g,
Polyunsaturated Fat: 1g,
Monounsaturated Fat: 2g,
Cholesterol: 3mg,
Sodium: 73mg,
Potassium: 39mg,
Fiber: 0.03g,
Sugar: 15g,
Vitamin A: 4IU,
Vitamin C: 0.1mg,
Calcium: 27mg,
Iron: 0.03mg
Nutrition information is automatically calculated, so should only be used as an approximation.
There you have it – a wonderfully simple, incredibly fun, and utterly delicious way to add a touch of Halloween charm to your celebrations. These Mummy Cookies are more than just a dessert; they’re an experience, a memory-making activity that brings joy to both young and old. So gather your ingredients, unleash your inner cookie decorator, and prepare to delight everyone with these adorable, no-bake Halloween masterpieces. Happy baking, and Happy Halloween!