
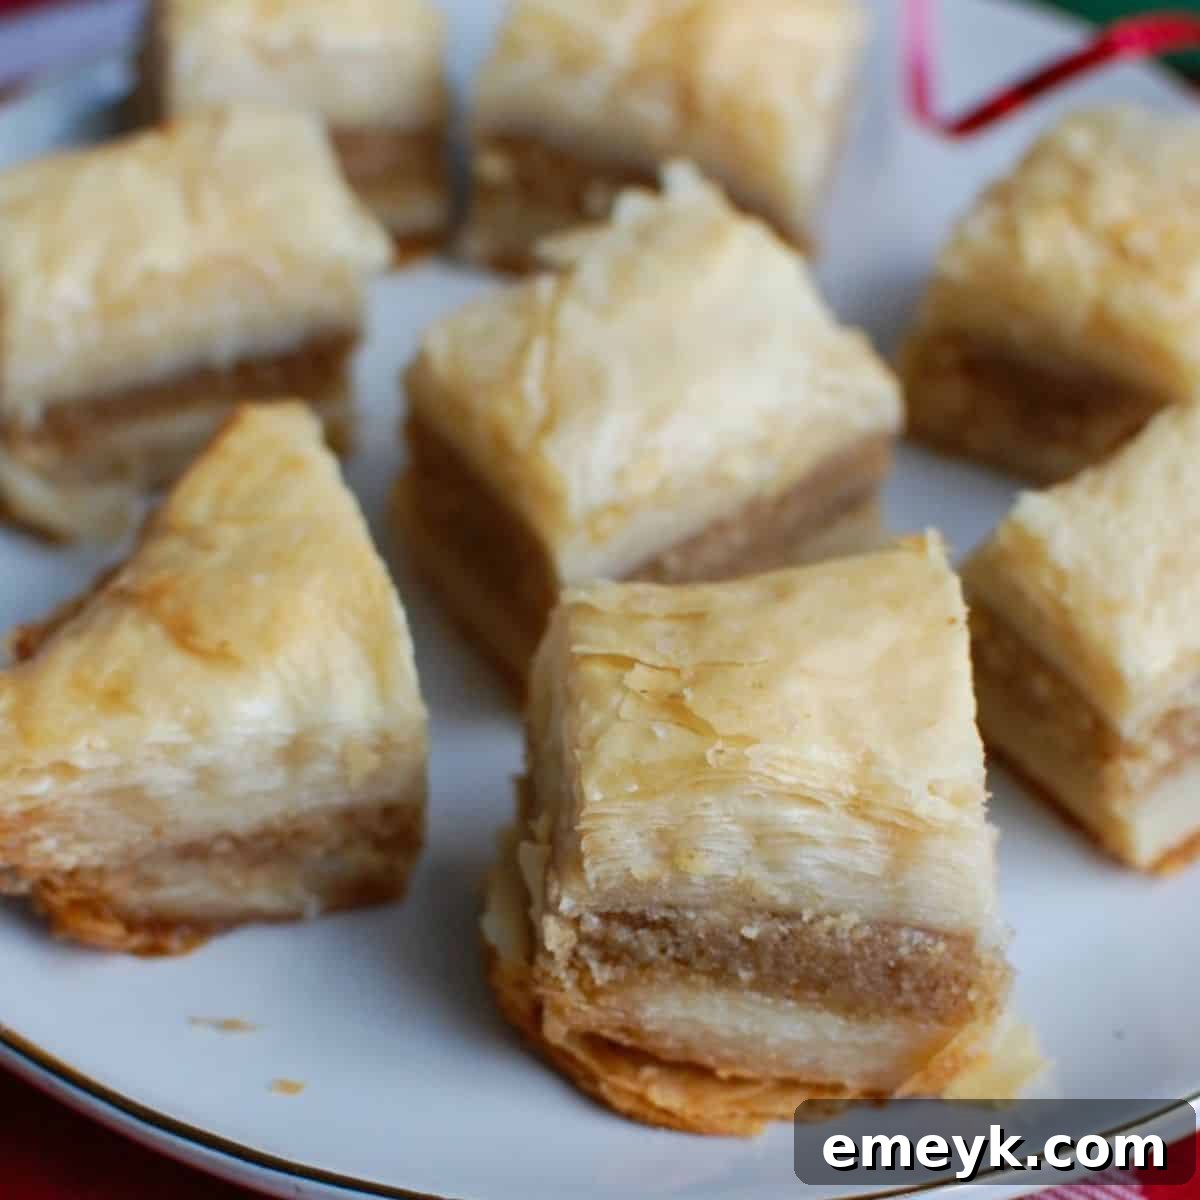
Have you ever experienced the sheer delight of biting into perfectly crisp, golden layers of pastry, revealing a rich, nutty filling, all generously soaked in a fragrant, sweet syrup? If you’ve had the pleasure of tasting baklava, especially during festive gatherings or around the holidays, you already understand its unparalleled deliciousness. Today, we’re not just sharing a recipe; we’re inviting you to discover How to Make Baklava, a truly authentic version that has been lovingly passed down through generations in my family, with roots tracing all the way back to Lebanon. Prepare to enchant and impress all your holiday guests with this time-honored, homemade delicacy.
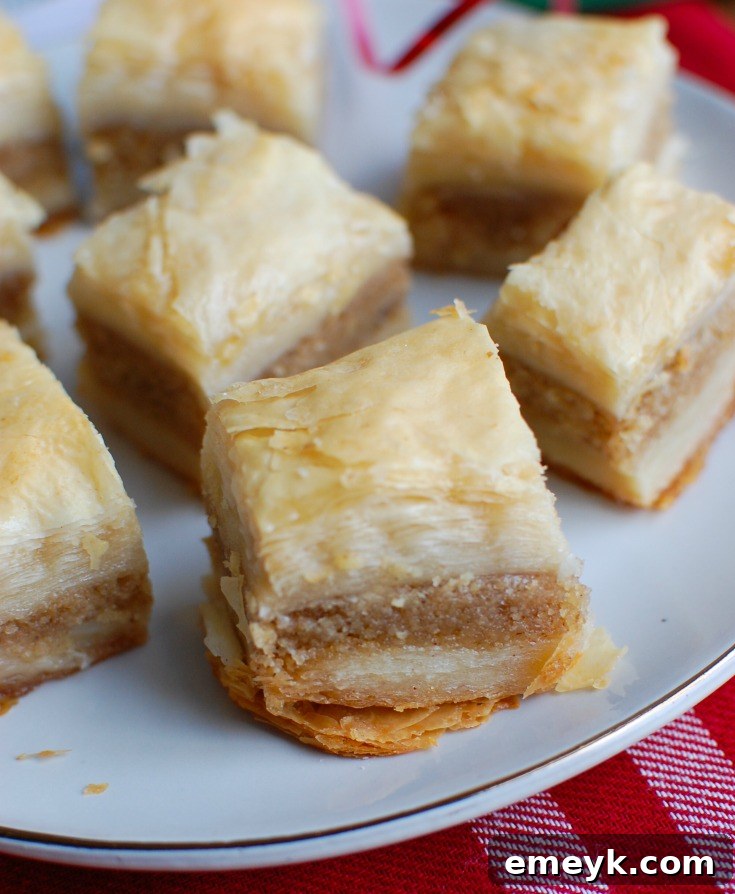
Traditional Lebanese Baklava holds a deeply cherished spot in our family’s holiday traditions. It’s far more than just a dessert; it embodies the spirit of celebration, family gatherings, and the joy of sharing. While this classic recipe requires a little patience and dedicated effort, the enchanting aroma that fills your kitchen and the exquisite taste of the finished product make every moment worthwhile. I vividly remember growing up with this incredible treat as a staple at our holiday tables. The love and meticulous work poured into each batch always yielded a dessert that was both deeply satisfying and truly unforgettable.
For many years, I harbored a strong desire to learn the intricate art of making this Lebanese traditional dessert. The holidays always felt incomplete without it, and I longed to master the family secret. It was a truly special experience when my sister and my beloved Grandma finally took the time to teach me. Their hands-on guidance transformed what might have seemed like a complex culinary challenge into a fun, engaging, and deeply meaningful activity. Learning from them, absorbing their wisdom and techniques, felt like a true rite of passage, connecting me further to my heritage.
I had been wanting to learn this craft for what felt like ages, and finally sitting down to master the process was incredibly rewarding. There’s a wonderful feeling of accomplishment that comes with creating something so beautiful and delicious from scratch. I have no doubt that preparing baklava will now become a treasured yearly tradition for me, just as it has been for my family before me. While baklava has always been synonymous with the holidays in our household, its irresistible charm makes it a dessert I could honestly enjoy at any time of the year!
My Mom and sisters are renowned for their baklava, consistently making multiple generous batches not just for our family, but also for countless friends and appreciative co-workers. It is always a HUGE hit, garnering rave reviews and heartfelt gratitude! If you’re looking for a guaranteed way to win hearts and instantly make new friends, sharing this baklava is your answer. People truly love, love, love this delightful confection. While I’m certainly not suggesting it’s the healthiest option on the menu, its incredible flavor profile makes it an indulgence that’s absolutely worth every bite. We especially love to conclude a traditional Lebanese meal – perhaps featuring savory Meat Pies, wholesome Lebanese Green Beans (Lubee), a refreshing Fattoush Salad, and creamy Hummus – with the sweet, sticky, and satisfying delight of homemade baklava.
Preparing Your Dedicated Baklava Workspace
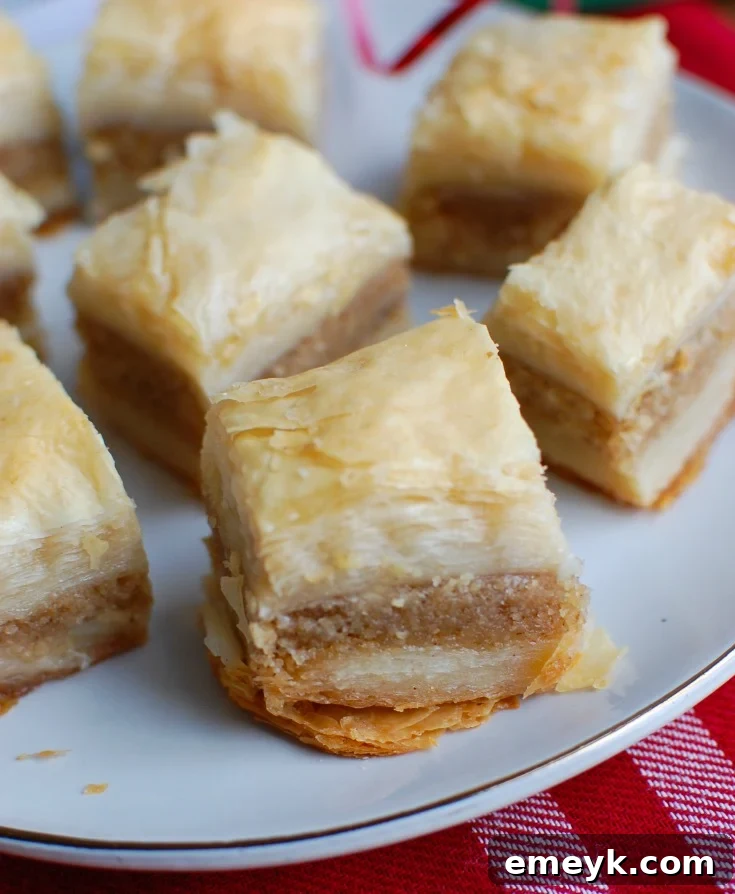
Before you dive into the delightful process of making baklava, it’s crucial to set up an efficient and clean workspace. This ensures a smooth flow and helps manage the somewhat delicate nature of phyllo dough. Designate a spacious area on your kitchen counter or table. I highly recommend placing down a protective covering, such as old newspapers, parchment paper, or an old tablecloth, as melted butter can easily splash and stain surfaces. You’ll also need to gather a few essential tools: a large, soft-bristled pastry brush, your package of phyllo dough, and a sturdy baking sheet.
The dimensions of your baking sheet are important and should be chosen based on the length of the phyllo dough you’ve purchased. Phyllo dough sheets come in various sizes, so select a baking pan that comfortably accommodates your sheets with minimal trimming, or be prepared to gently adjust them. A little bit of thoughtful preparation and focused effort at this stage will lay the groundwork for a stunning final product. Remember, baklava is a labor of love, and a well-organized workspace makes the entire experience much more enjoyable and successful, culminating in those beautiful, golden layers.
Essential Ingredients for Authentic Lebanese Baklava
Creating the perfect baklava hinges on the quality and preparation of its core ingredients. Each component plays a specific and vital role in achieving that signature flaky texture, rich filling, and exquisite aromatic sweetness. Here’s a detailed breakdown of what you’ll need to gather:
- Phyllo Dough (Fillo Dough): This incredibly delicate, paper-thin pastry is the very foundation of baklava, responsible for its numerous crisp and flaky layers. For the best results, I always recommend trying to source fresh phyllo from a local Middle Eastern bakery if available; it tends to be more pliable and less prone to tearing. When buying packaged phyllo, look for varieties that specify 18-20 sheets per pound, as thinner sheets create more intricate and delicate layers. If you’re using frozen phyllo dough, it is absolutely essential to thaw it slowly in the refrigerator overnight before you plan to use it. Once opened, it dries out remarkably quickly, so always keep the unused sheets covered with a damp cloth or plastic wrap during assembly to prevent them from becoming brittle and cracking.
- Unsalted Butter: A substantial amount of melted butter is required – this recipe calls for 1 ½ pounds. Opting for unsalted butter is key, as it gives you complete control over the overall salt content of your dessert. Melt the butter gently over low heat or in the microwave until it’s completely liquid and clear. Keep it warm throughout the assembly process for easy and even brushing. For an even purer butter flavor and a crisper finish, some prefer to use clarified butter (ghee), which has had its milk solids removed.
For the Aromatic Syrup:
The syrup isn’t just a sweetener; it’s the fragrant, glistening embrace that infuses the baklava with its characteristic moisture and captivating aroma.
- Granulated Sugar: Standard white granulated sugar forms the sweet base of our baklava syrup. The precise ratio of sugar to water is vital for achieving the correct viscosity and ensuring the syrup can be properly absorbed by the hot pastry.
- Rosewater: This is arguably the most distinctive and quintessential ingredient in Lebanese baklava, imparting its characteristic delicate floral aroma and taste. Rosewater is created by distilling rose petals with water and is a beloved staple in Middle Eastern culinary traditions. Its unique perfume is irreplaceable, so definitely do not omit this ingredient! If authentic rosewater is unavailable, orange blossom water can be used as a close alternative, offering a similar, though slightly different, floral note.
- Lemon: Fresh lemon juice is a critical addition to the syrup, serving a dual purpose. Firstly, its bright acidity wonderfully balances the intense sweetness of the sugar, preventing the dessert from being cloyingly sweet. Secondly, and very importantly, the lemon juice acts as a natural anti-crystallization agent, ensuring your syrup remains smooth and clear. Always aim for fresh lemon juice, meticulously straining out any seeds or pulp. Bottled lemon juice can be a last resort, but fresh offers superior flavor.
For the Rich Walnut Filling:
The filling provides a delightful textural contrast and a deep, earthy flavor that beautifully complements the sweet syrup and delicate pastry.
- Walnuts: Walnuts are the traditional nut of choice for authentic Lebanese baklava. For the filling, they should be finely ground in a food processor until they resemble a coarse meal, avoiding over-processing into a paste. This fine texture allows for even distribution between the phyllo layers. While a food processor makes this task quick and easy, you can also meticulously chop them by hand, ensuring a consistent, fine grind.
- Granulated Sugar: A small amount of white granulated sugar is also mixed into the nut filling. This addition not only slightly sweetens the nuts but also helps them bind together more effectively, preventing the filling from scattering too much during the layering and cutting processes.
- Cinnamon: Ground cinnamon is a classic pairing with walnuts in many Middle Eastern desserts. This warm, aromatic spice adds a comforting depth of flavor to the filling, complementing the nutty notes without overpowering them. It’s a subtle but essential component.
- Rosewater: Similar to its inclusion in the syrup, a touch of rosewater is added to the nut filling. This further enhances that signature floral essence, weaving it throughout every component of the baklava and contributing to its intoxicating aroma and complex flavor profile.
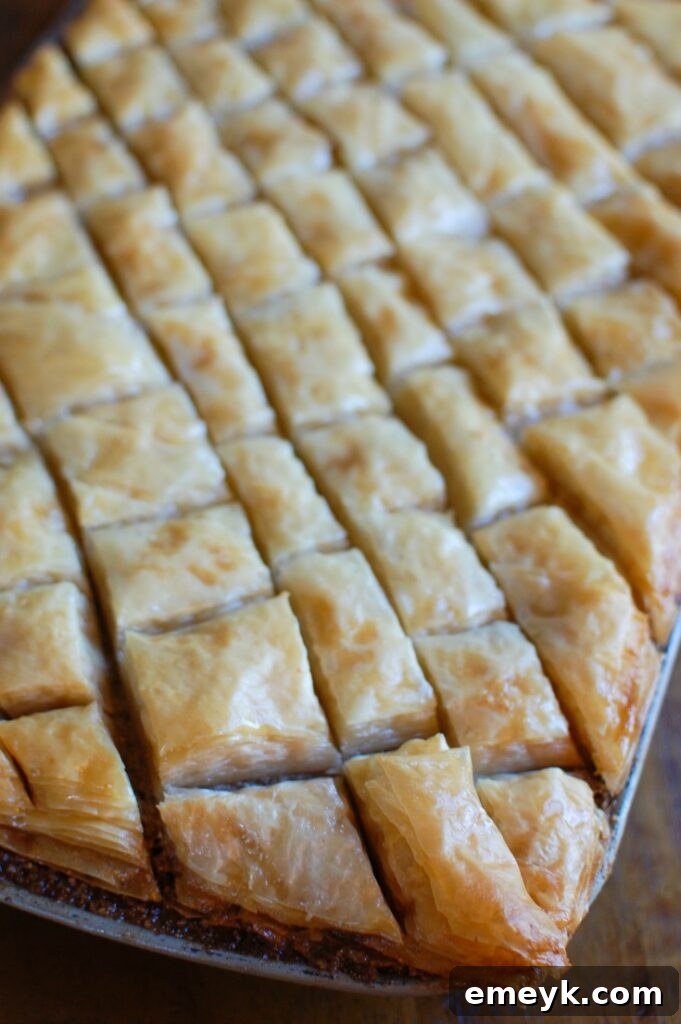
The Art of Crafting Homemade Lebanese Baklava: A Detailed Step-by-Step Guide
Creating baklava is a true labor of love, a beautiful culinary journey that culminates in an exquisite and unforgettable dessert. Follow these comprehensive steps to achieve perfectly golden, crisp layers and rich, aromatic flavors.
Step 1: Prepare the Aromatic Syrup (and ensure it cools completely).
- Begin by preheating your oven to 350 degrees F (175 degrees C).
- In a medium saucepan, combine the granulated sugar, water, and 1 teaspoon of fragrant rosewater. Place the saucepan over medium-high heat and bring the mixture to a rolling boil, stirring occasionally to ensure the sugar fully dissolves.
- Once the syrup reaches a boil, reduce the heat to low and allow it to simmer gently for approximately 5-7 minutes. This simmering helps to thicken the syrup slightly. Remove the saucepan from the heat and stir in the fresh lemon juice.
- This next step is absolutely crucial: set the syrup aside to cool completely to room temperature. It is essential that the syrup is cold or at least lukewarm when it’s poured over the hot baklava to ensure proper absorption and to prevent the pastry from becoming soggy, maintaining its desired crispness.
Step 2: Create the Rich Walnut Filling.
- In a food processor, combine the finely ground walnuts, 1 cup of granulated sugar, 1 teaspoon of ground cinnamon, and 1 teaspoon of rosewater. Pulse the mixture until it is finely ground and thoroughly combined, resembling coarse sand. Be careful not to over-process, as you want to avoid it turning into a paste.
- Transfer the prepared nut filling to a bowl and set it aside, ready for layering.
Step 3: Master the Delicate Layering of Phyllo Dough.
- Generously brush the bottom and all sides of your chosen 14×18 inch baking tray (or a size that perfectly accommodates your phyllo sheets) with plenty of melted unsalted butter. This prevents sticking and contributes to the golden crust.
- Carefully lay one sheet of phyllo dough onto the bottom of the prepared pan. Using your pastry brush, gently and thoroughly brush the entire surface of this sheet with melted butter.
- Repeat this precise process, laying down one phyllo sheet at a time and buttering each individual sheet, until you have accumulated exactly half of your phyllo dough package (typically around 18-20 sheets if you’re using a 2lb package). Generous buttering between layers is the fundamental secret to achieving those distinct, flaky layers.
- Evenly distribute the prepared walnut filling over the top of this buttered stack of phyllo layers. Spread it right to the edges of the pan to ensure consistent flavor in every piece.
- Now, take the remaining half of your phyllo dough. Continue the layering and buttering process: place one sheet on top of the nut mixture, brush thoroughly with butter, and repeat for every subsequent sheet until all the phyllo is used. The very top layer should be impeccably brushed with butter, ensuring it bakes to a beautiful golden brown.
Step 4: Precisely Cut the Uncooked Baklava.
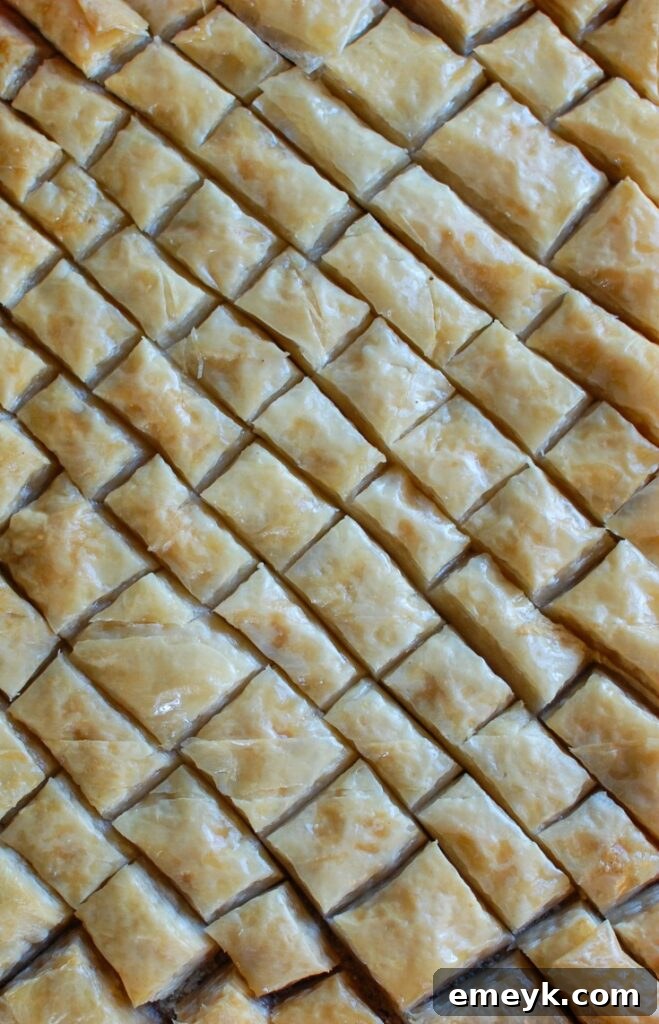
- This crucial step *must* be performed before baking. Using a very sharp, non-serrated chef’s knife, carefully and methodically cut the uncooked baklava into your desired shapes. Traditional Lebanese baklava is most commonly cut into elegant diamond shapes.
- To achieve diamonds, first make straight, lengthwise cuts across the pan, about 1 ½ inches wide. Then, make diagonal cuts across these lines, creating distinct diamond patterns, also approximately 1 ½ inches in size. Ensure your knife cuts all the way through every layer to the bottom of the pan.
- Pre-cutting prevents the delicate pastry layers from cracking once baked and guarantees that the sweet syrup will evenly penetrate every single piece. You can cut them into smaller pieces if you plan to serve them in mini cupcake or muffin tins later.
Step 5: Bake to Golden Perfection.
- Carefully place the baking pan in the middle rack of your preheated 350 degrees F (175 degrees C) oven.
- Bake for approximately 35-45 minutes. The baklava is ready when its top layers have achieved a beautiful, deep golden-brown color, and the edges appear crisp and slightly pulled away from the pan. Monitor it closely, as oven temperatures can vary, to prevent over-browning.
Step 6: The Golden Syrup Pour & Essential Cooling Ritual.
- Immediately upon removing the hot, golden-brown baklava from the oven, slowly and evenly pour the *completely cooled* rosewater syrup over the entire surface of the hot pastry. You should hear a satisfying sizzle as the syrup begins to absorb into the hot, porous layers.
- Do not rush this pouring process; allow the syrup to seep gradually and thoroughly into every crack and crevice.
- The next step is vital for the perfect texture and flavor: let the baklava cool completely on the baking sheet. Ideally, this should be for at least 4-6 hours, but allowing it to rest overnight is even better. This extended cooling period is essential for the syrup to be fully absorbed, preventing sogginess, and allowing the rich flavors to meld beautifully, resulting in that perfectly crisp yet moist baklava.
- Once it has fully cooled, if necessary, gently re-cut along the pre-made lines to cleanly separate the individual pieces. You can then transfer them into small cupcake or muffin tins for elegant presentation, or store them as whole pieces.
Expert Storage Tips for Your Baklava Masterpiece
- The Importance of Resting: After generously pouring the aromatic syrup, it is absolutely crucial to let your baklava rest on the baking sheet for a minimum of 4-6 hours. For optimal flavor development and texture, allowing it to sit overnight is ideal. This extended resting period allows the syrup to fully penetrate and be absorbed by all the delicate phyllo layers, ensuring the flavors meld together beautifully and the baklava maintains its perfect balance of crispness and moist sweetness.
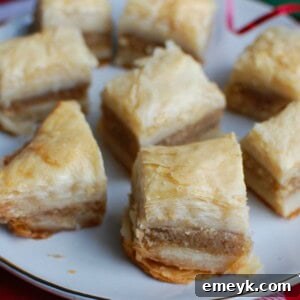
- Preparing for Storage and Presentation: Once your baklava has completely cooled and rested, use a very sharp knife again to carefully separate the individual pieces along the pre-cut lines. For an elegant touch, gently transfer these beautiful diamond or square pieces into festive holiday muffin tins or cupcake liners. This not only enhances presentation but also makes them easy to serve.
- Optimal Storage Conditions: To preserve its delightful crispness and fresh flavor, store baklava at room temperature in an airtight container. When stored correctly, your homemade baklava will remain delicious for up to one week.
- Why Avoid Refrigeration: It is generally best to avoid refrigerating baklava. The moisture and cold environment inside a refrigerator can cause the delicate phyllo pastry to absorb too much moisture, leading to a loss of its characteristic crispness and potentially making it soggy.
- Freezing for Longer Shelf Life (Optional): If you wish to store your baklava for a longer period, it can be frozen. Wrap individual pieces tightly in plastic wrap, then place them in an airtight, freezer-safe container. When you’re ready to enjoy, simply thaw the baklava at room temperature. Be aware that the texture might be slightly softer after freezing, but the flavor will still be wonderful.
Frequently Asked Questions About Making Baklava
Absolutely! Most home bakers use frozen phyllo dough, and it works wonderfully. The most important step is proper thawing: make sure to thaw the dough slowly in the refrigerator overnight (at least 8-10 hours) before you plan to use it. Once you open the package, phyllo dough dries out extremely quickly when exposed to air. To prevent this, always keep the stack of unused phyllo sheets covered with a slightly damp, clean kitchen towel or plastic wrap while you are assembling your baklava. This keeps it pliable and easy to work with.
For the best results, you must cut the baklava into its desired diamond or triangle shapes *before* it goes into the oven. This pre-cutting step is crucial because it helps to prevent the delicate baked layers from cracking later, and it ensures that the sweet syrup will penetrate evenly into every piece. I highly recommend using a very sharp, non-serrated chef’s knife for clean, precise cuts. A serrated knife can often tear the fragile phyllo layers. To make the cutting process smoother and prevent the dough from sticking to the blade or your hands, you can lightly moisten the knife or your fingertips with a little water occasionally.
Phyllo dough is notoriously delicate and will dry out and become brittle almost instantly when exposed to air. To combat this, always keep the stack of phyllo sheets that you are not actively working with covered. A slightly damp, clean kitchen towel placed directly over the phyllo is the most effective method. This keeps the dough moist and pliable, making it much easier to handle, layer, and prevent frustrating tears and cracks.
Thorough preparation, often referred to as “mise en place,” is paramount for successful baklava making. Before you even think about opening your phyllo dough package, ensure all your components are ready: mix your nut filling, cook your syrup and allow it to cool completely (or even chill it), and melt your butter so it’s warm and ready for brushing. Having all your ingredients and tools prepared beforehand allows you to work quickly and efficiently with the delicate phyllo dough, minimizing its exposure to air. This streamlined approach significantly reduces stress and greatly increases your chances of achieving a perfect baklava.
This is one of the most important rules for baklava! You must always pour cold syrup over hot baklava, or, conversely, hot syrup over cold baklava. This temperature contrast is absolutely essential. It prevents the baklava from becoming soggy and ensures that the syrup is absorbed deeply and properly into the layers, resulting in that delightful balance of crisp pastry and sweet, moist interior. For this recipe, we specifically prepare the syrup first and allow it to cool completely while the baklava bakes, ensuring it’s cold when poured over the hot pastry.
While walnuts are the traditional and classic choice for Lebanese baklava, you absolutely can experiment with other types of nuts! Pistachios are another incredibly popular choice, especially in other Middle Eastern and Mediterranean variations; they offer a beautiful vibrant green hue and a distinct, slightly sweeter flavor. Almonds can also be used, or you can create a delightful mix of different nuts, such as walnuts and pistachios, for a more complex and varied flavor profile. Just ensure whatever nuts you choose are finely ground for the best texture in the filling.
Baklava is, by its nature, a wonderfully sweet dessert, but you can certainly adjust the level of sweetness to better suit your preference. One effective method is to reduce the amount of granulated sugar used in the syrup by about ¼ to ½ cup. Alternatively, you can simply pour slightly less syrup over the baked baklava after it comes out of the oven. Another approach to temper the sweetness is to slightly increase the proportion of nuts in your filling; the savory, earthy notes of the nuts will provide a lovely contrast to the sweetness of the syrup.
More Irresistible Dessert Recipes to Explore
Desserts
Simple No Bake Cookie Recipe
Desserts
White Chocolate Toasted Coconut Cookies
Desserts
Oatmeal White Chocolate Peppermint Cookies
Desserts
Classic Christmas Shortbread Cookies
Tried this recipe? We’d love to hear from you! Share your thoughts and photos below. Don’t forget to subscribe to my newsletter or follow me on
Facebook,
Instagram, or
Pinterest for the latest recipes and culinary inspiration.
How to Make Authentic Lebanese Baklava
Print Recipe
Ingredients
- 2 pounds phyllo dough, 18-20 sheets per lb., thawed if frozen
- 1 1/2 pounds unsalted butter, melted
For the Syrup:
- 3 cups granulated sugar
- 1 1/2 cups water
- 1 teaspoon rosewater
- 1 lemon, freshly juiced (about 2 tablespoons)
For the Filling:
- 1 pound ground walnuts
- 1 cup granulated sugar
- 1 teaspoon ground cinnamon
- 1 teaspoon rosewater
Instructions
- Preheat oven to 350°F (175°C).
- Prepare the Syrup: In a medium saucepan, combine 3 cups sugar, 1 1/2 cups water, and 1 teaspoon rosewater. Bring to a boil, stirring until sugar dissolves. Reduce heat and simmer for 5-7 minutes. Remove from heat and stir in the lemon juice. Set aside to cool completely.
- Prepare the Filling: In a food processor, combine 1 pound ground walnuts, 1 cup sugar, 1 teaspoon cinnamon, and 1 teaspoon rosewater. Pulse until finely ground and well mixed. Set aside.
- Layer the Phyllo: Brush a 14×18 inch baking tray generously with melted unsalted butter. Lay one sheet of phyllo dough in the pan and brush with butter. Repeat this process until half of your phyllo dough package (approx. 18-20 sheets for a 2lb package) has been layered and buttered.
- Add the Filling: Evenly distribute the prepared walnut mixture over the buttered phyllo layers.
- Top with Remaining Phyllo: Place the second half of the phyllo dough sheets on top of the nut mixture, brushing each individual sheet with melted butter, just as you did for the bottom layers. Ensure the top layer is thoroughly buttered.
- Cut the Baklava: Using a very sharp, non-serrated knife, carefully cut the uncooked baklava into diamond shapes. Start by making lengthwise cuts (about 1.5 inches wide), then cut diagonally (about 1.5 inches apart) to form diamonds. Make sure to cut all the way through the layers to the bottom of the pan.
- Bake: Place the pan in the middle rack of the preheated oven. Bake for 35-45 minutes, or until the baklava is golden brown and crispy.
- Pour Syrup and Cool: Immediately remove the baked baklava from the oven. Slowly and evenly pour the *cooled* syrup over the entire hot baklava. Let it cool completely on the baking sheet for at least 4-6 hours, or preferably overnight, to allow the syrup to fully absorb and the flavors to develop. Re-cut if necessary and serve.
Recipe Notes & Expert Tips
- Handling Phyllo: Phyllo dough dries out incredibly fast. Always keep the unused sheets covered with a slightly damp, clean kitchen towel while you are working to maintain its pliability and prevent cracking.
- Cutting Technique: Cutting the baklava before baking is crucial. Use a very sharp, non-serrated knife and make sure your cuts go all the way through. This ensures even syrup absorption and prevents the delicate layers from shattering. Lightly wetting your knife blade can also help prevent sticking.
- Syrup Temperature: The contrast in temperature between the hot baklava and cold syrup (or vice versa) is key for a crispy, not soggy, result. This allows the baklava to absorb the syrup without becoming overly soft.
- Resting Time: The long cooling period after pouring the syrup is not optional. It’s essential for the syrup to fully permeate the layers and for the distinct flavors of the nuts and rosewater to meld beautifully. Patience here yields the best results.
- Customizing the Filling: While walnuts are traditional, feel free to experiment! Pistachios are another popular choice for baklava and offer a vibrant color and unique flavor. You can also mix walnuts and pistachios for a more complex profile.
- Controlling Sweetness: If you prefer a less sweet baklava, you can reduce the amount of sugar in the syrup by ¼ to ½ cup, or simply pour slightly less syrup over the baked pastry.
Nutrition Information (Approximate)
Carbohydrates: 112g,
Protein: 12g,
Fat: 75g,
Saturated Fat: 33g,
Polyunsaturated Fat: 20g,
Monounsaturated Fat: 18g,
Trans Fat: 2g,
Cholesterol: 122mg,
Sodium: 374mg,
Potassium: 251mg,
Fiber: 4g,
Sugar: 68g,
Vitamin A: 1427IU,
Vitamin C: 5mg,
Calcium: 65mg,
Iron: 4mg
Nutrition information is automatically calculated and should be used as an approximation.